Quick Install - Windows

GT400 Installation
Quickly get started with the GT400 REDCAP 5G Dongle (module:
MT5710-CN) on Windows
Prerequisites
- A Windows 10 / 11 PC
- Dongle GT400 and a Type-C data cable
- A Nano-SIM card with Internet service
- The TD Tech / TDTECH MT5710 Windows driver
- A serial terminal tool (pick one): SSCOM / PuTTY / SecureCRT
Installing the Nano-SIM Card
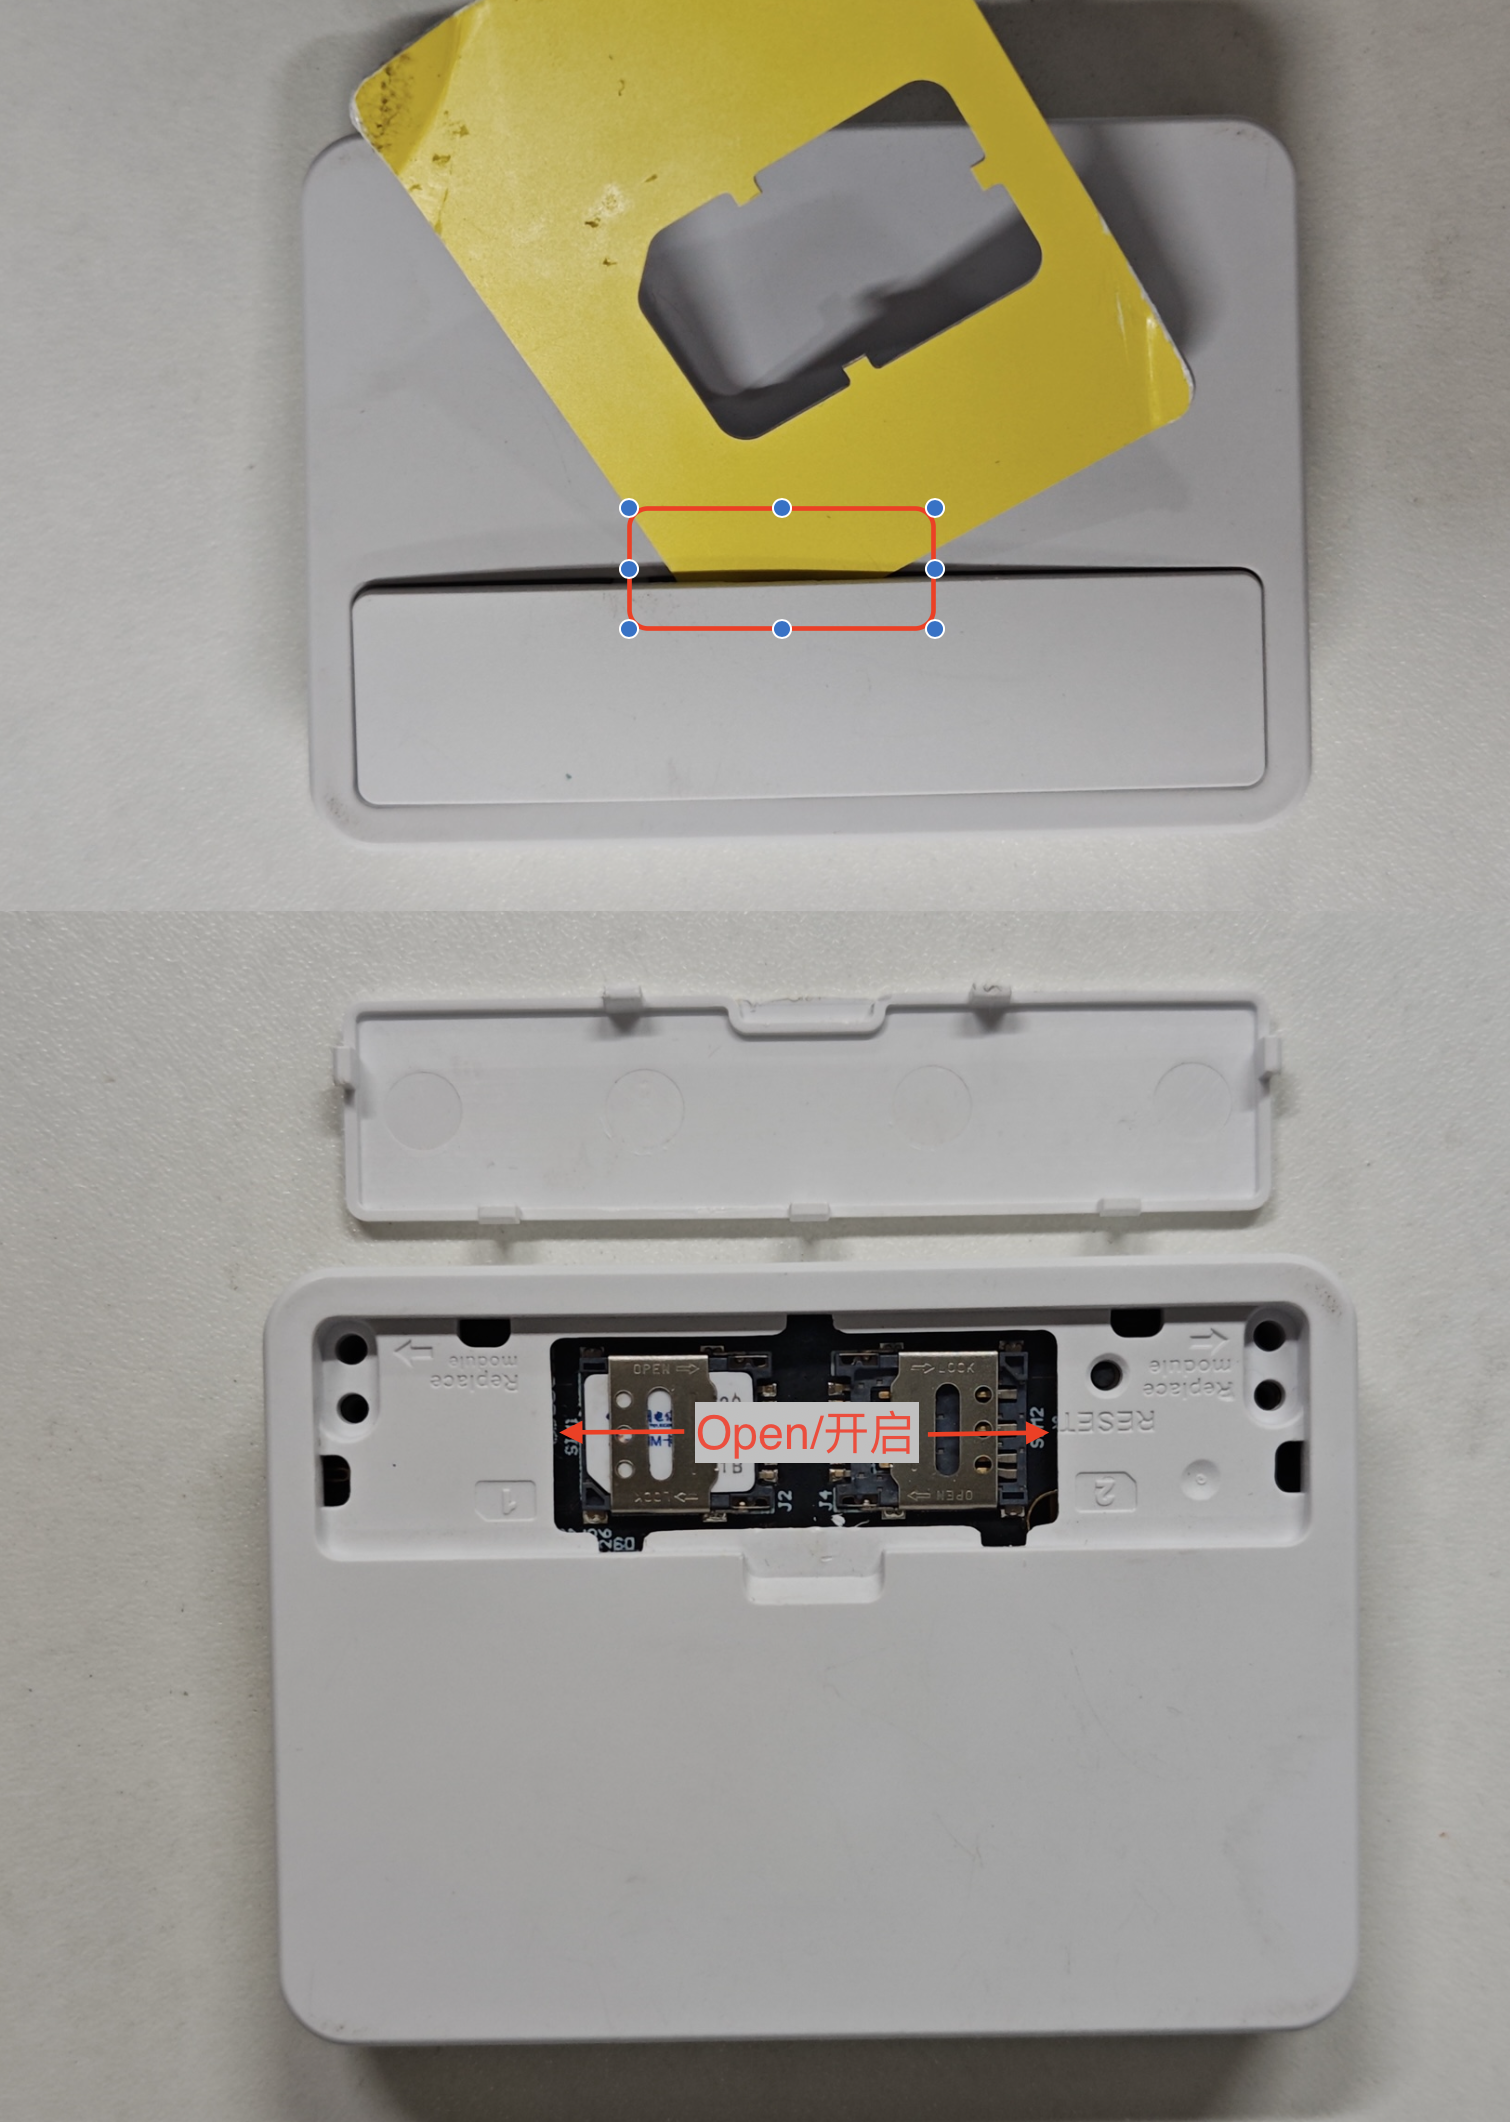
- Find a plastic card and pry the cover open
- Gently pull out the SIM1 card holder, insert the Nano-SIM card, and push it back in place
Choose exactly one of the three USB network adapter modes according to your needs; do not mix multiple procedures. After changing SETMODE, always run AT^RESET (or replug), and use the current COM number shown in "Computer Management".
AT^SETMODE | Mode | Characteristics | Recommendation for Windows |
|---|---|---|---|
6 | RNDIS | The most common "Remote NDIS / USB network adapter" on Windows; the driver path is mature | First choice; if no driver is available, you can manually install Microsoft's "Remote NDIS Compatible Device" |
1 | NCM | Win10 NCM Normal; a more standardized protocol and a cleaner network adapter | Alternative; use when RNDIS misbehaves |
0 | ECM | Linux CDC ECM; the manual is oriented toward Linux / Mac | Not recommended; Windows connectivity is less stable than RNDIS / NCM |
Other values in brief: 3 = NCM Debug; 4 = Linux NCM (for OpenWrt, see the Linux document); 7 = MBIM (not supported yet); 8 = Modem/PPP (generally not recommended).
Step 1: Install the Windows Driver and Serial Tool
- Install the MT5710 Windows driver provided by TD Tech / TDTECH (the TDTECH serial devices and network adapter appear only after installation).
- Prepare a serial terminal (choose one):
- SSCOM / serial debugging assistant
- PuTTY (Connection type = Serial)
- SecureCRT, etc.
Plug in the Dongle and confirm that the TDTECH-related ports and network adapter appear in Device Manager / Computer Management.
Step 2: Find the COM Port for AT in "Computer Management" (Key Step)
Always check the port name in "Computer Management"; do not rely on the COM number alone.
- Right-click "This PC" → Manage → Computer Management
Or:Win + X→ Computer Management - In the left pane open: System Tools → Device Manager → Ports (COM & LPT)
- After plugging in the module, entries with names similar to the following usually appear (the COM numbers are examples only; yours may differ):
TDTECH Broadband - SerialC (COM50)
TDTECH Connect - Application Interface (COM53)
TDTECH Connect - GPS Interface (COM51)
TDTECH Connect - PC UI Interface (COM52)
To send AT commands, choose:
| Purpose | Port name to select | Example |
|---|---|---|
| AT configuration (PCUI) | TDTECH Connect - PC UI Interface | e.g. COM52 |
| Application port | Application Interface | e.g. COM53 (generally not used for dial-up configuration) |
| GPS | GPS Interface | e.g. COM51 |
| SerialC | Broadband - SerialC | e.g. COM50 |
How to identify the port: look for PC UI in the name (some interfaces display it as
PC Ul, which is a UI rendering issue); that is the AT port.
After changingSETMODE/ runningRESET, USB re-enumerates and the COM number may change; reopen "Computer Management" to confirm before connecting again.
Step 3: Open the PC UI Port with a Serial Tool
Parameters (must match):
| Item | Value |
|---|---|
| Port | The COMx corresponding to PC UI Interface |
| Baud rate | 115200 |
| Data bits | 8 |
| Stop bits | 1 |
| Parity | None |
| Flow control | None |
Using SSCOM / serial assistant as an example:
- Select the port
COMxx(PC UI) - Select the baud rate
115200 - Open the serial port
- Send each AT command with Enter and wait for
OKor the result before sending the next one
Tips:
- Garbled output → confirm the baud rate is 115200 and that PC UI is selected, not GPS / SerialC.
- No response to
AT→ go back to "Computer Management" and re-identify the port, or replug USB and reconnect.
Step 4: Send the AT Commands One by One
Important: press Enter after each line and wait for the module to reply before sending the next one.
First do the common configuration below, then setSETMODEwith exactly one of the three options.
4.1 Common Steps
ATE0
(Note: disables command echo so later responses are cleaner)
AT
(Note: handshake test; a reply of OK means PC UI serial communication is working)
AT^SETMODE?
(Note: query the current USB mode)
AT^SETE5STICK=0
(Note: USB Stick network adapter mode, in which the host obtains the carrier-side IP)
AT^TDCFG="infcfg","mode",1
(Note: USB Stick dial-up path)
AT+CGDCONT=1,"IPV4V6","ctnet"
(Note: CID 1 APN; ctnet is the China Telecom example, change it according to your carrier)
4.2 Choose One of Three: Set the USB Mode (send only one)
Option A — RNDIS (first choice for Windows)
AT^SETMODE=6
(Note: Win10 RNDIS; usually appears in Device Manager as "Remote NDIS" / USB network adapter)
Option B — NCM (alternative for Win10/11)
AT^SETMODE=1
(Note: Win10 NCM Normal; use when RNDIS misbehaves)
Option C — ECM (not recommended for daily Windows connectivity)
AT^SETMODE=0
(Note: Linux ECM Normal; usable for Windows screenshots during debugging, but less stable than RNDIS / NCM)
4.3 Dial-Up and Applying the Settings
AT^NDISSTATQRY?
(Note: query the dial-up status)
AT^NDISDUP=1,1,"ctnet"
(Note: dial immediately)
AT^DHCP?
(Note: view the module-side IP to confirm it has been assigned)
AT^RESET
(Note: reboot to apply the SETMODE USB descriptors. After rebooting, return to "Computer Management" and reconfirm the PC UI COM number before connecting)
After rebooting, confirm again:
AT^SETMODE?
(should equal the 6 / 1 / 0 you selected)
Troubleshooting
AT^RESET
or
AT+CFUN=0
AT^SETMODE=6
AT+CFUN=1
(replace 6 with the 1 or 0 you actually chose)
Step 5: [Set Once and Forget] Write Auto-Dial Settings
AT^SETAUTODIAL=1,1,"IPV4V6","ctnet","","",0
(Note: the first 1 = enable auto-dial; the second 1 = USB data transfer; empty username/password; 0 = no authentication. Once written, it dials automatically when powered on)
Note: this is not entirely stable and needs long-term verification
AT^SETAUTODIAL?
(should return 1,1,"IPV4V6","ctnet","","",0)
AT^NDISSTATQRY?
(when connected, the status should be connected)
Step 6: Confirm Network Adapter Connectivity in Windows
- Settings → Network & Internet → Ethernet (or "Change adapter options")
- Depending on the mode you selected, the corresponding adapter should appear:
- RNDIS: Remote NDIS / USB Ethernet
- NCM:
TDTECH Connect - Network Card(not Remote NDIS) - ECM: CDC ECM / USB Ethernet (the name depends on the driver; not recommended for daily use)
- IPv4: Obtain an IP address automatically (DHCP)
- Verify:
ipconfig
ping 8.8.8.8
If RNDIS shows an exclamation mark: Device Manager → that device → Update driver → Browse my computer → Let me pick from a list → Network adapters → Microsoft → Remote NDIS Compatible Device.
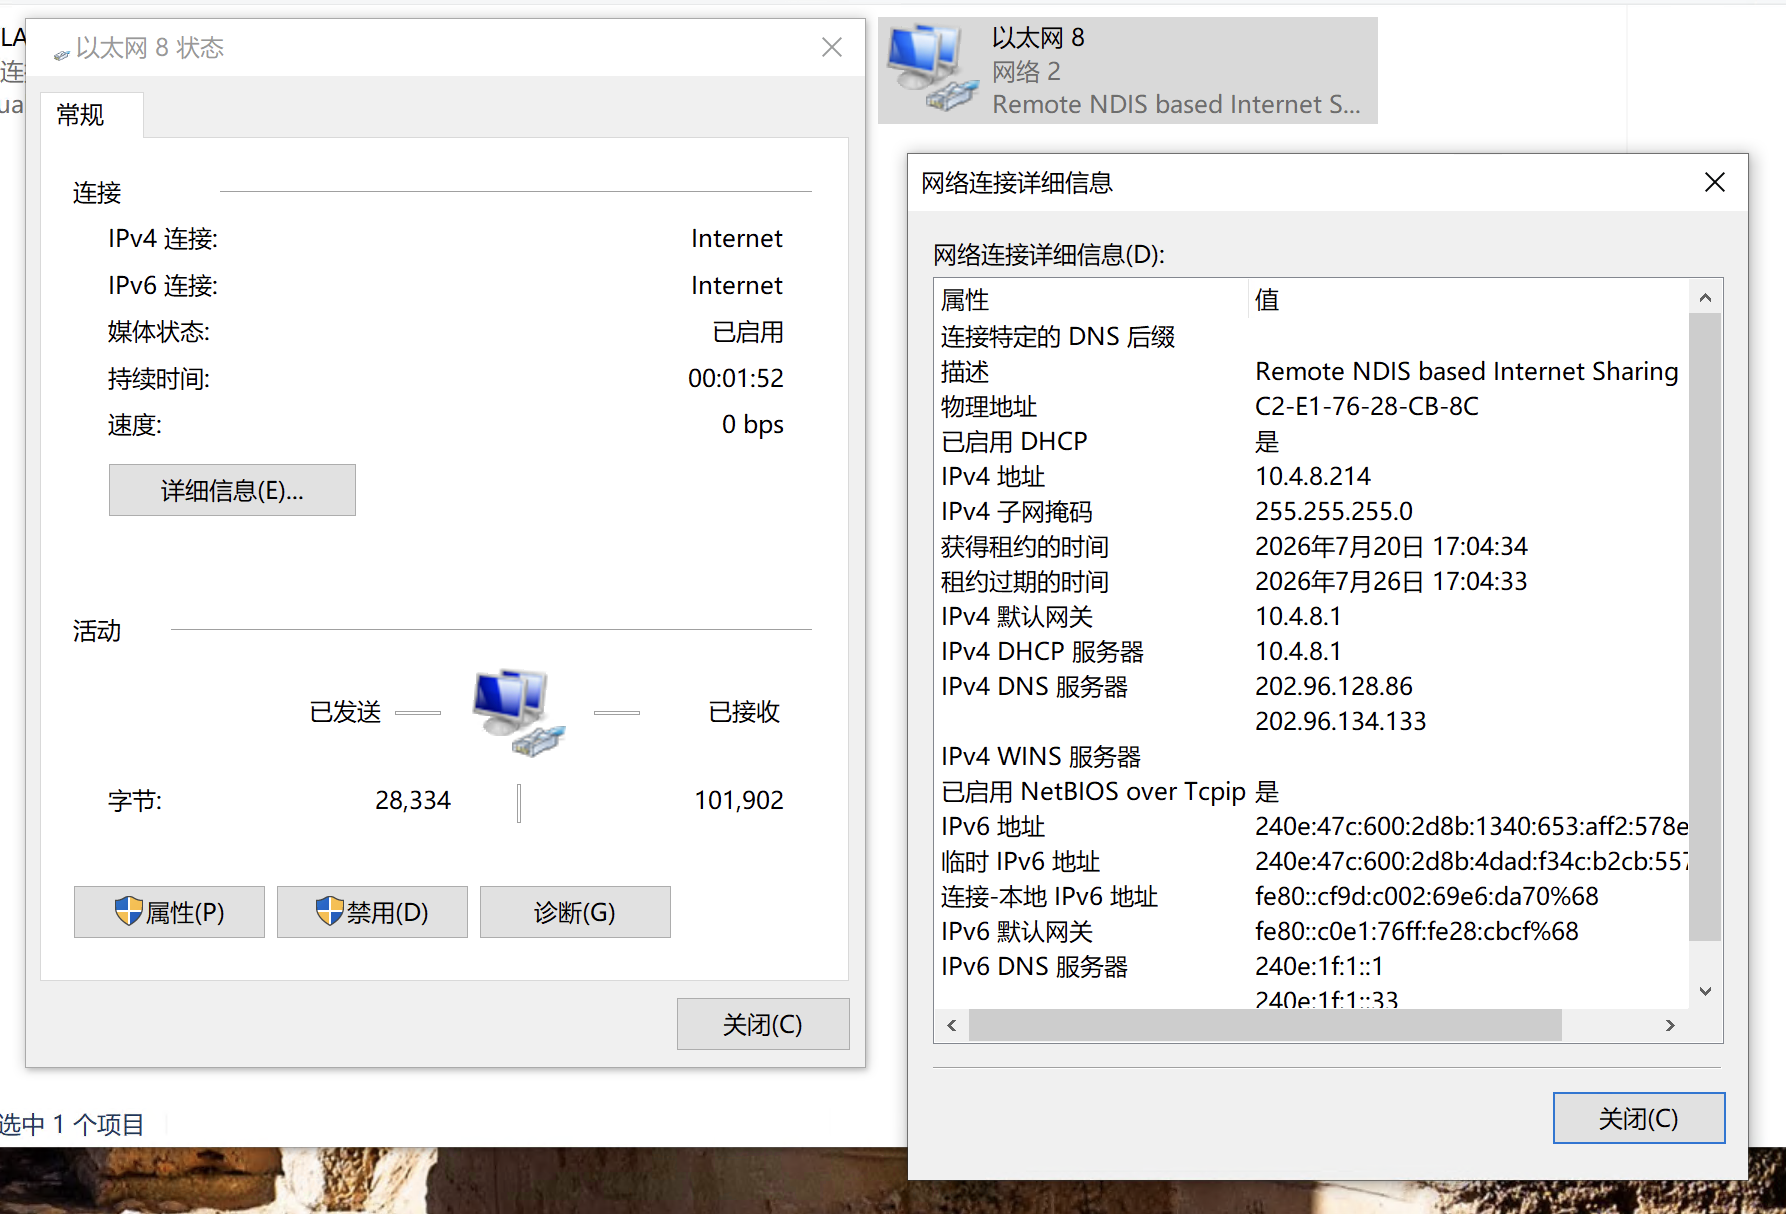
RNDIS Obtaining an IP (Measured)
Described as Remote NDIS based Internet Sharing; DHCP obtains the carrier-side address (such as
10.4.8.214).
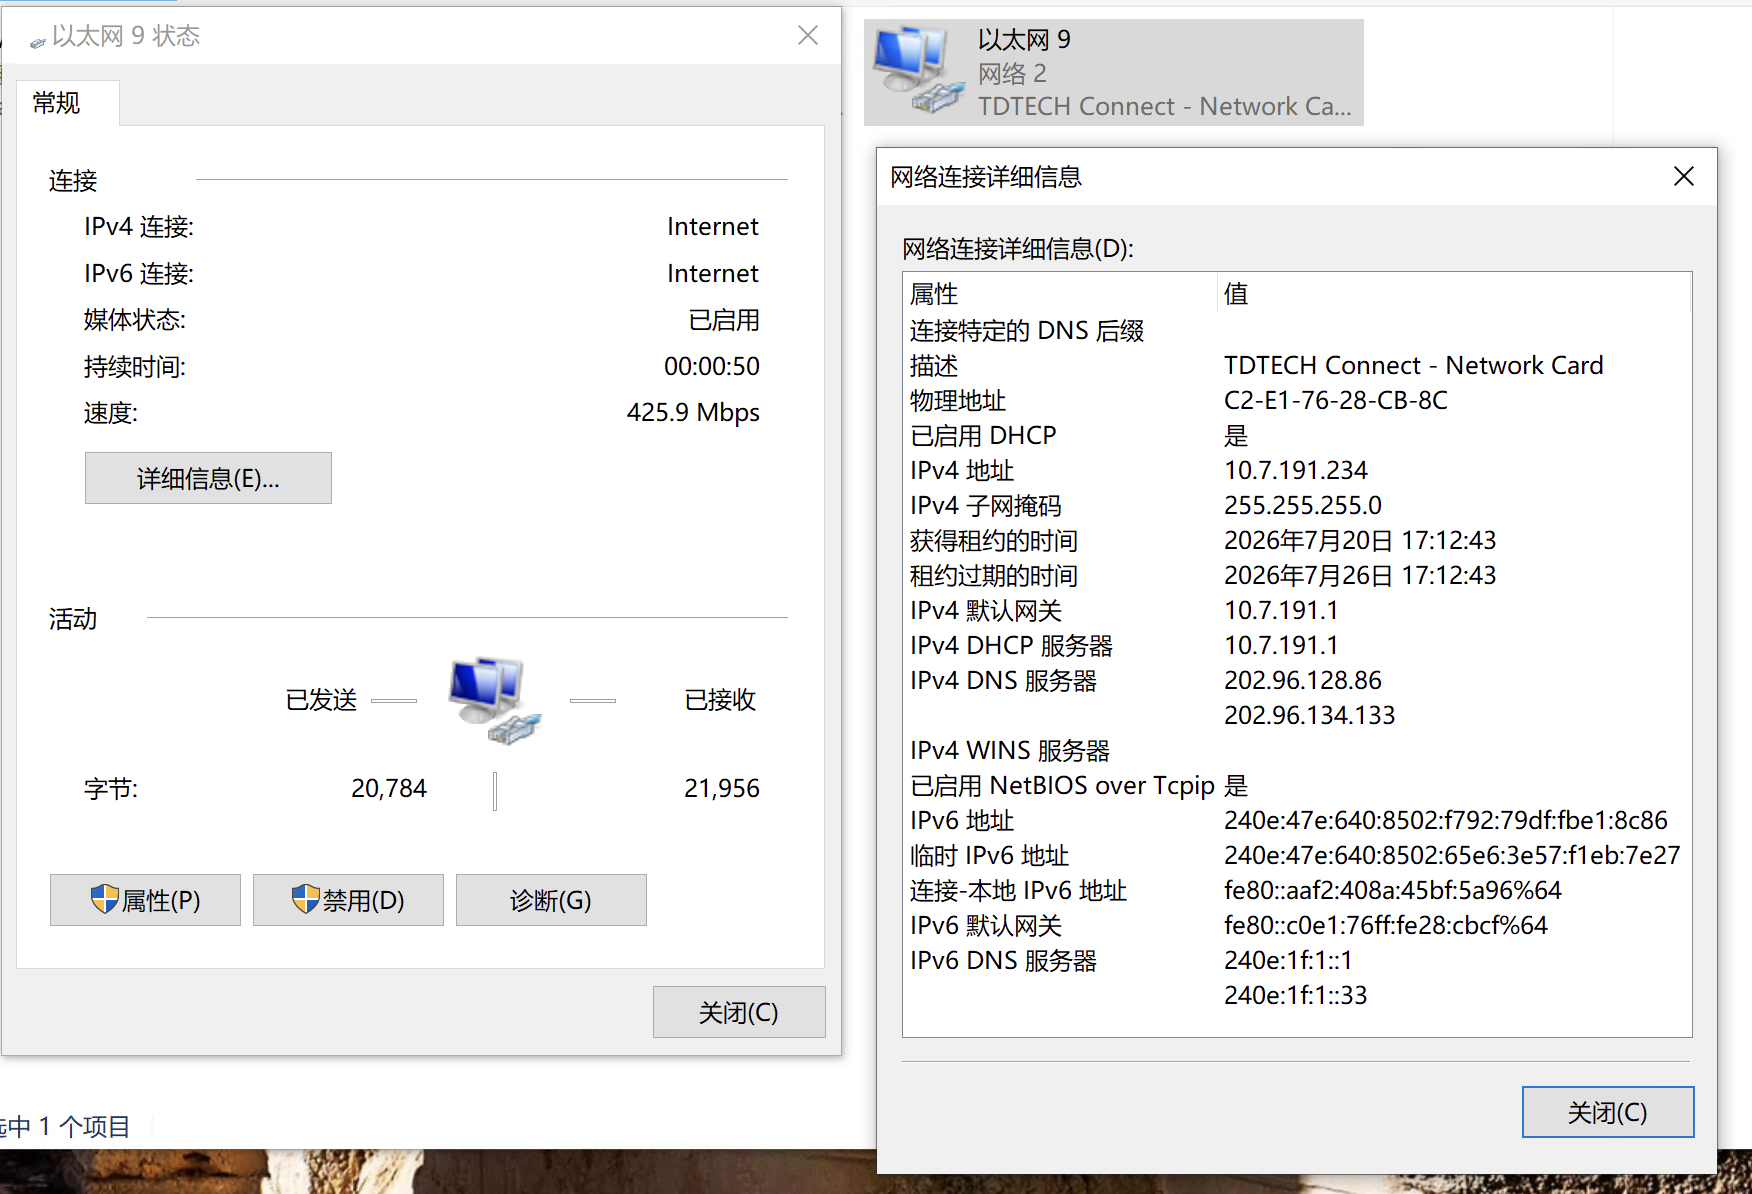
NCM Obtaining an IP (Measured)
Described as TDTECH Connect - Network Card; DHCP obtains the carrier-side address (such as
10.7.191.234).
Optional: USB E5 (Fixed 192.168.8.x)
If Stick mode never obtains an IP over a long period, you can switch to E5 (LAN NAT). For daily Windows use, Stick + RNDIS / NCM is still recommended.
AT^TDCFG="infcfg","mode",2
AT^SETE5STICK=1
AT^SETAUTODIAL=1,1,"IPV4V6","ctnet","","",0
AT^RESET
Expected DHCP: gateway 192.168.8.1, hosts such as 192.168.8.2 / .3.
Manual fallback: IP 192.168.8.10, mask 255.255.255.0, gateway 192.168.8.1, DNS 8.8.8.8.
Summary Checklist
- ✅ TDTECH Connect - PC UI Interface (COMxx) is visible in "Computer Management"
- ✅ The serial tool uses that COM port with baud rate 115200, and
ATreturnsOK - ✅
AT^SETMODE?reports the6(RNDIS) /1(NCM) you selected (daily use of0ECM is not recommended) - ✅
AT^RESEThas been executed andAT^SETAUTODIAL?has been written - ✅ The corresponding Windows adapter has obtained an IP and
pingsucceeds
Relationship with Other Documents
| Document | Scenario |
|---|---|
| This document | Windows: choose one of RNDIS / NCM / ECM (RNDIS recommended) |
| Quick Install - Linux | OpenWrt: Linux NCM (SETMODE=4) |
| Quick Install - Mac | Mac: ECM + USB E5 |