Connecting the Mainboard

1. Enter Upgrade Mode
1.0 Mainboard/Device Diagram
Wiring Diagram
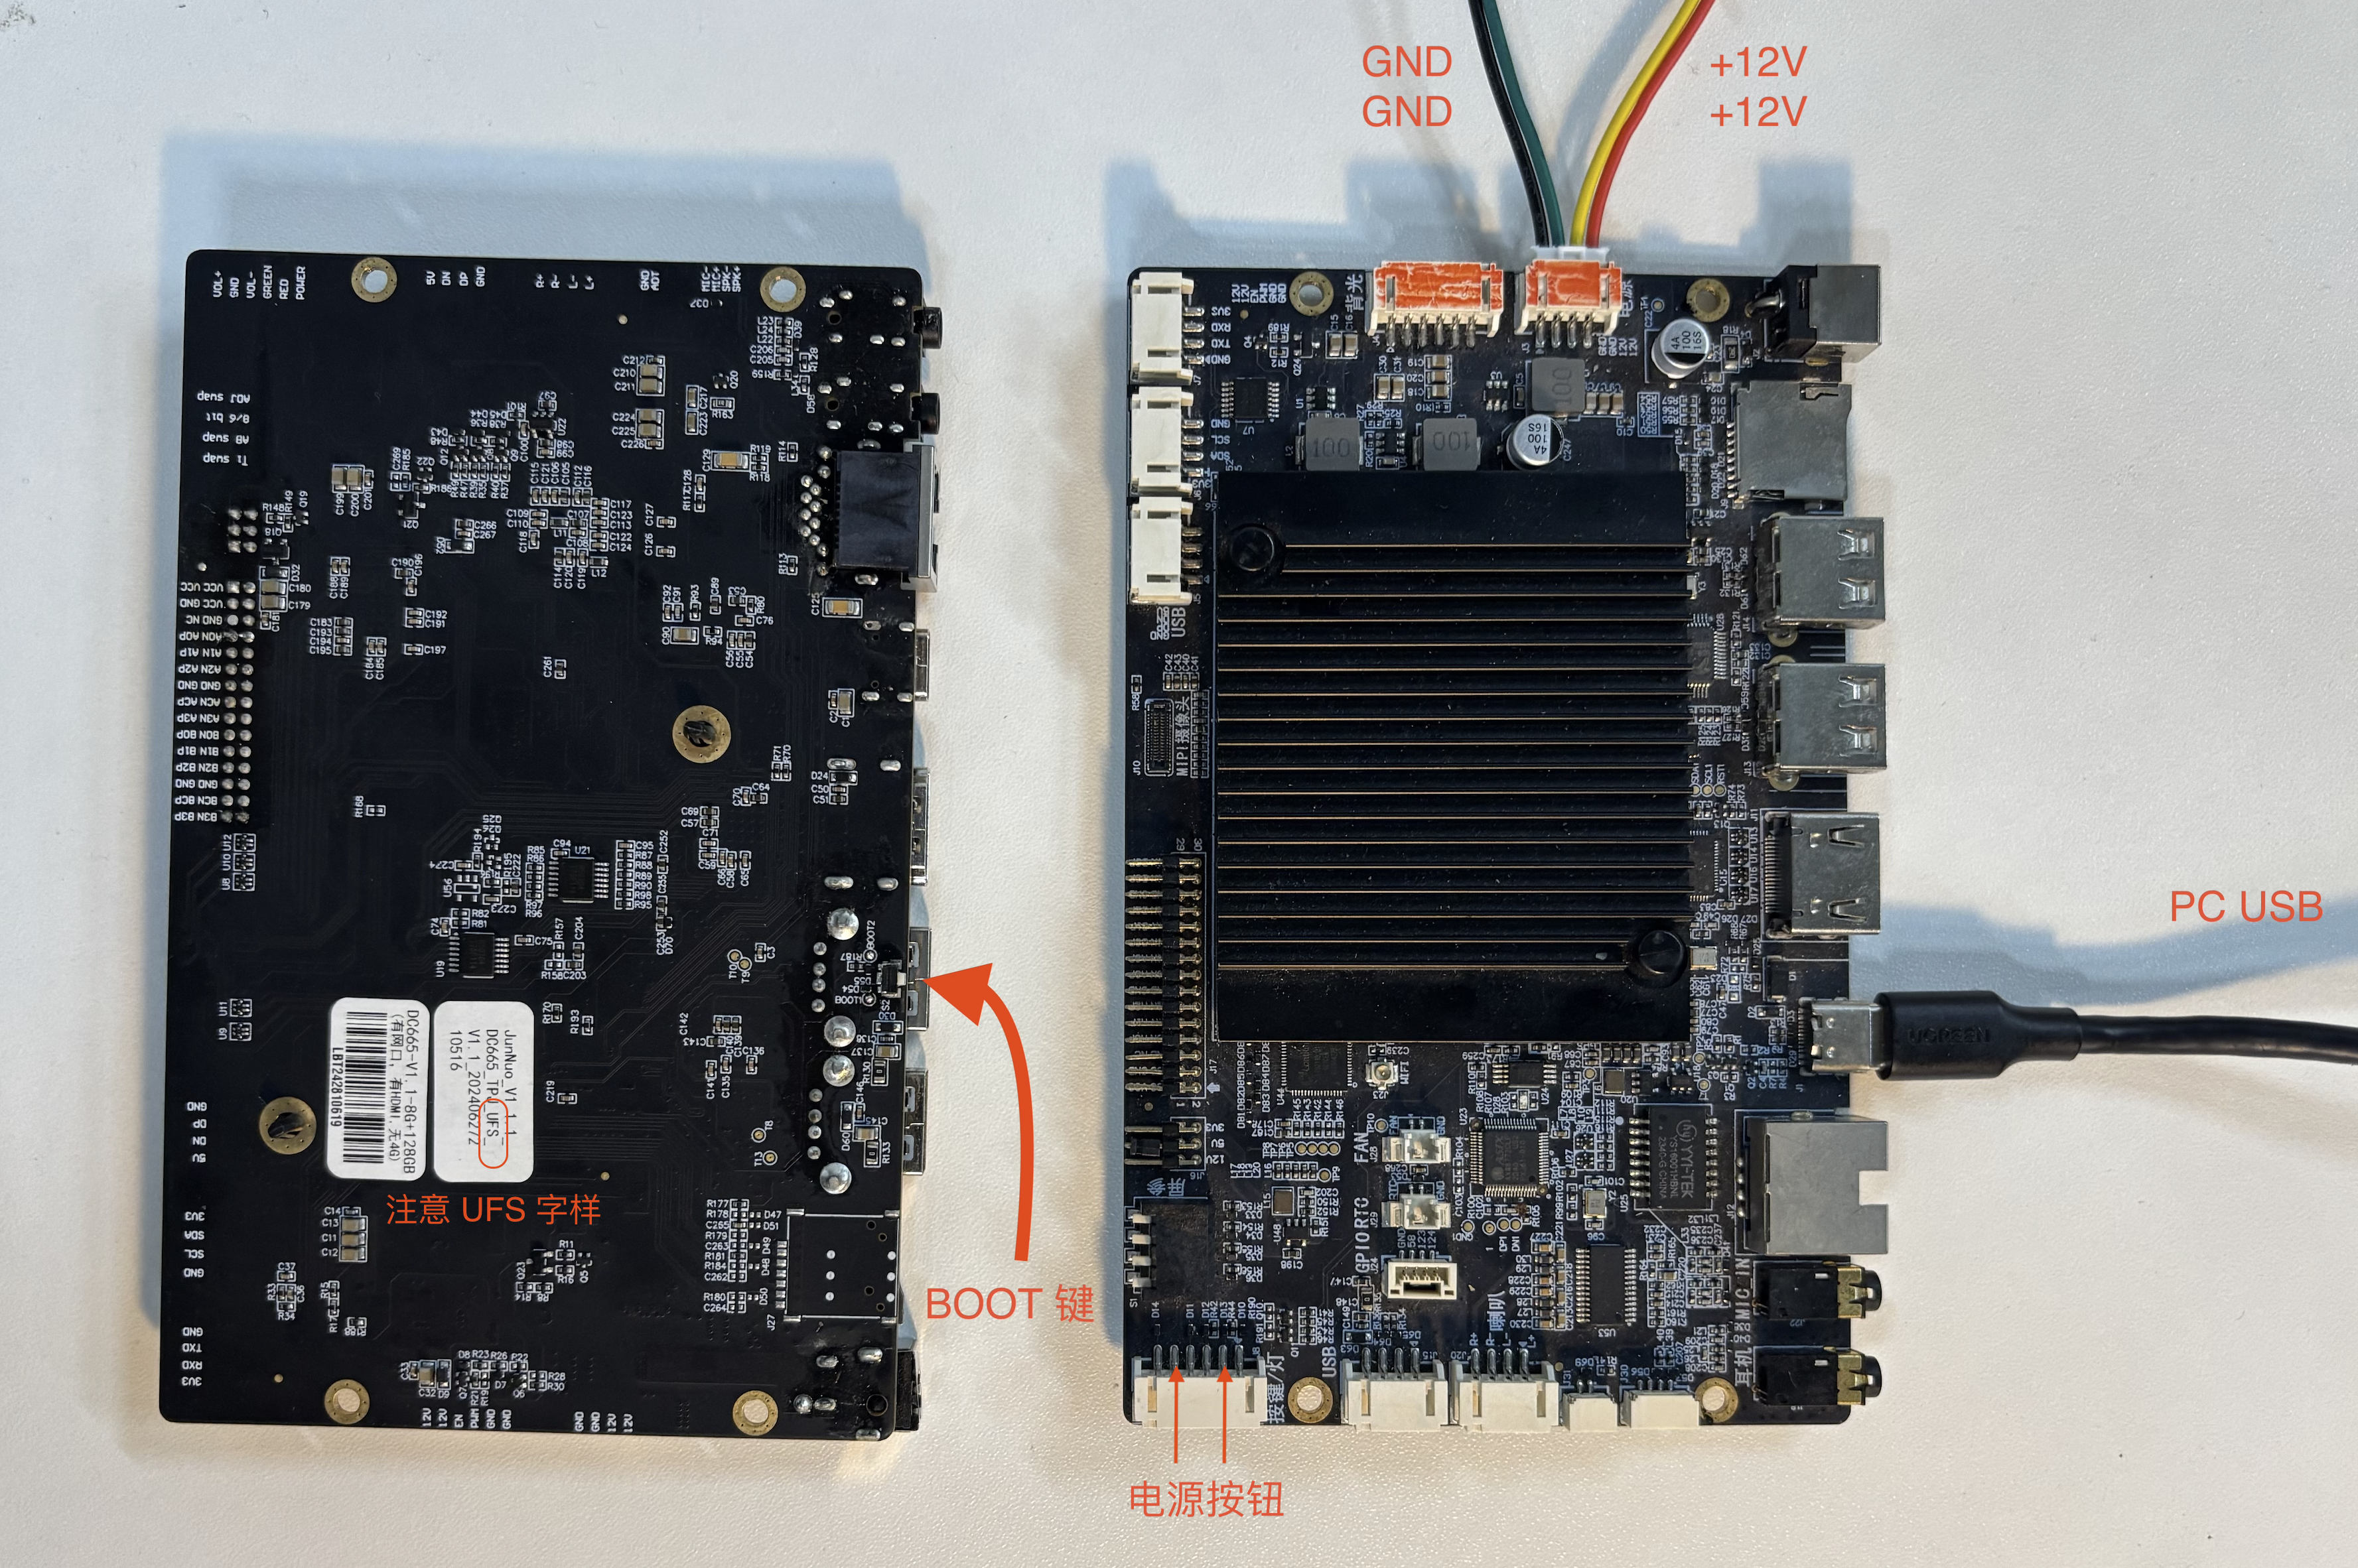
If there is a casing, you can use a toothpick or similar object to press and hold the
BOOT buttonhere.
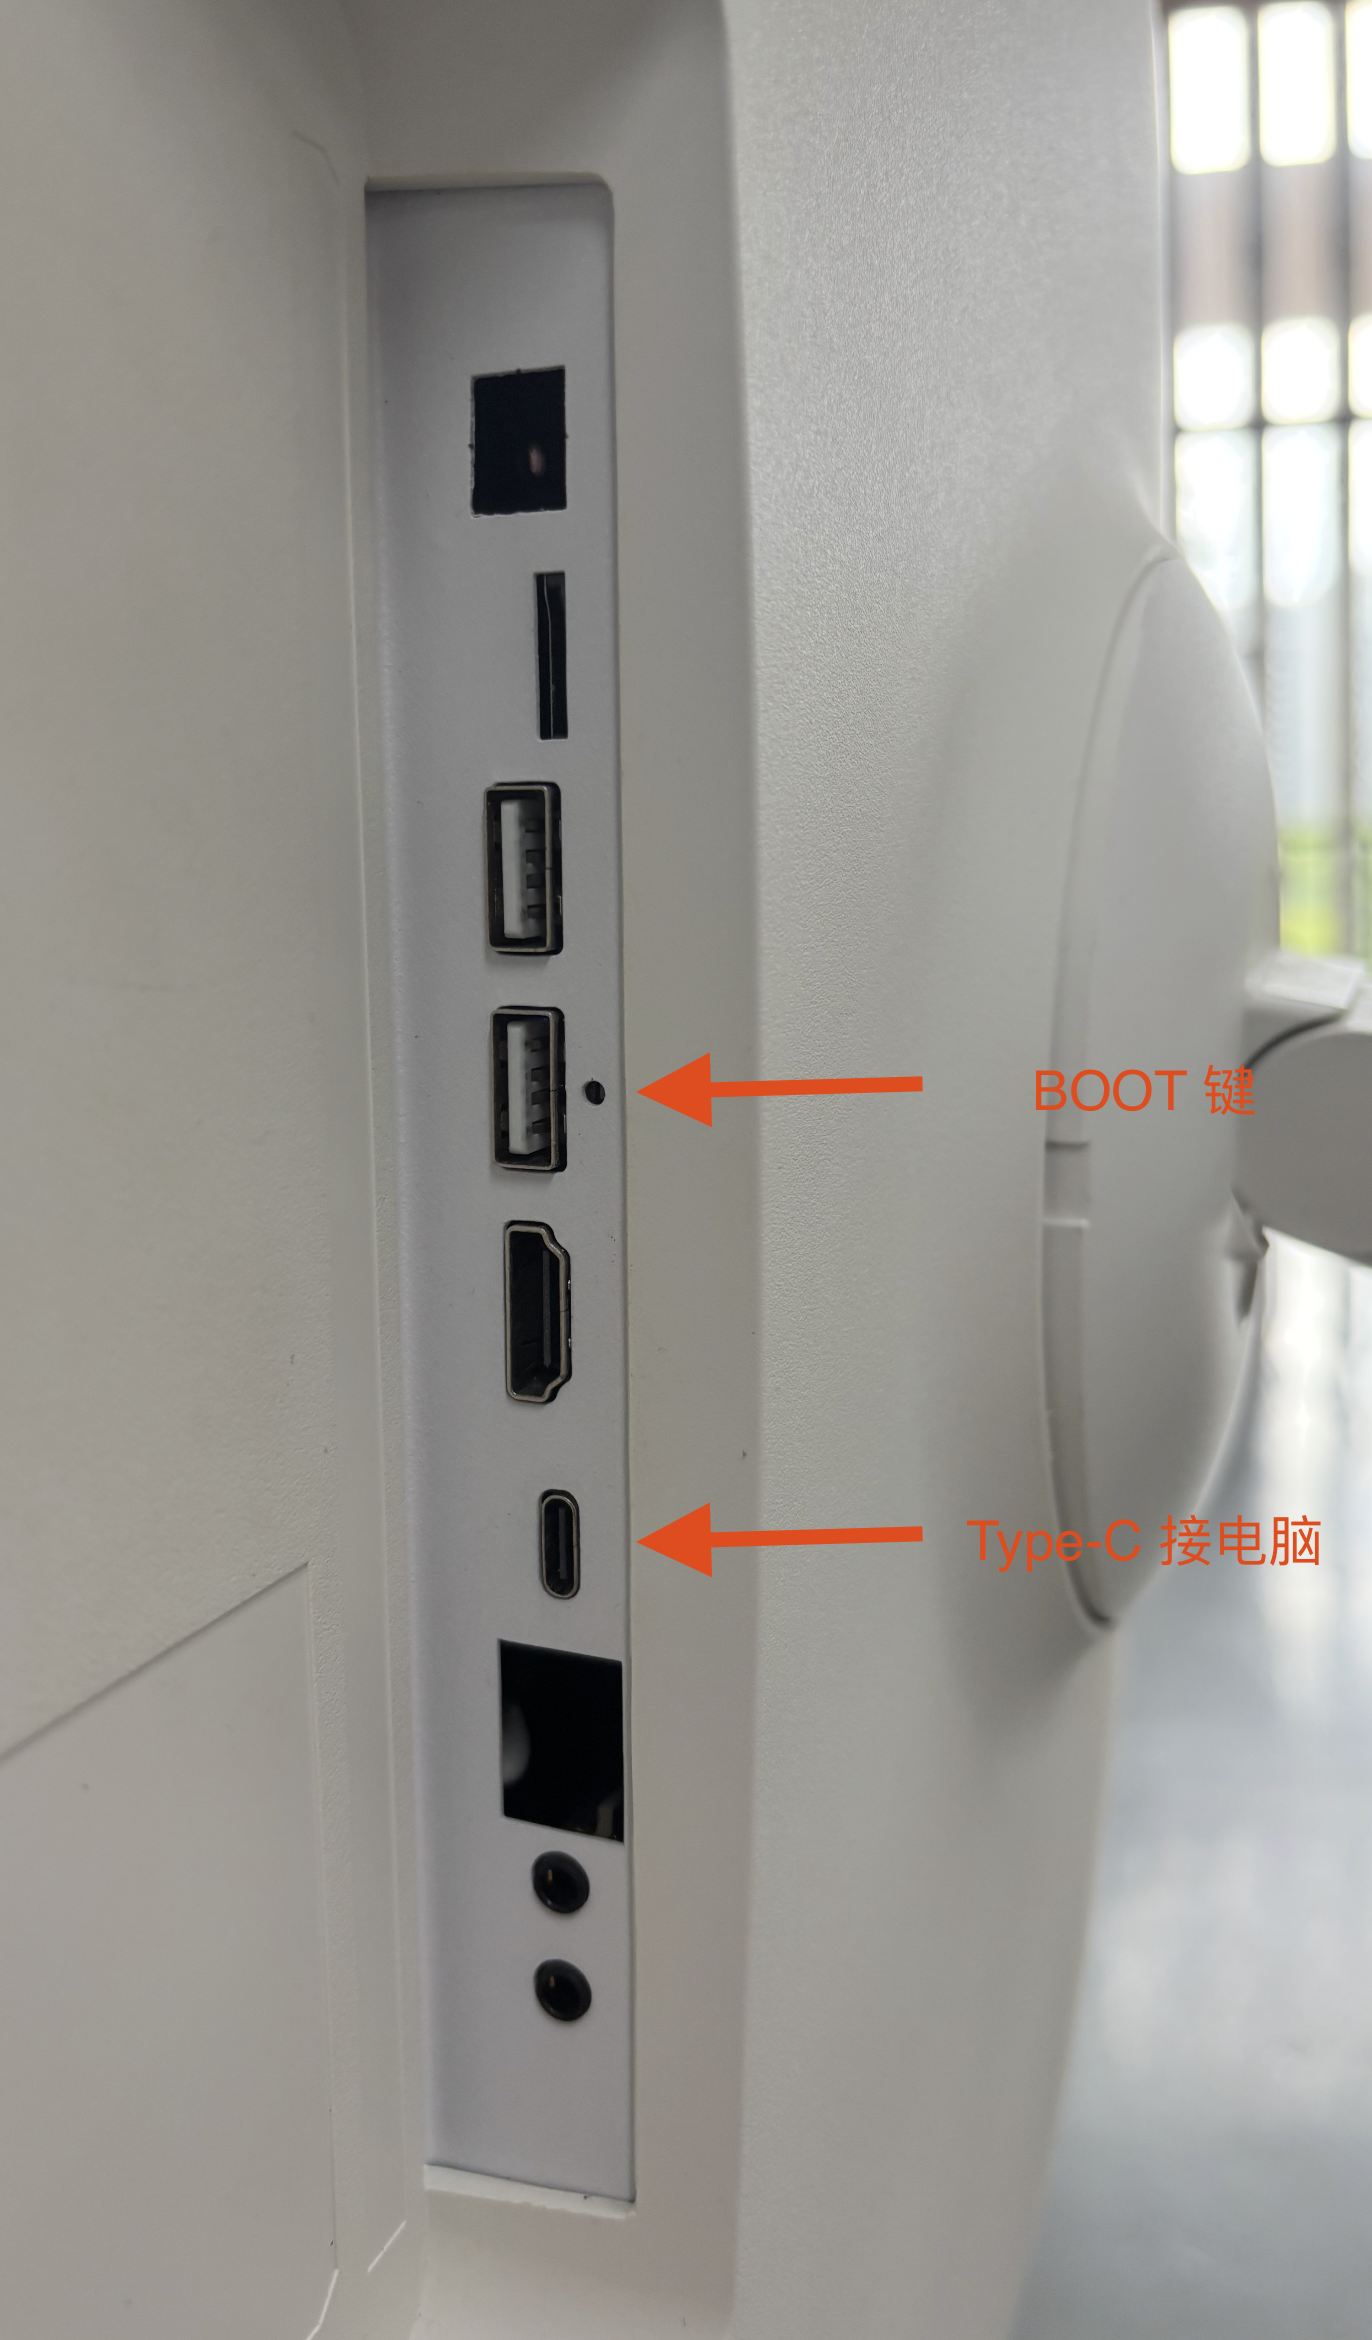
1.1 Entering Upgrade Mode on Auto-Power-On Mainboards
Auto-power-on mainboards will power on automatically when connected to power.
-
Connect the
USB TYPE-Cdata cable to the mainboard. -
Press and hold the
Boot buttonwithout releasing it. -
Connect the
DC12Vpower supply to the mainboard. -
Wait for it to enter
boot mode, then release the button.
1.2 Entering Upgrade Mode on Manual Power-On Mainboards
After connecting power to a non-auto-power-on mainboard, you need to manually power it on.
-
Connect the
USB TYPE-Cdata cable to the mainboard. -
Connect the
DC12Vpower supply to the mainboard. -
Press and hold the
Boot buttonwithout releasing it. -
Press and hold the
Power button. Once it entersboot mode, release both buttons.
1.3 Entering Loader Mode via adb shell
When the device is in a normal state, you can also enter upgrade mode by directly inputting the following commands via adb.
# Check if the device is connected
adb devices
# List of devices attached

# Reboot into QDLoader mode
adb reboot edl
If you encounter error: closed during debugging, it indicates that password verification is required to continue debugging.
error: closed


# Verify password
adb shell password
# Reboot into loader mode
adb reboot edl
Enter the password to proceed with normal debugging. Note: password is not the actual password. Please contact technical personnel to obtain the actual password.
Note: The password is not publicly released. Please contact technical personnel to obtain it.
For specific reference
2. Parameter Settings
2.1 Select the Device for Upgrade
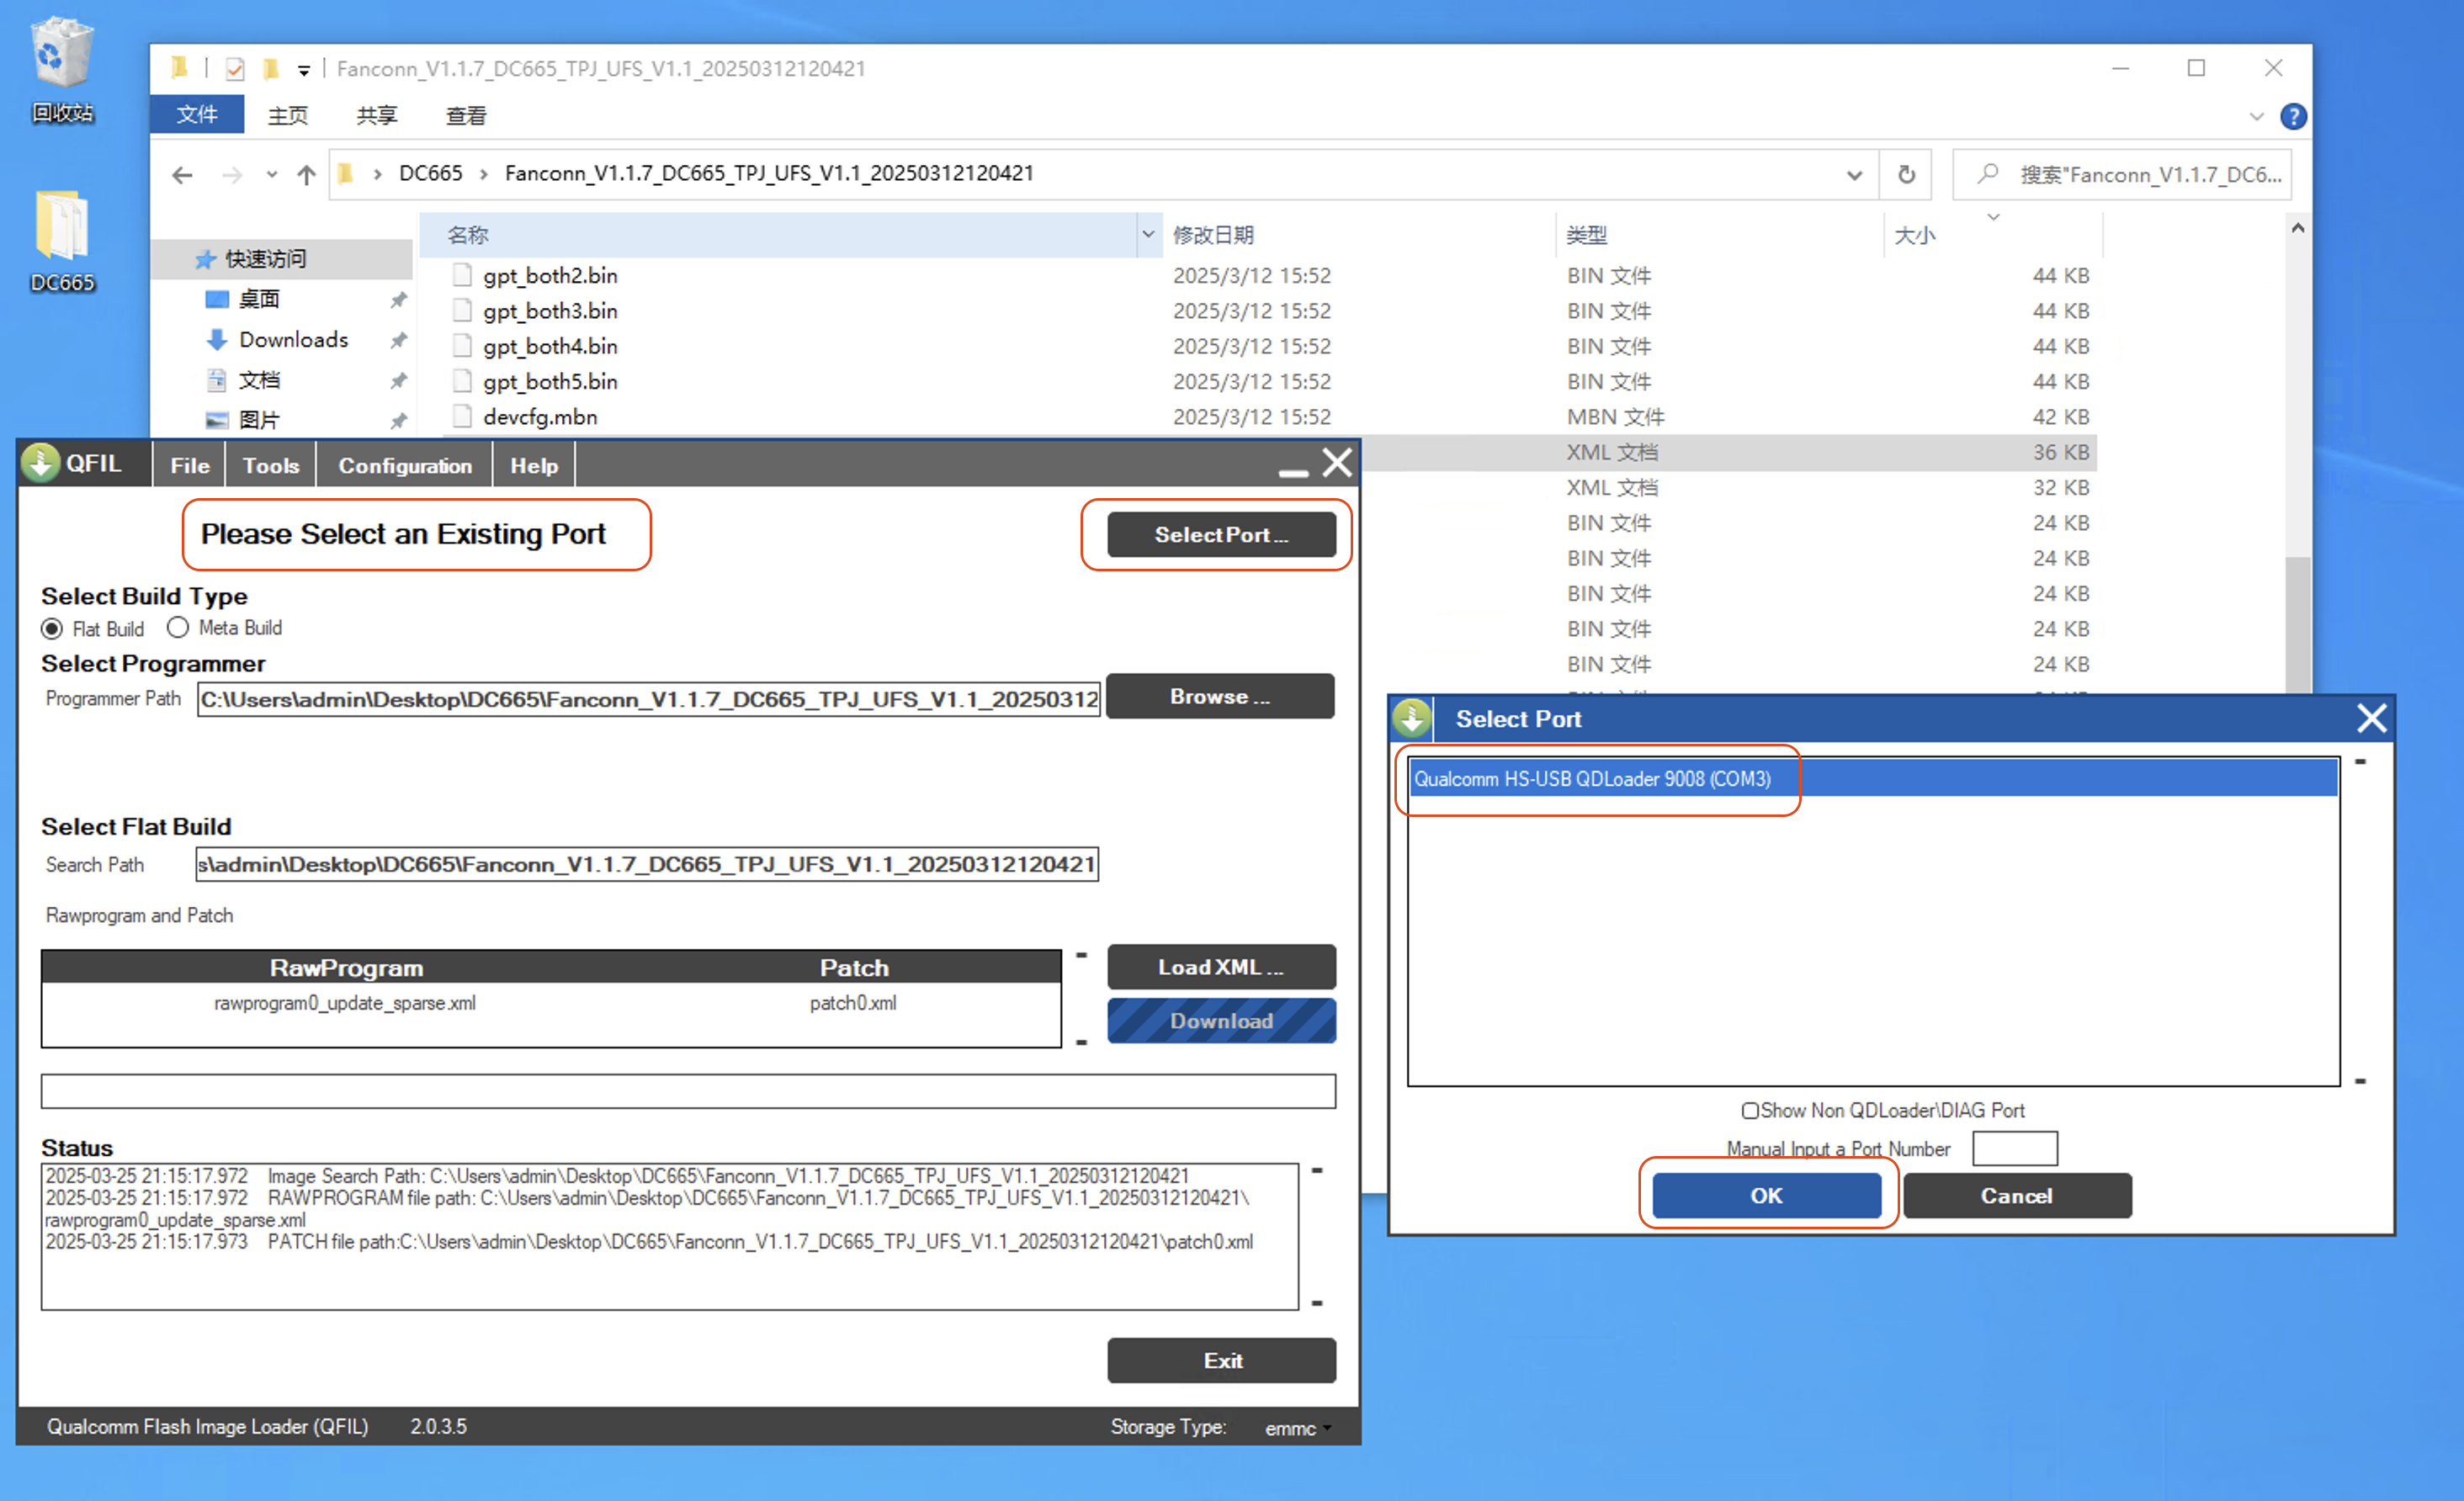
When Please Select an Existing Port appears, click Select Port, then choose Qualcomm HS- USB QDloader 9008(COM3) and click OK.
Select
Qualcomm HS- USB QDloader 9008(COM3)
2.2 Select the Device Flash Type
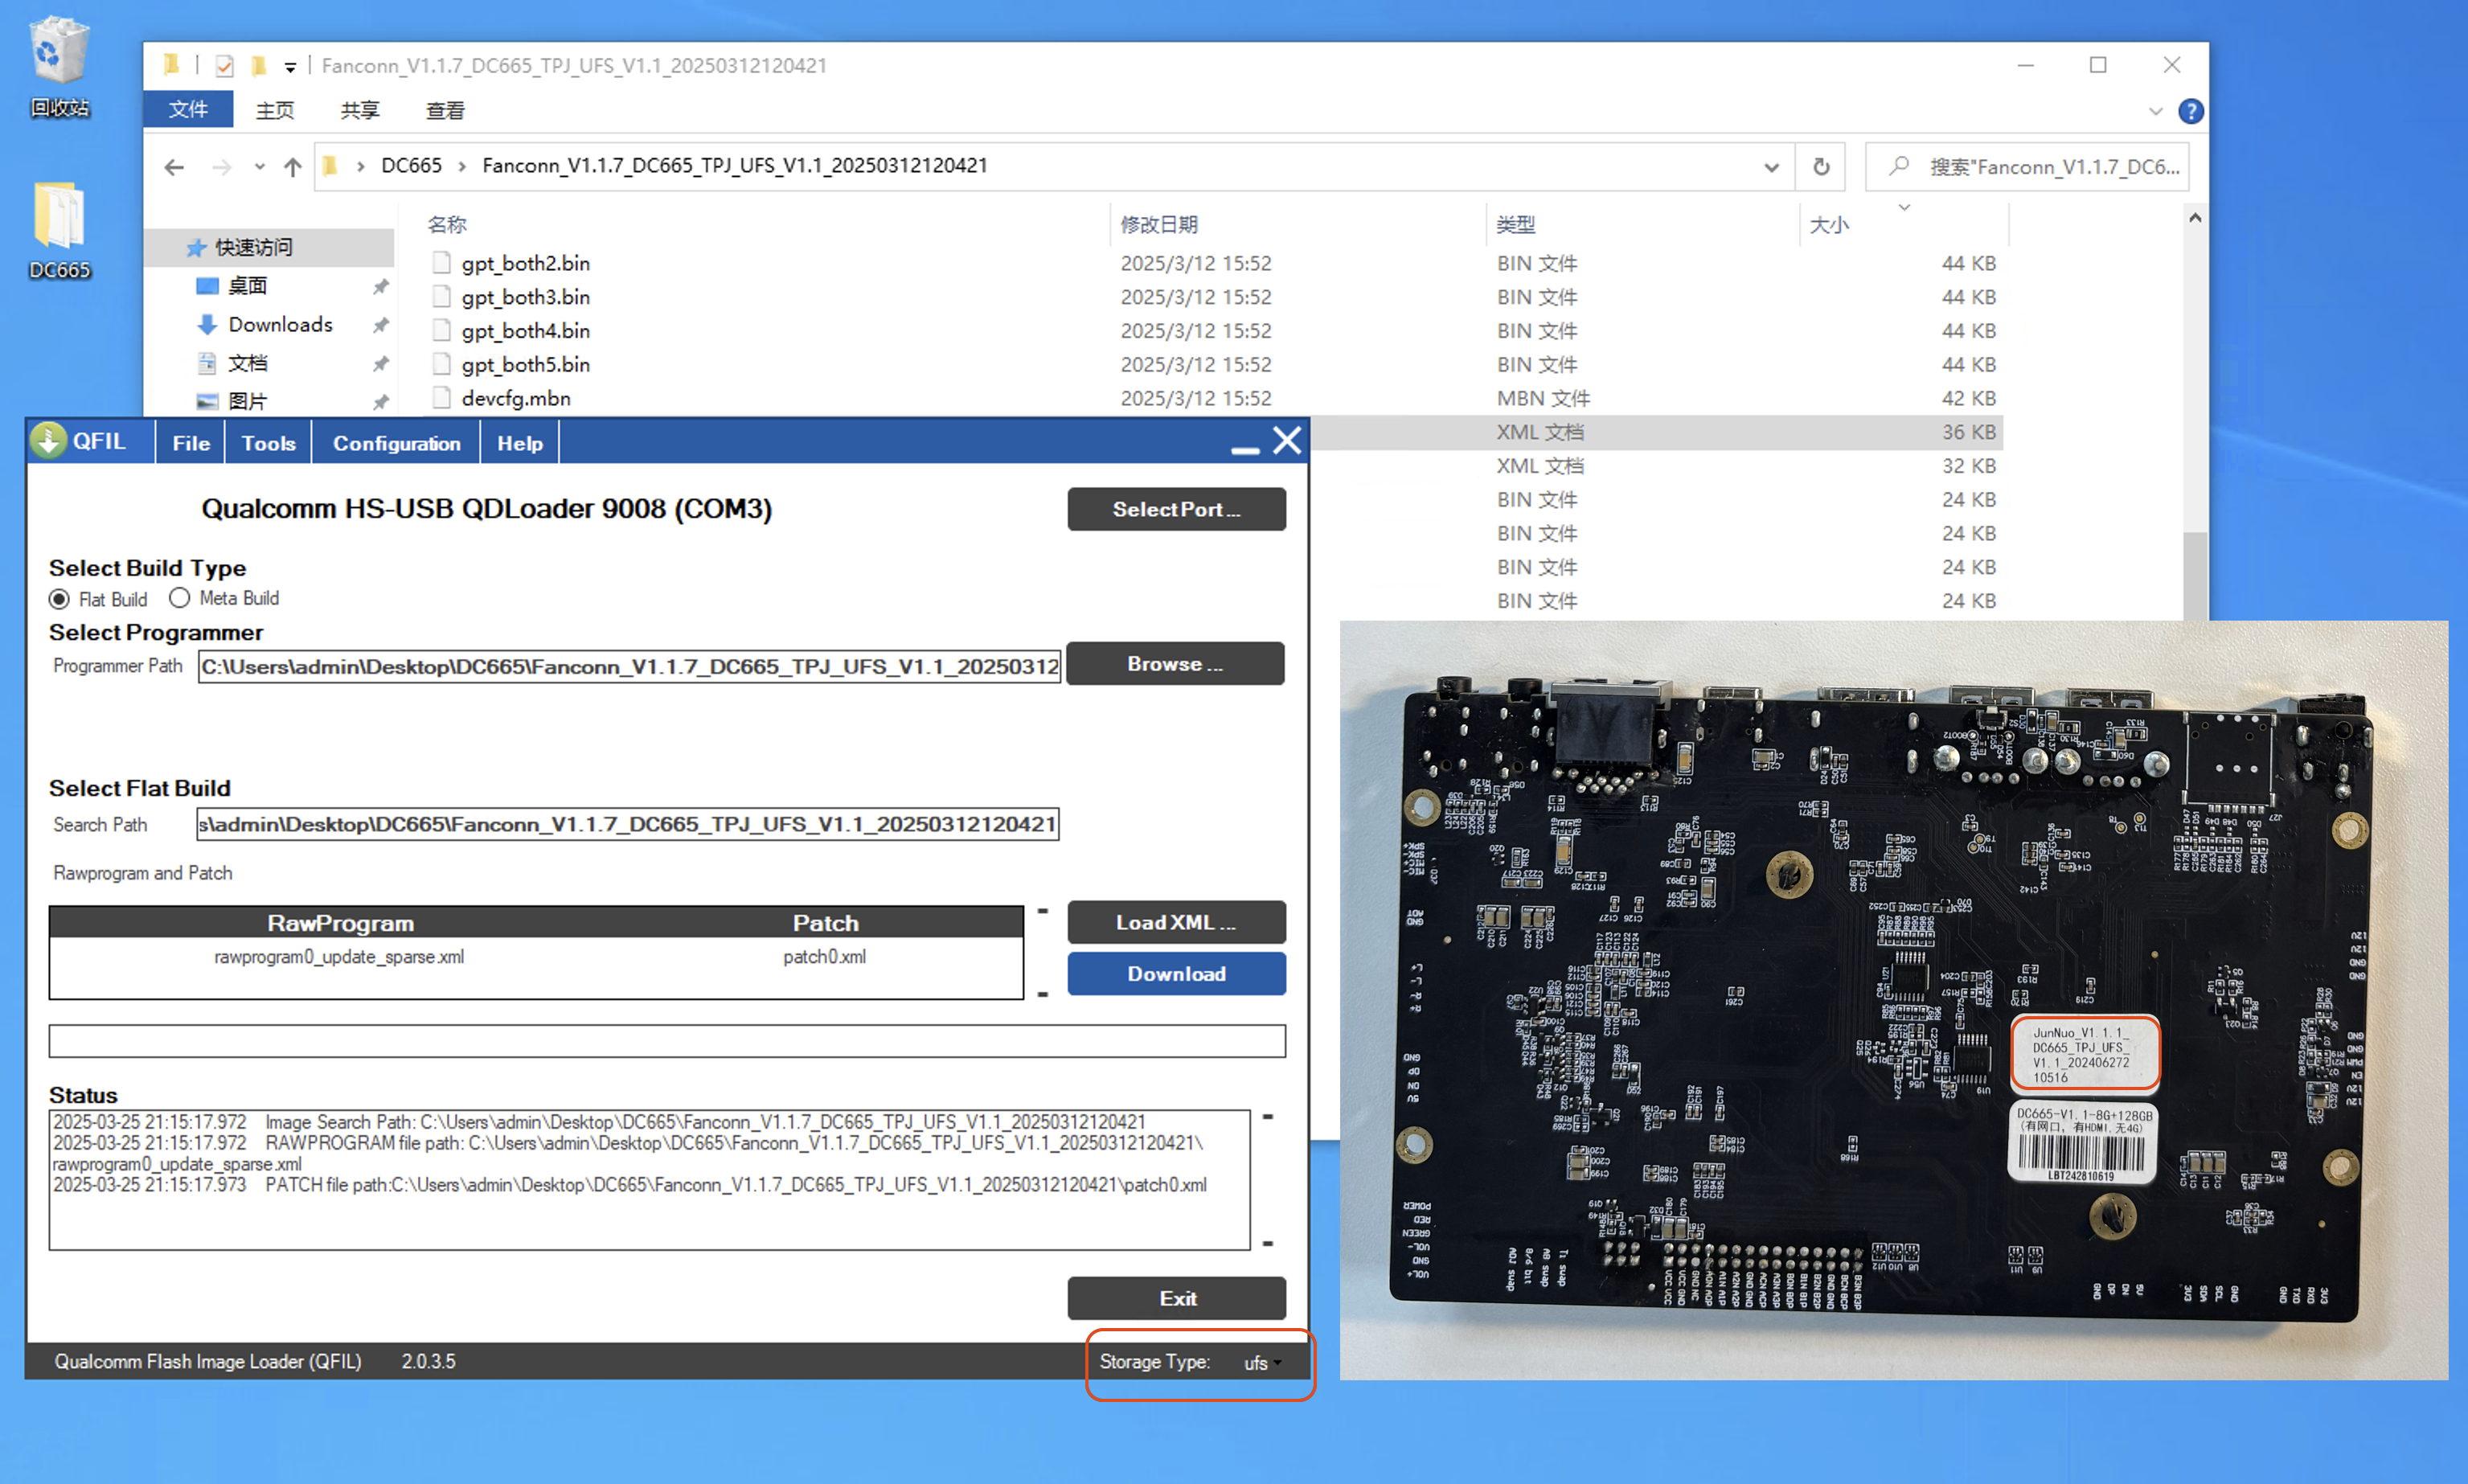
Based on the information on the sticker on the back of the mainboard, finally select Storage Type: - ufs.
Select
Storage Type:-ufs
3. Select Upgrade Mode
3.0 Select Configuration View
Finally, confirm the upgrade mode.
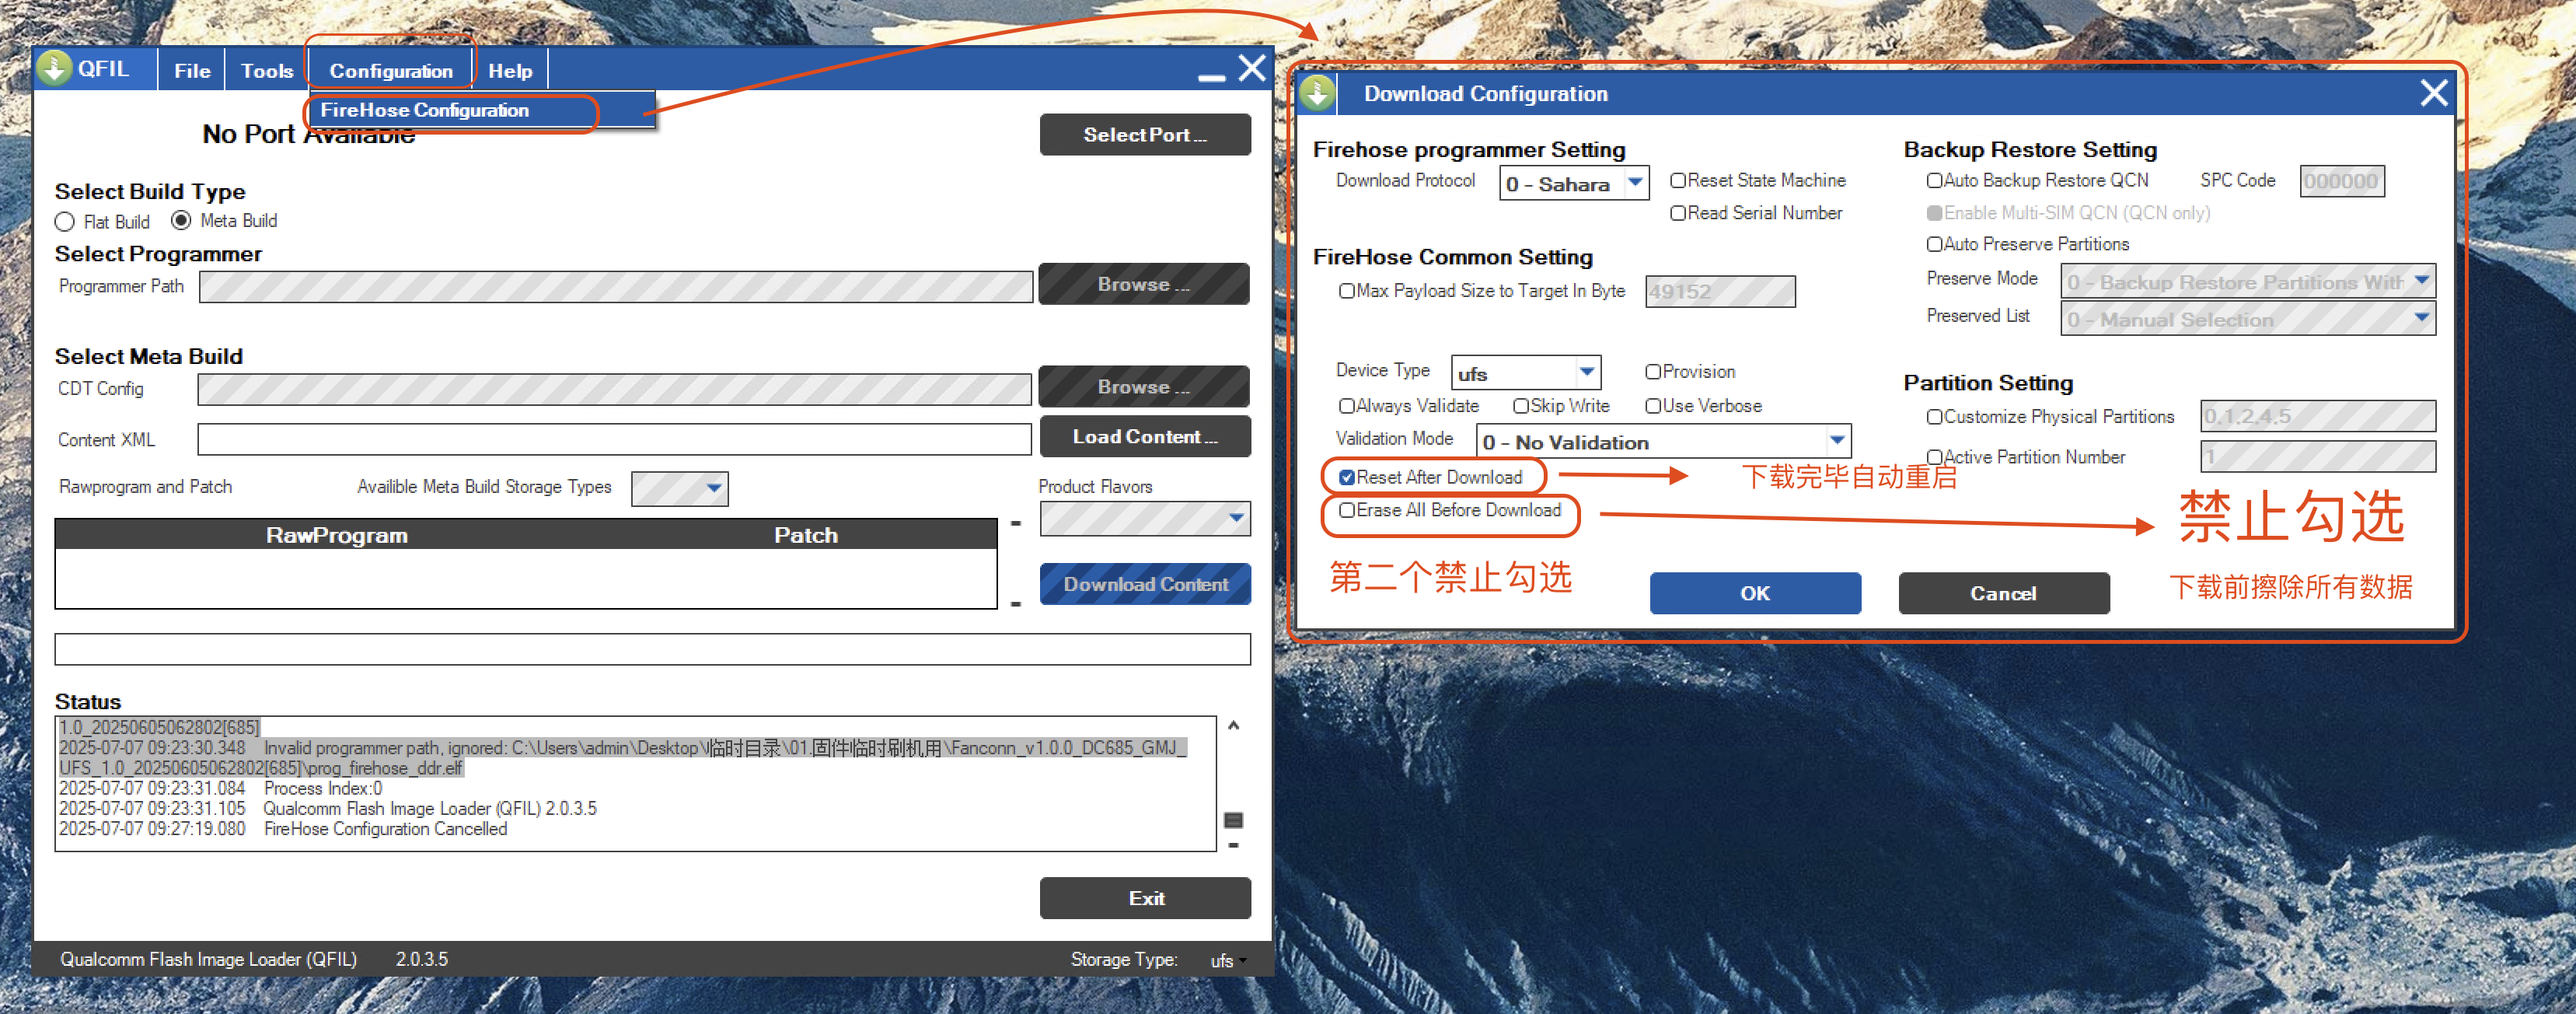
3.1 Auto-Restart After Upgrade Completion
In Configuration - FireHose Configuration - Download Configuration
Check the Reset After Download option.
This means Auto-restart after download completion.
3.2 Flash Erase Option Erase All Before Download
Erase All Before DownloadWARNING
Risk of System Software Failure!
-
This option is strictly for qualified personnel to completely
erase/restorean entire device. -
Unless specifically required for
flashing base firmware packages,do NOT check .Erase All Before Download -
If its use is necessary for special circumstances,
immediately uncheck the .erase optionafter use
Be careful not to select this option by mistake