Upgrade Firmware

Preface
This document describes how to flash firmware from a host PC to the storage of a Rockchip development board via a data cable.
During the upgrade, you need to select the firmware according to your actual requirements and choose the appropriate upgrade method.
Obtaining the Firmware
All GT8550 Download Links
Link: https://pan.baidu.com/s/1t_EBW43yrsN9Y7aApIinIg?pwd=fanc
Extraction code: fanc
GT8550 Ubuntu AIBOX Public Version
Qualcomm-GT8550-Ubuntu-AIBOX
Link: https://pan.baidu.com/s/1AKu9MGi9ieHpme0uPV0Zig?pwd=fanc
Extraction code: fanc
Installing the Flashing Tool
Download the Files
Download and install the Qualcomm USB driver QUD.WIN.1.1%20Installer-10093.1.zip
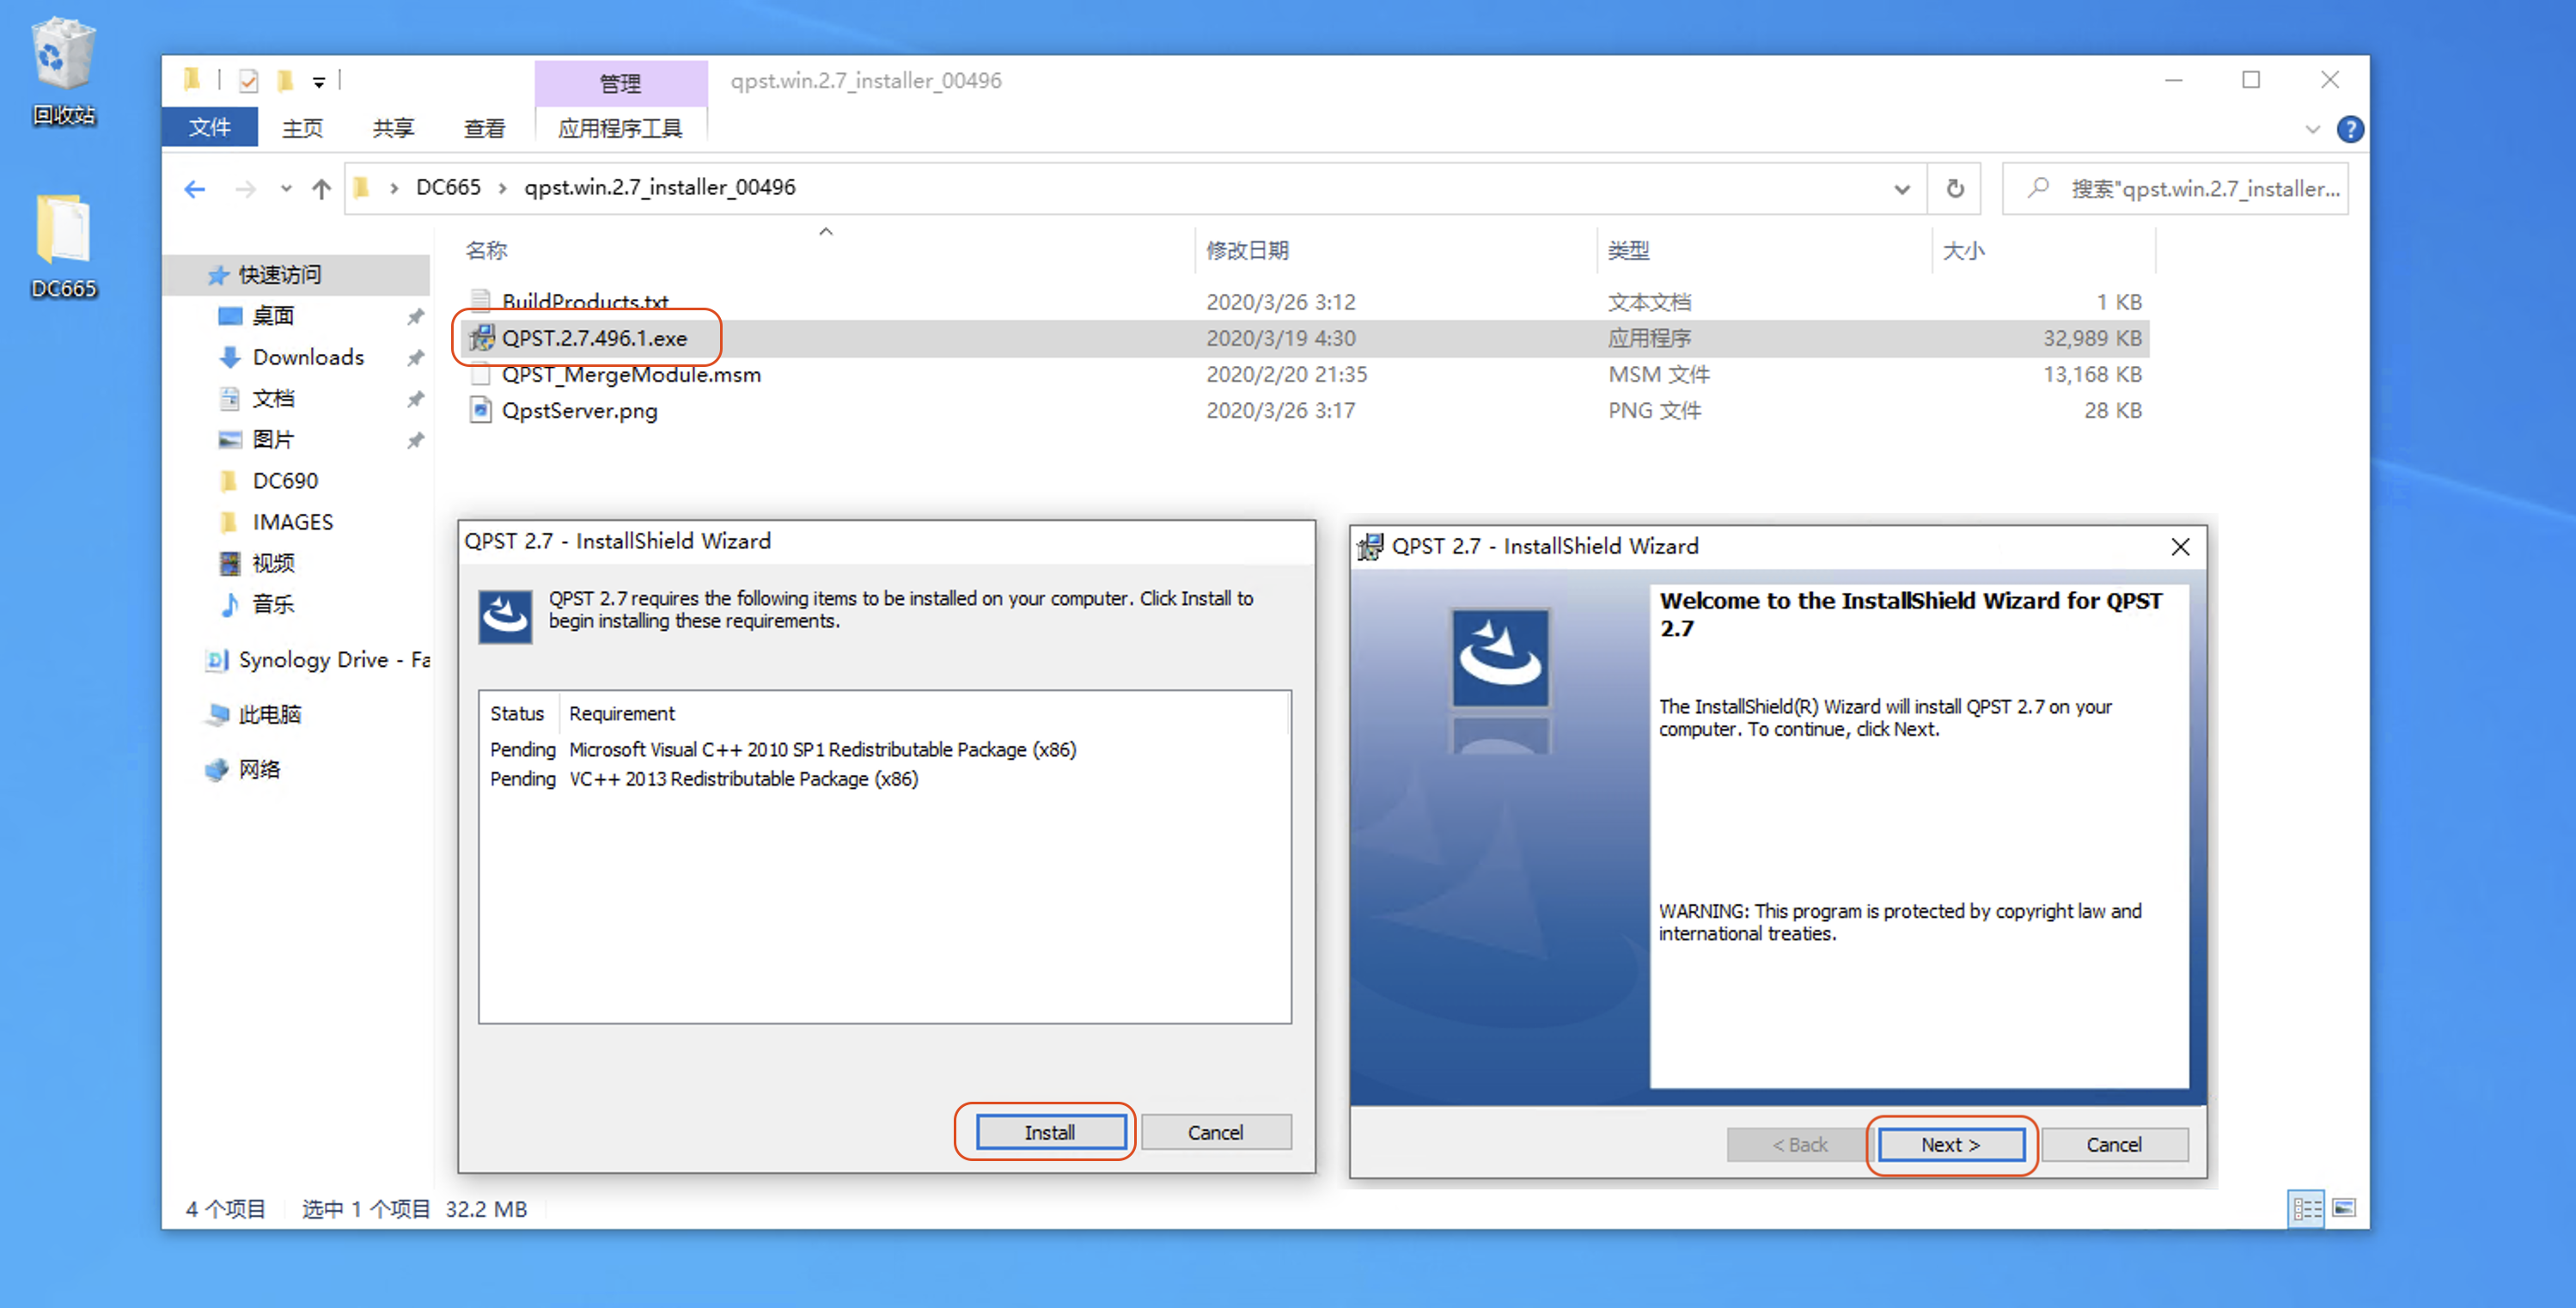
Download and install the QPST/QFIL flashing tool qpst.win.2.7_installer_00496.2.rar
Please download the
Driver
- The driver must be installed before flashing, otherwise the host
cannot recognize the mainboard
QUD.WIN.1.1%20Installer-10093.1.zip
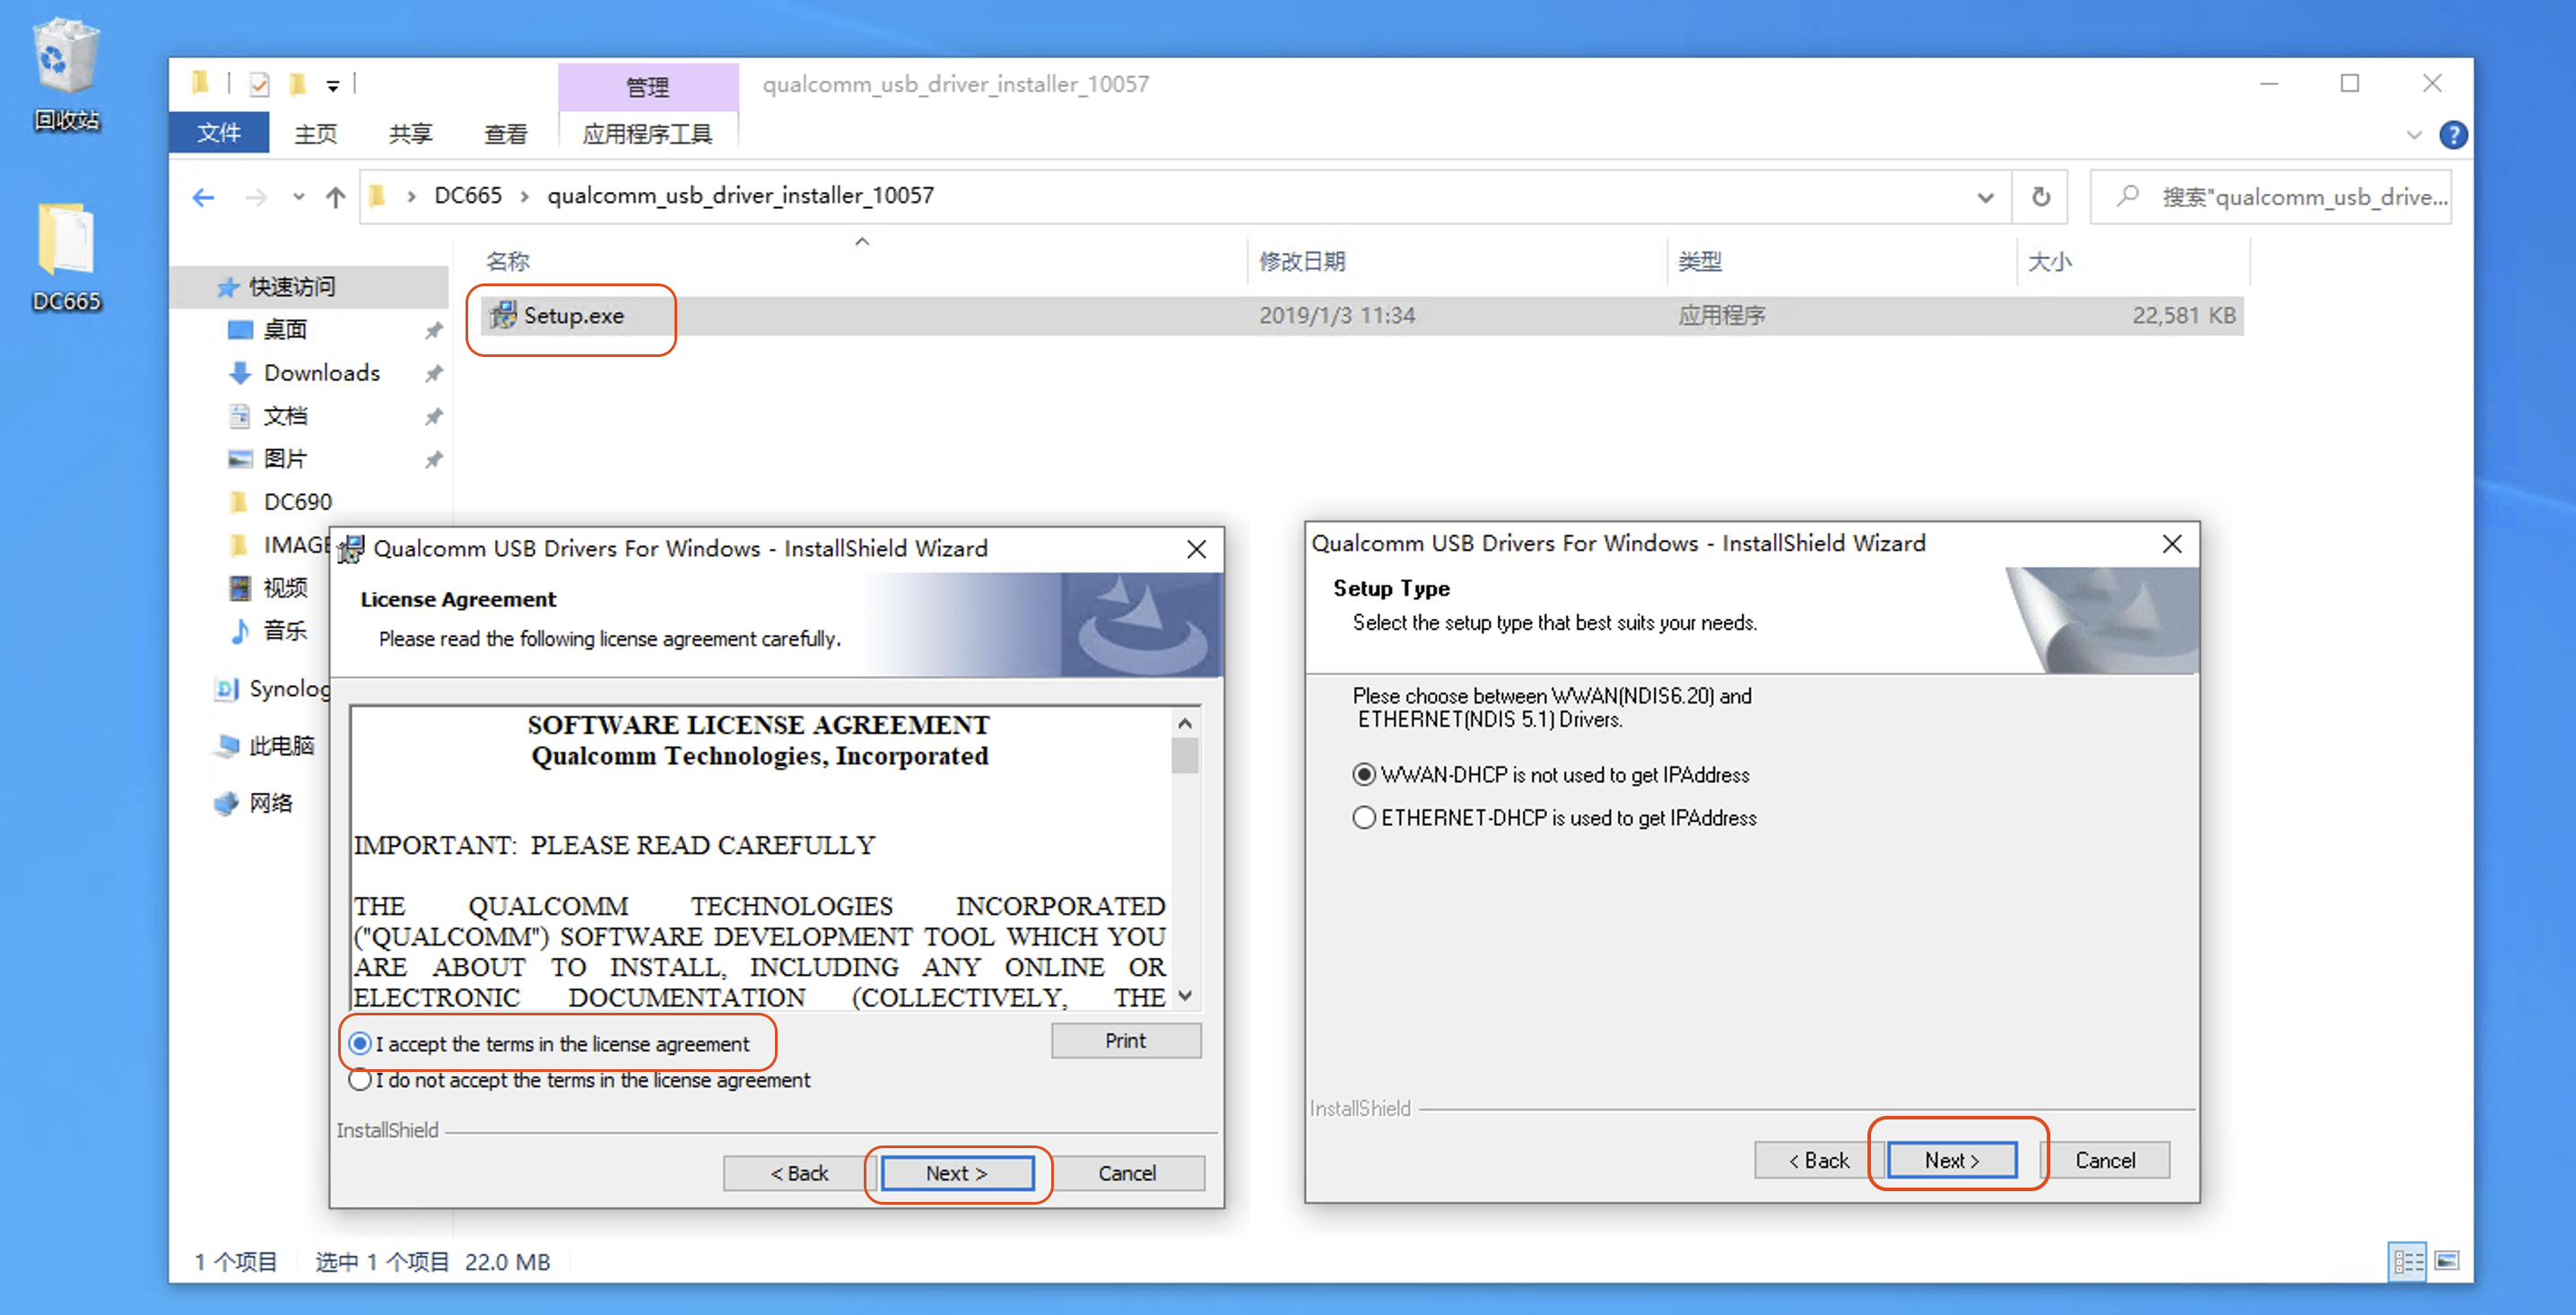
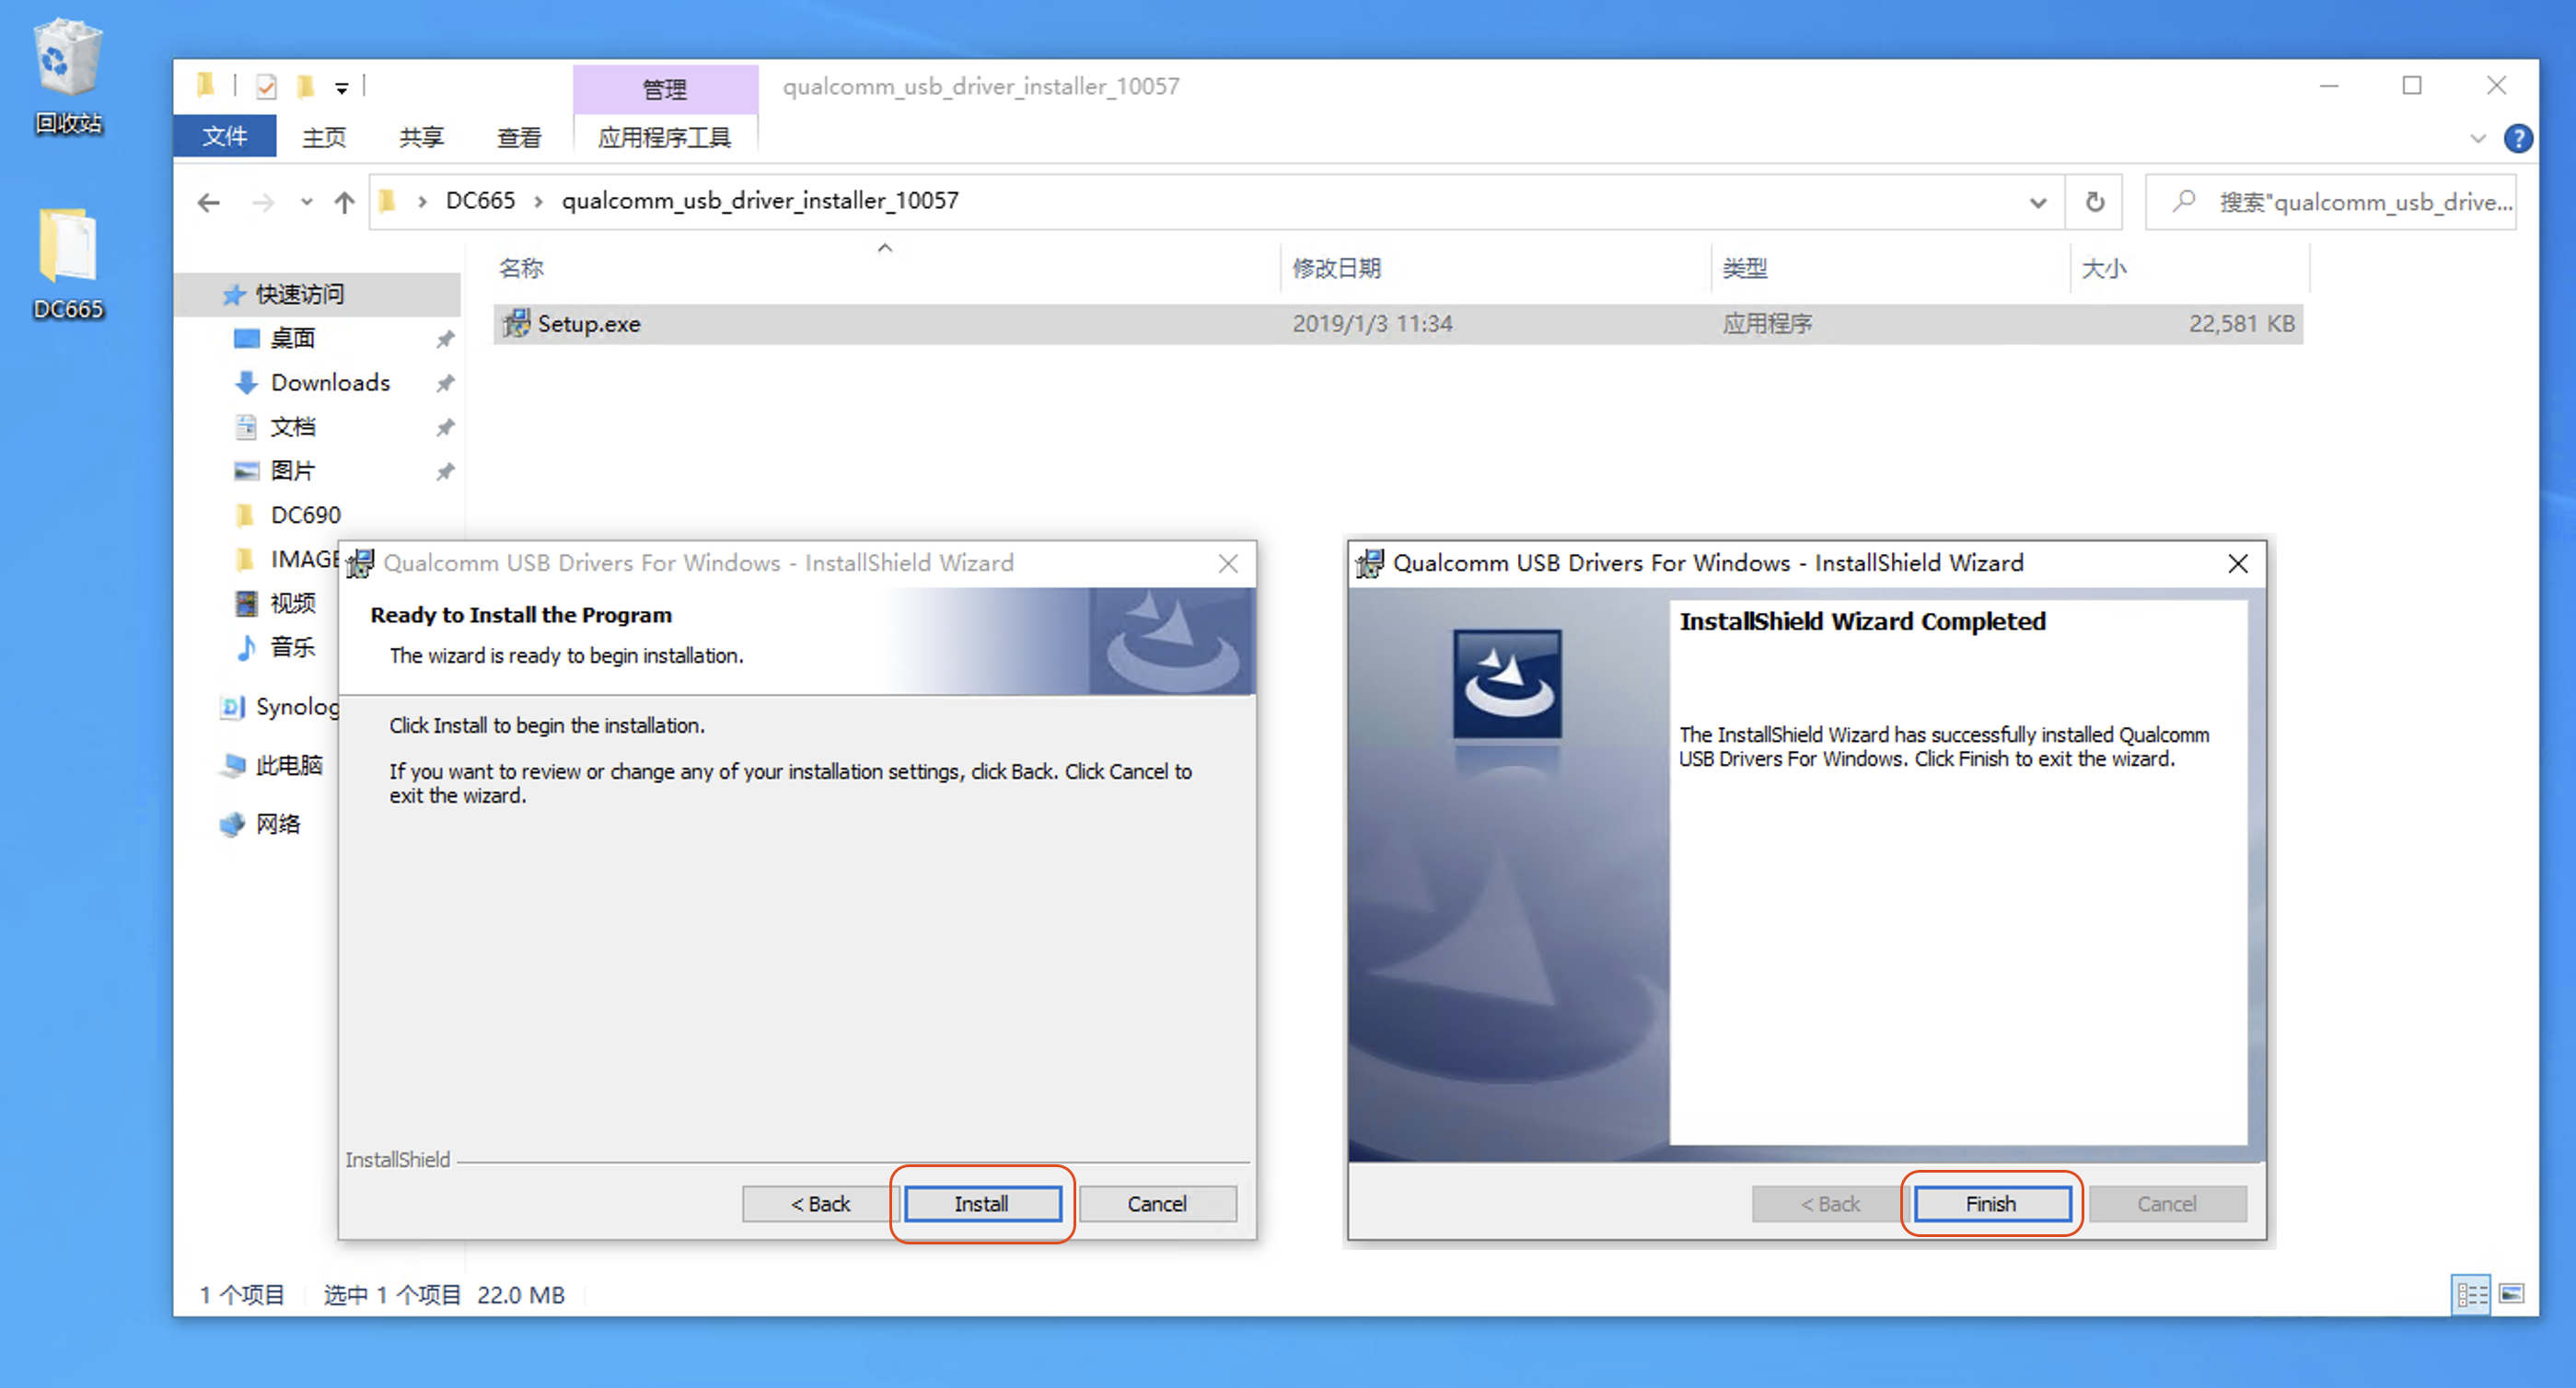
After extracting, open qualcomm_usb_driver_installer_10057 \ Setup.exe to install the driver
Installation completed
Flashing Tool
qpst.win.2.7_installer_00496.2.rar
Open qualcomm_usb_driver_installer_10057 \ Setup.exe to install the driver
Installation completed
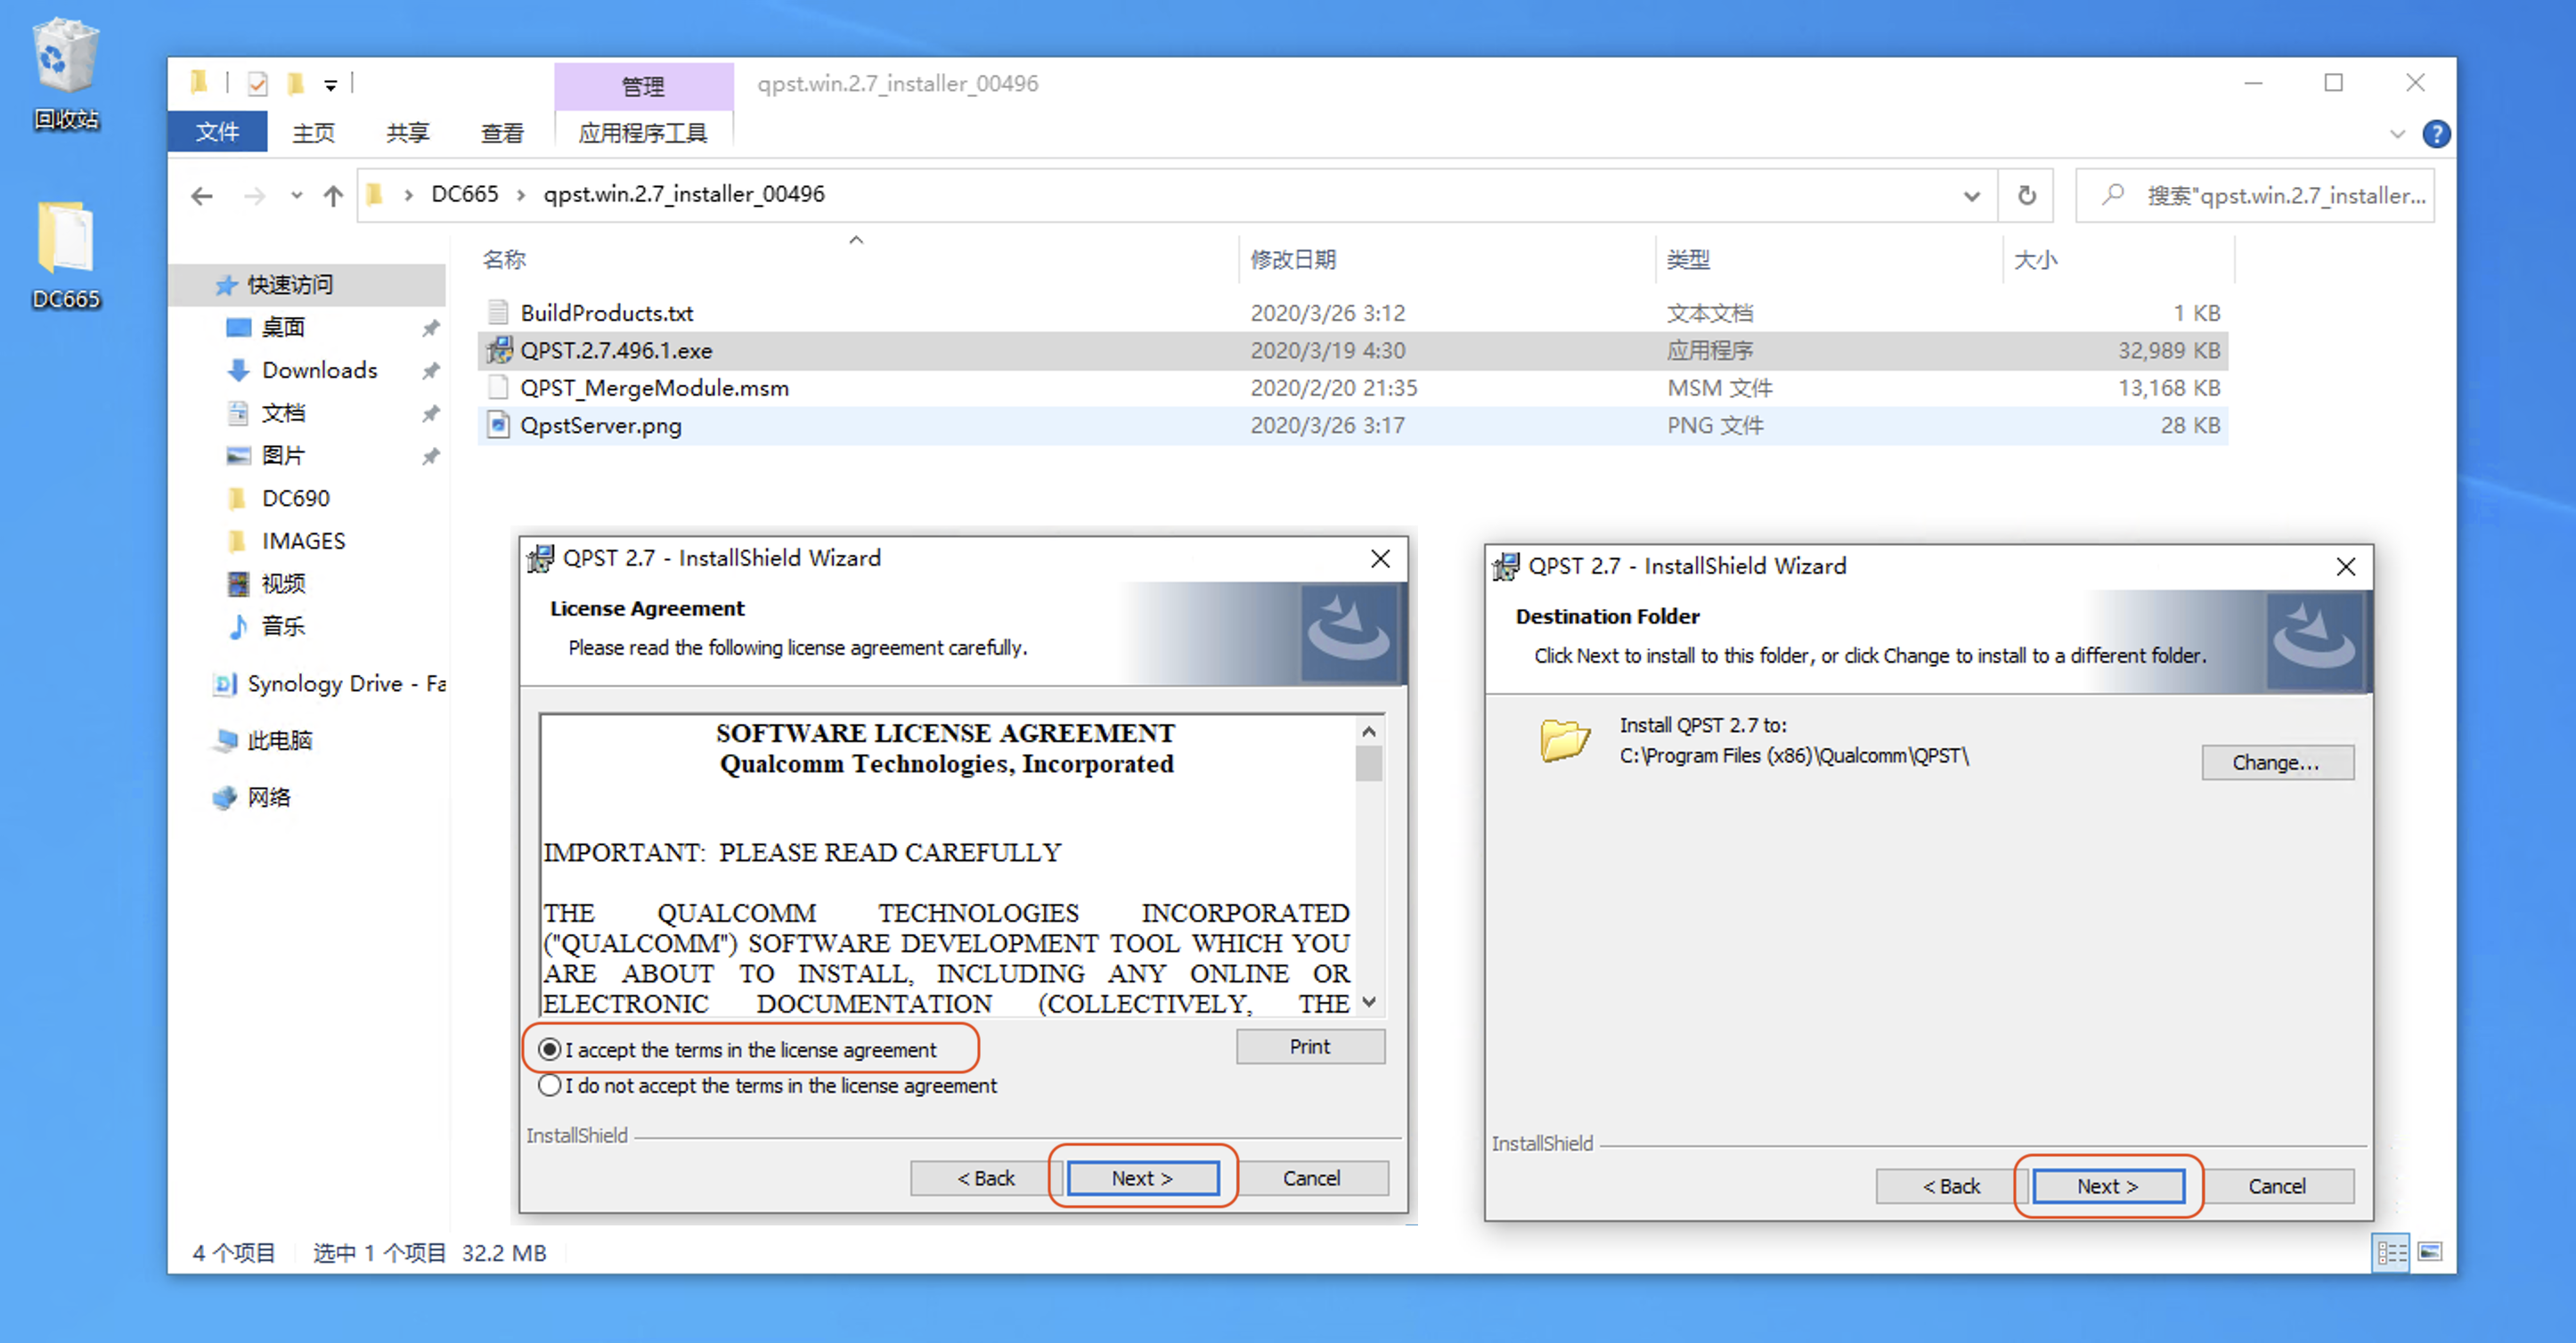
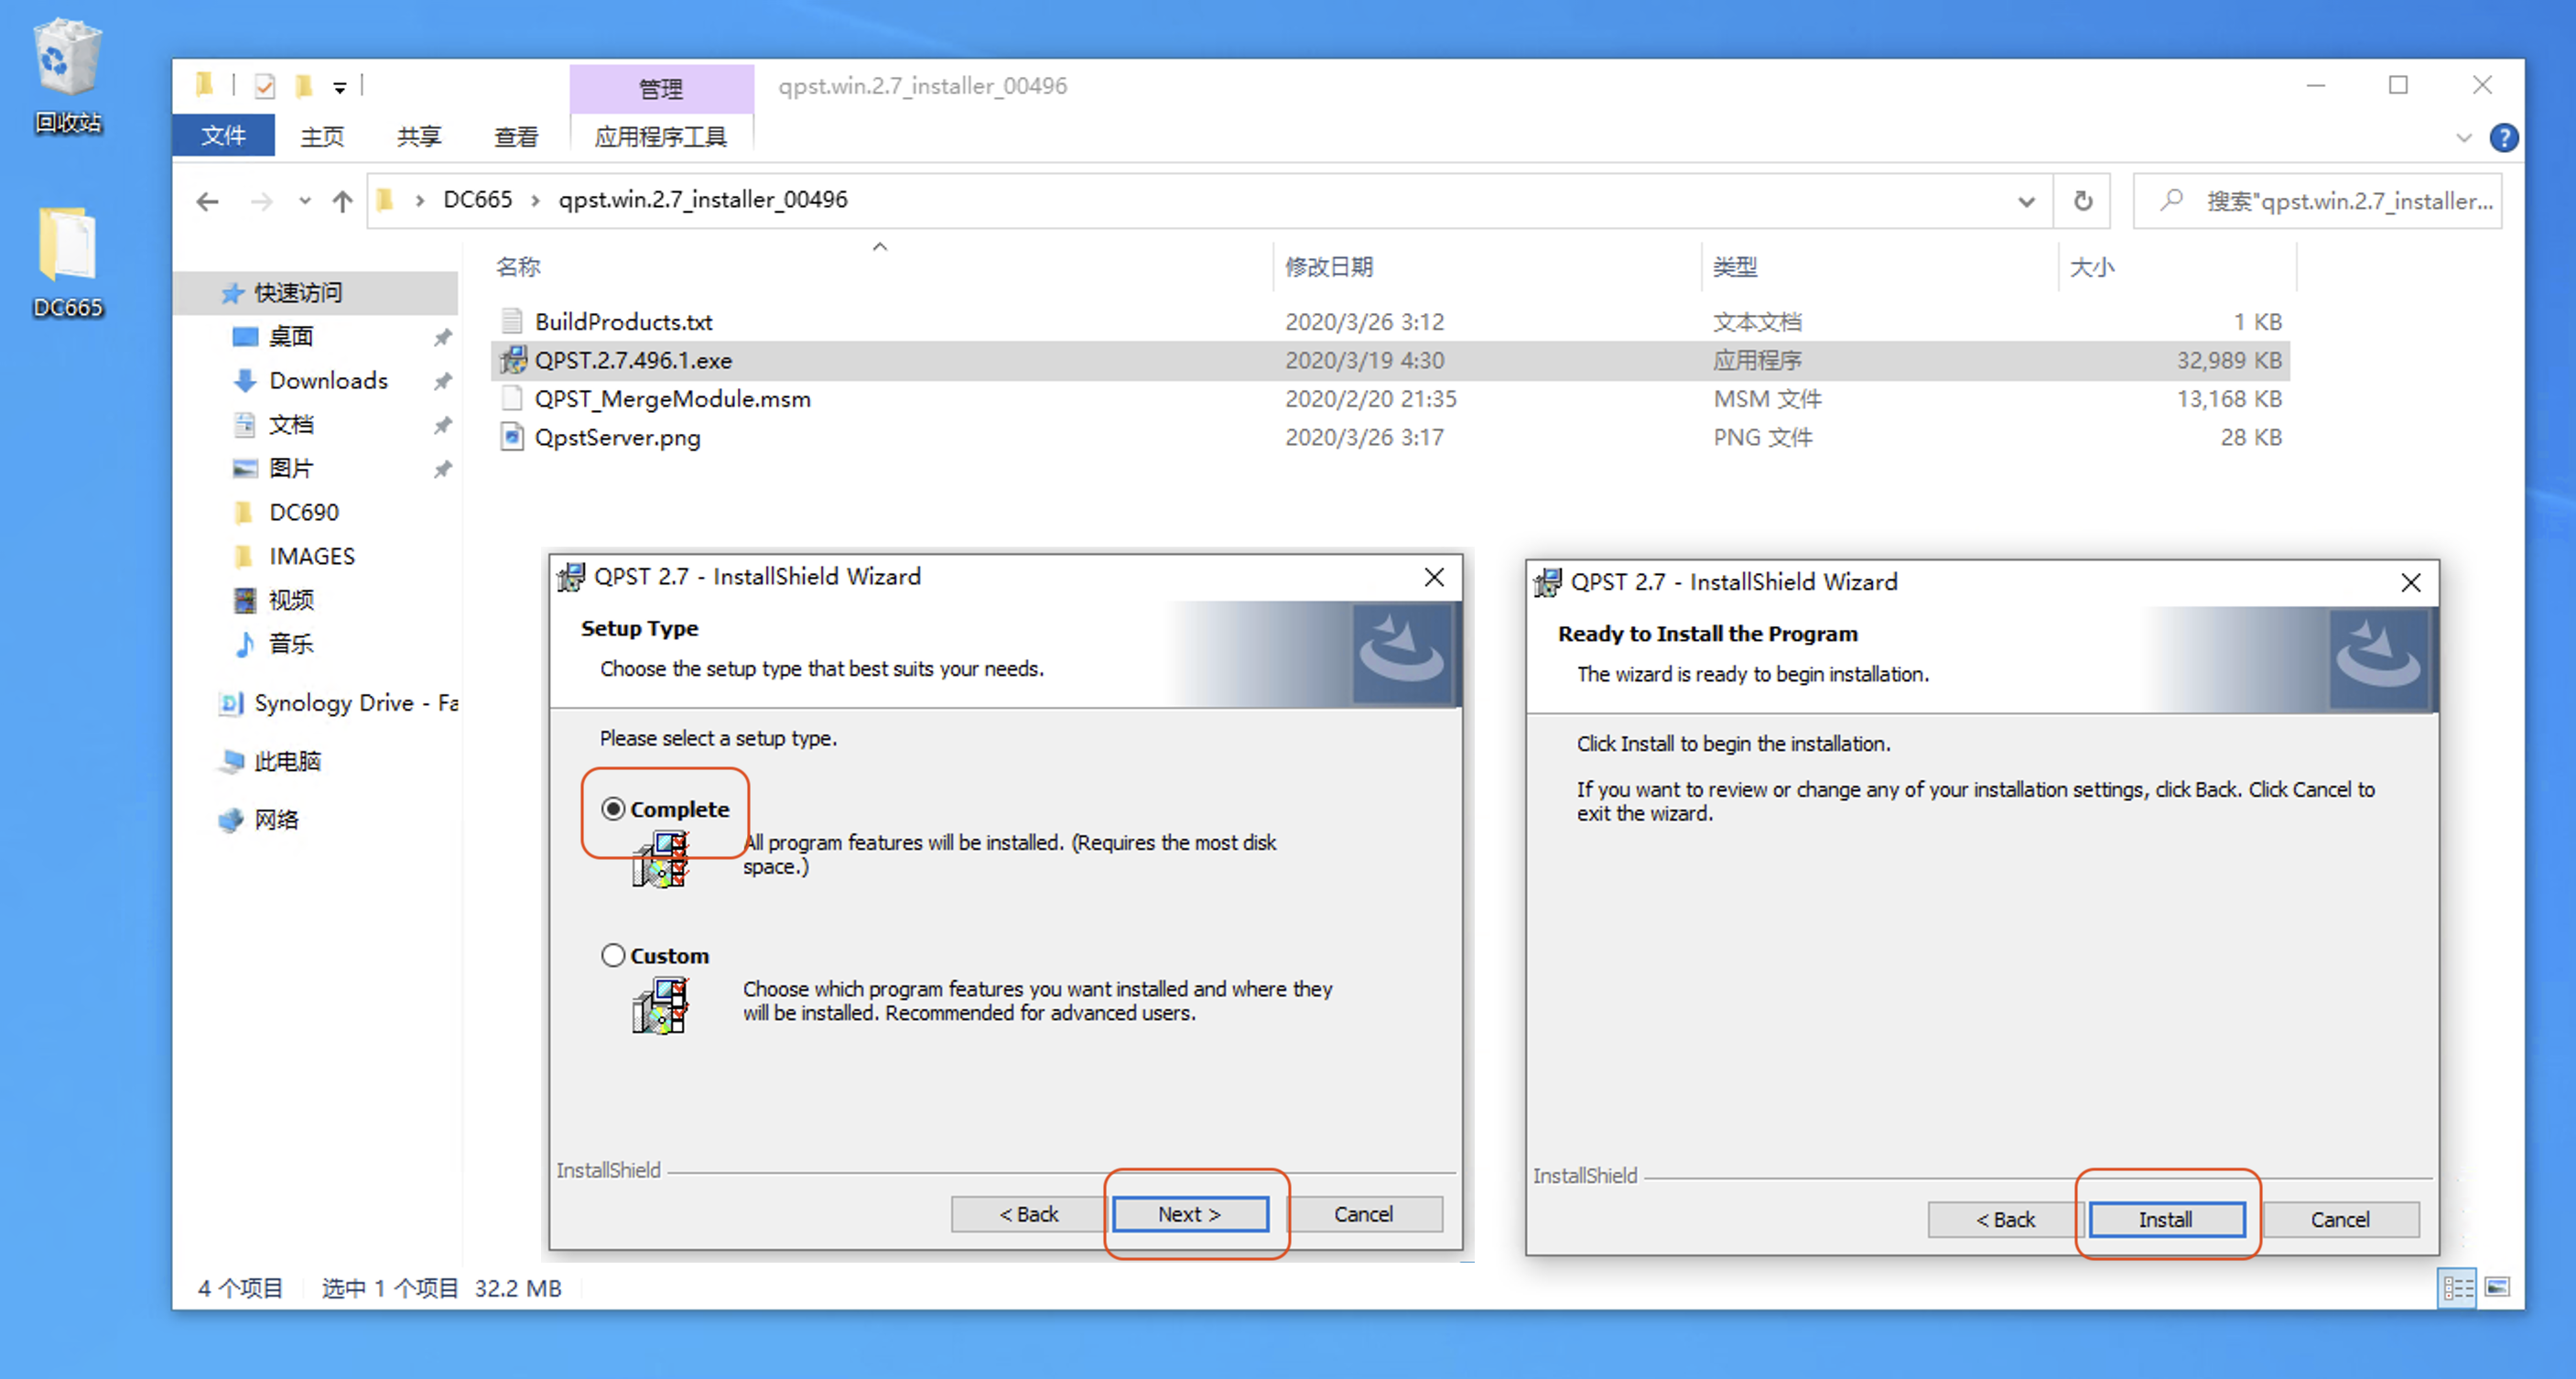
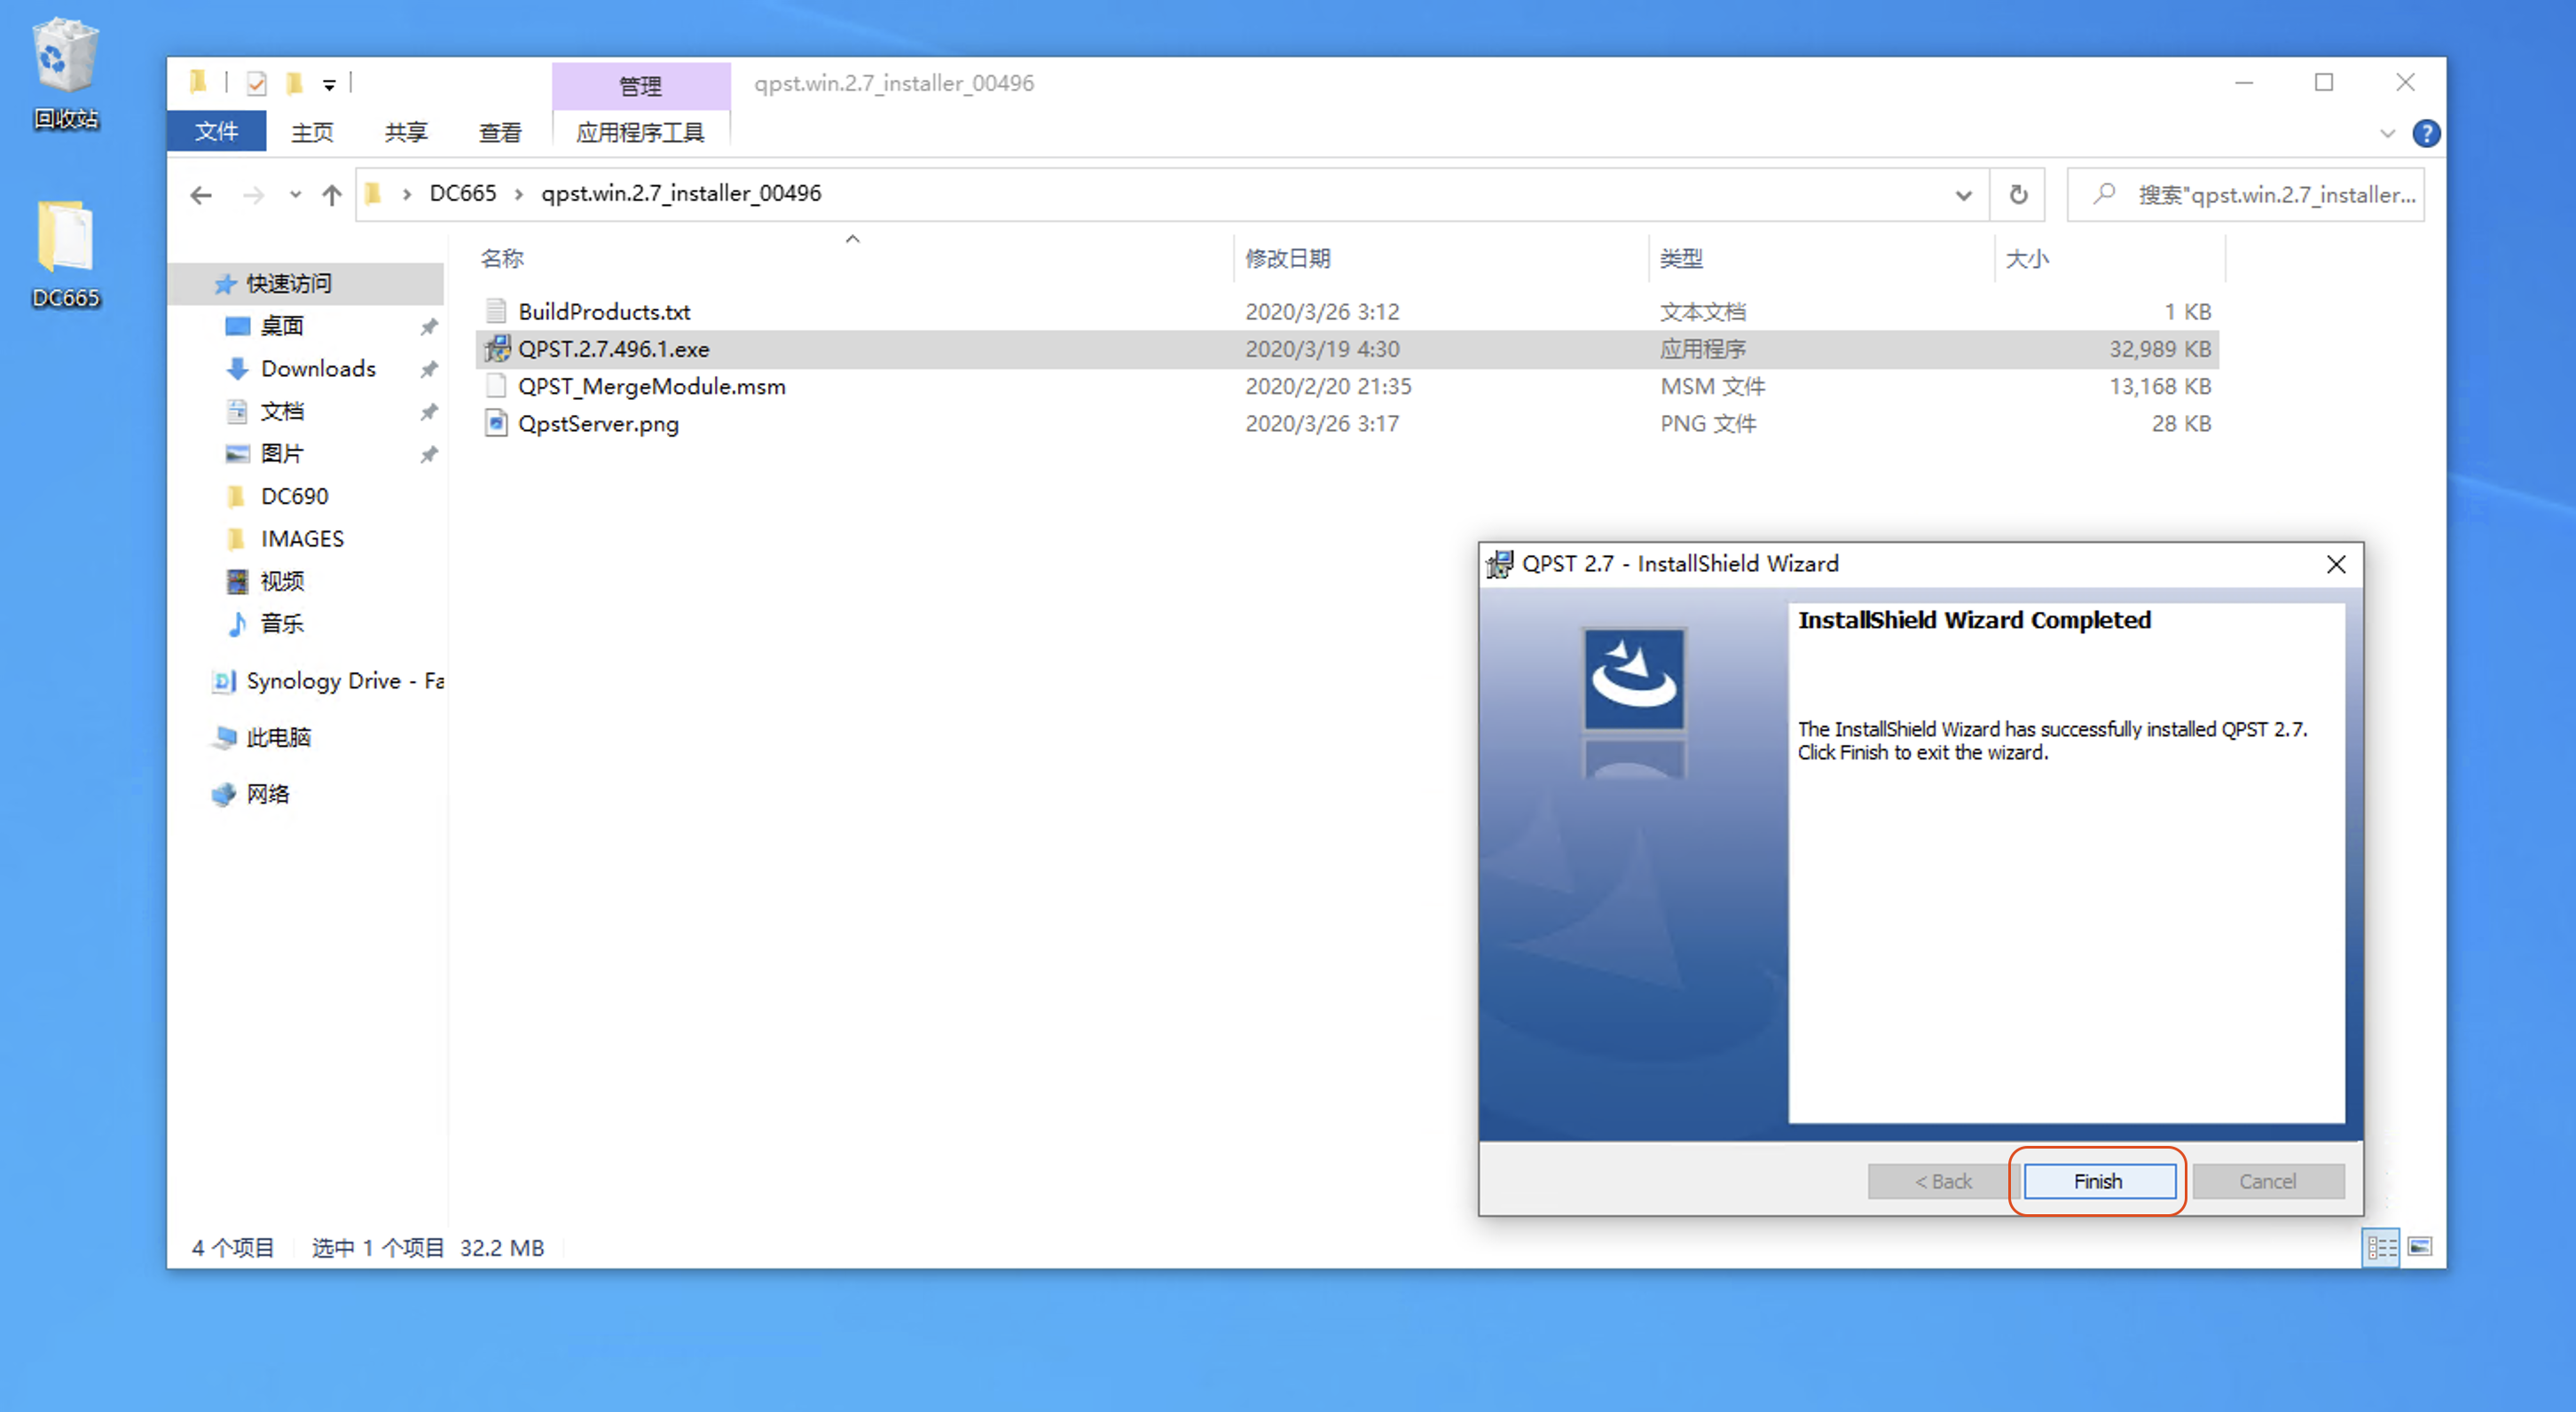
Starting the Upgrade
Open the Upgrade Software
Open Start Menu \ QPST \ QFIL
Opened
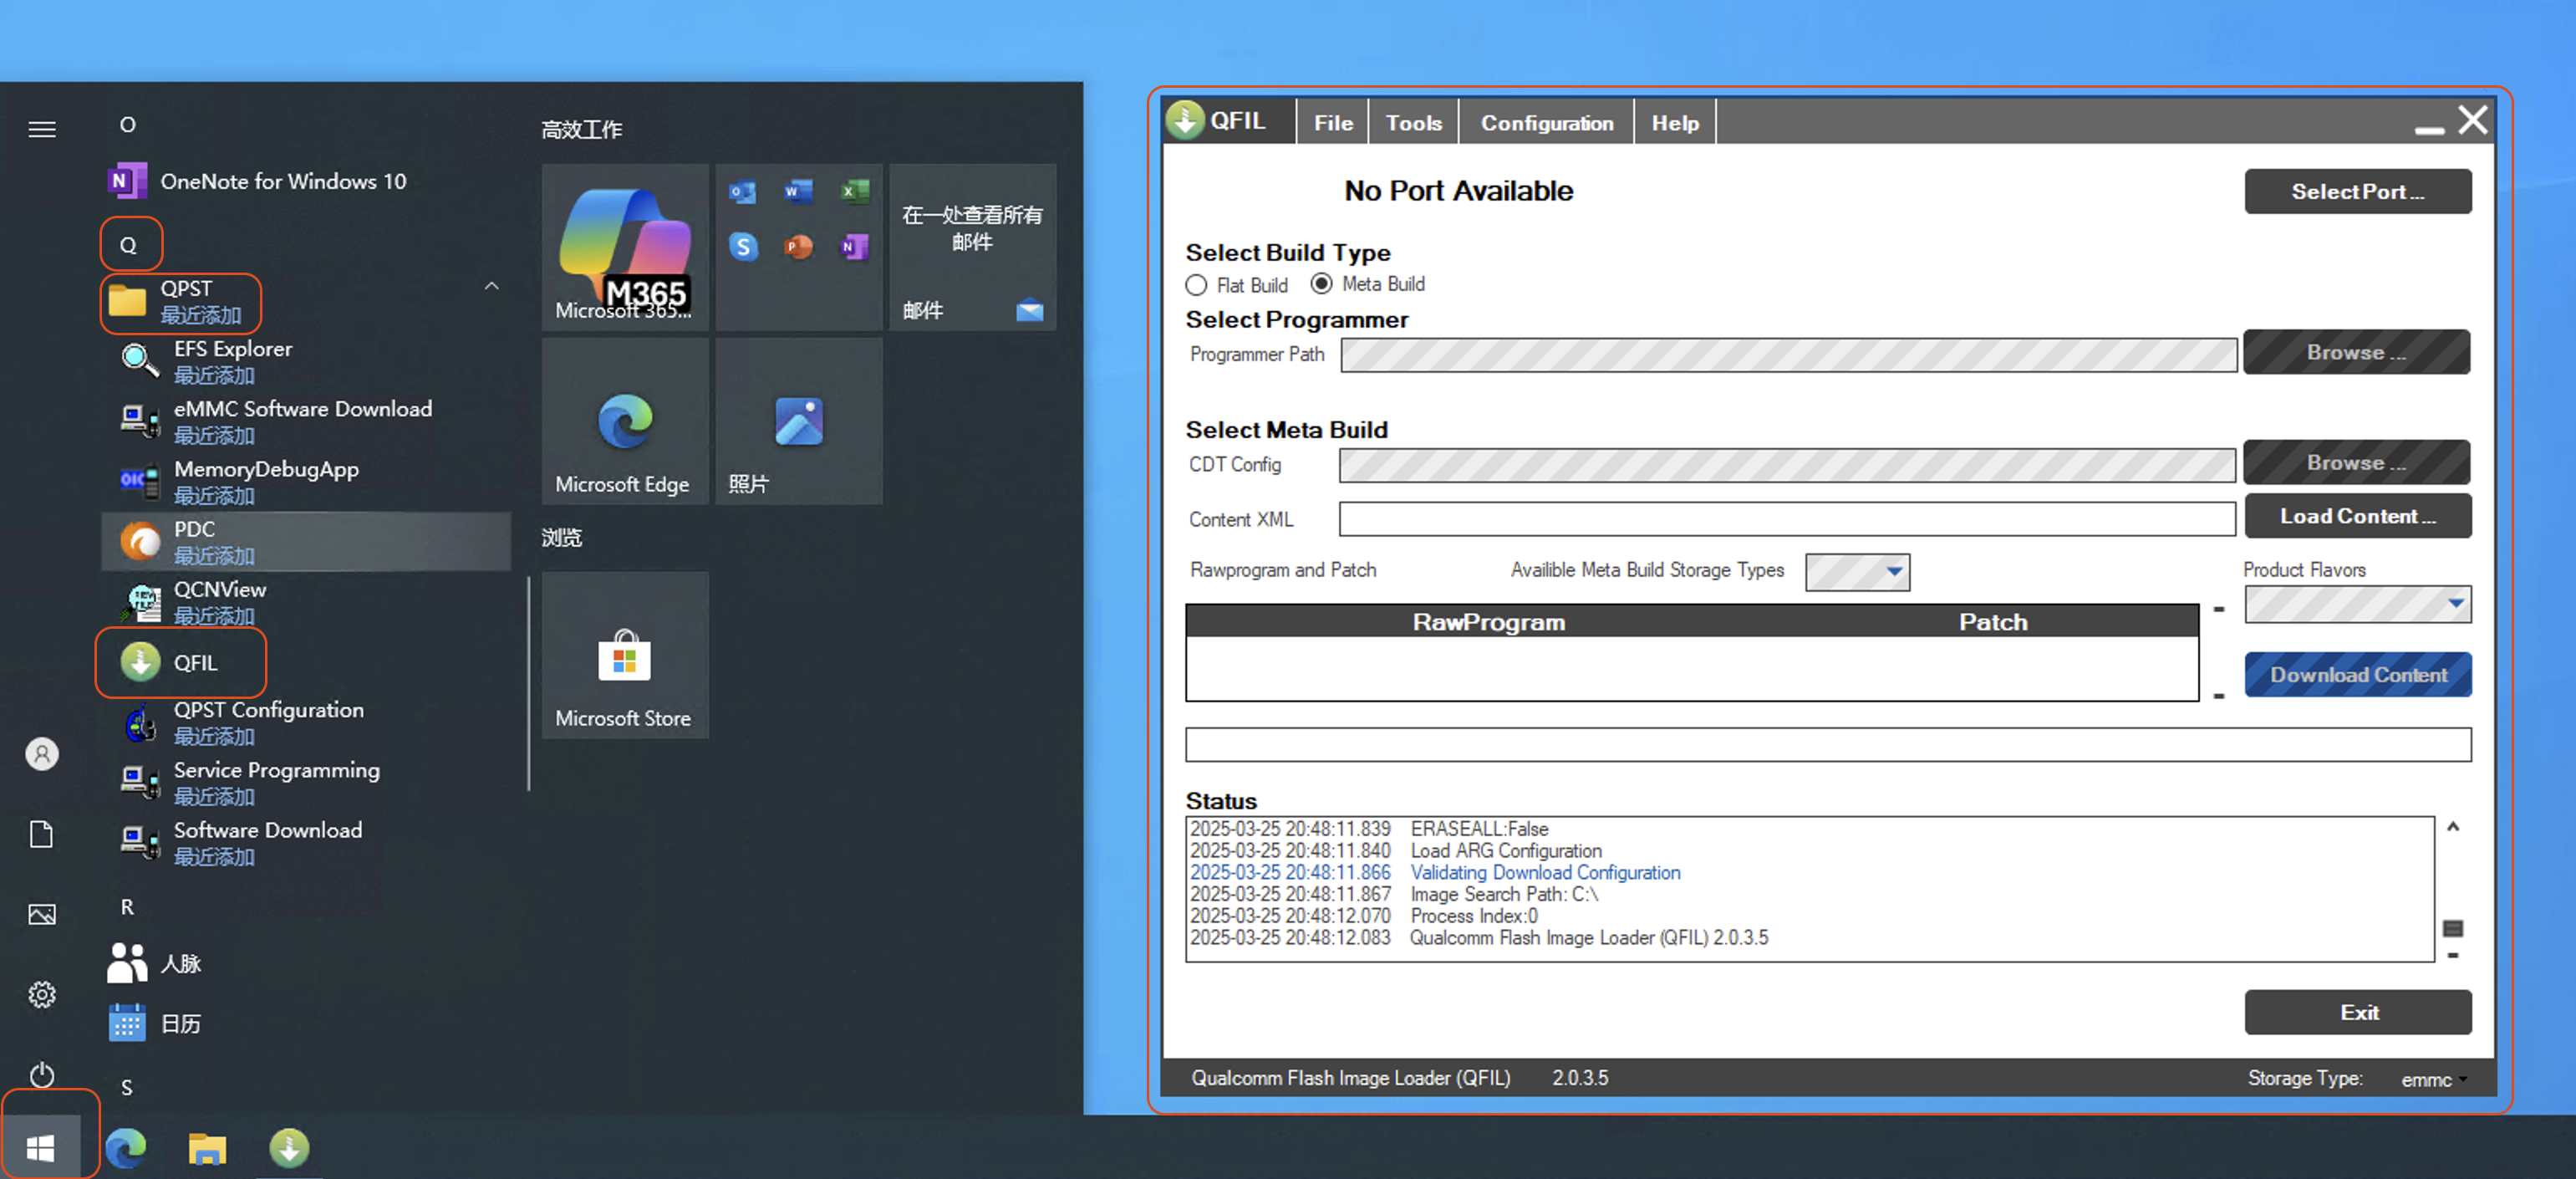
Select the Firmware
-
Select
Flat Build-Browse ... -
Select
Fanconn_V1.1.7_DC665_TPJ_UFS_V1.1_20250312120421\prog_firehose_ddr.elfand clickOpen
Select
prog_firehose_ddr.elf
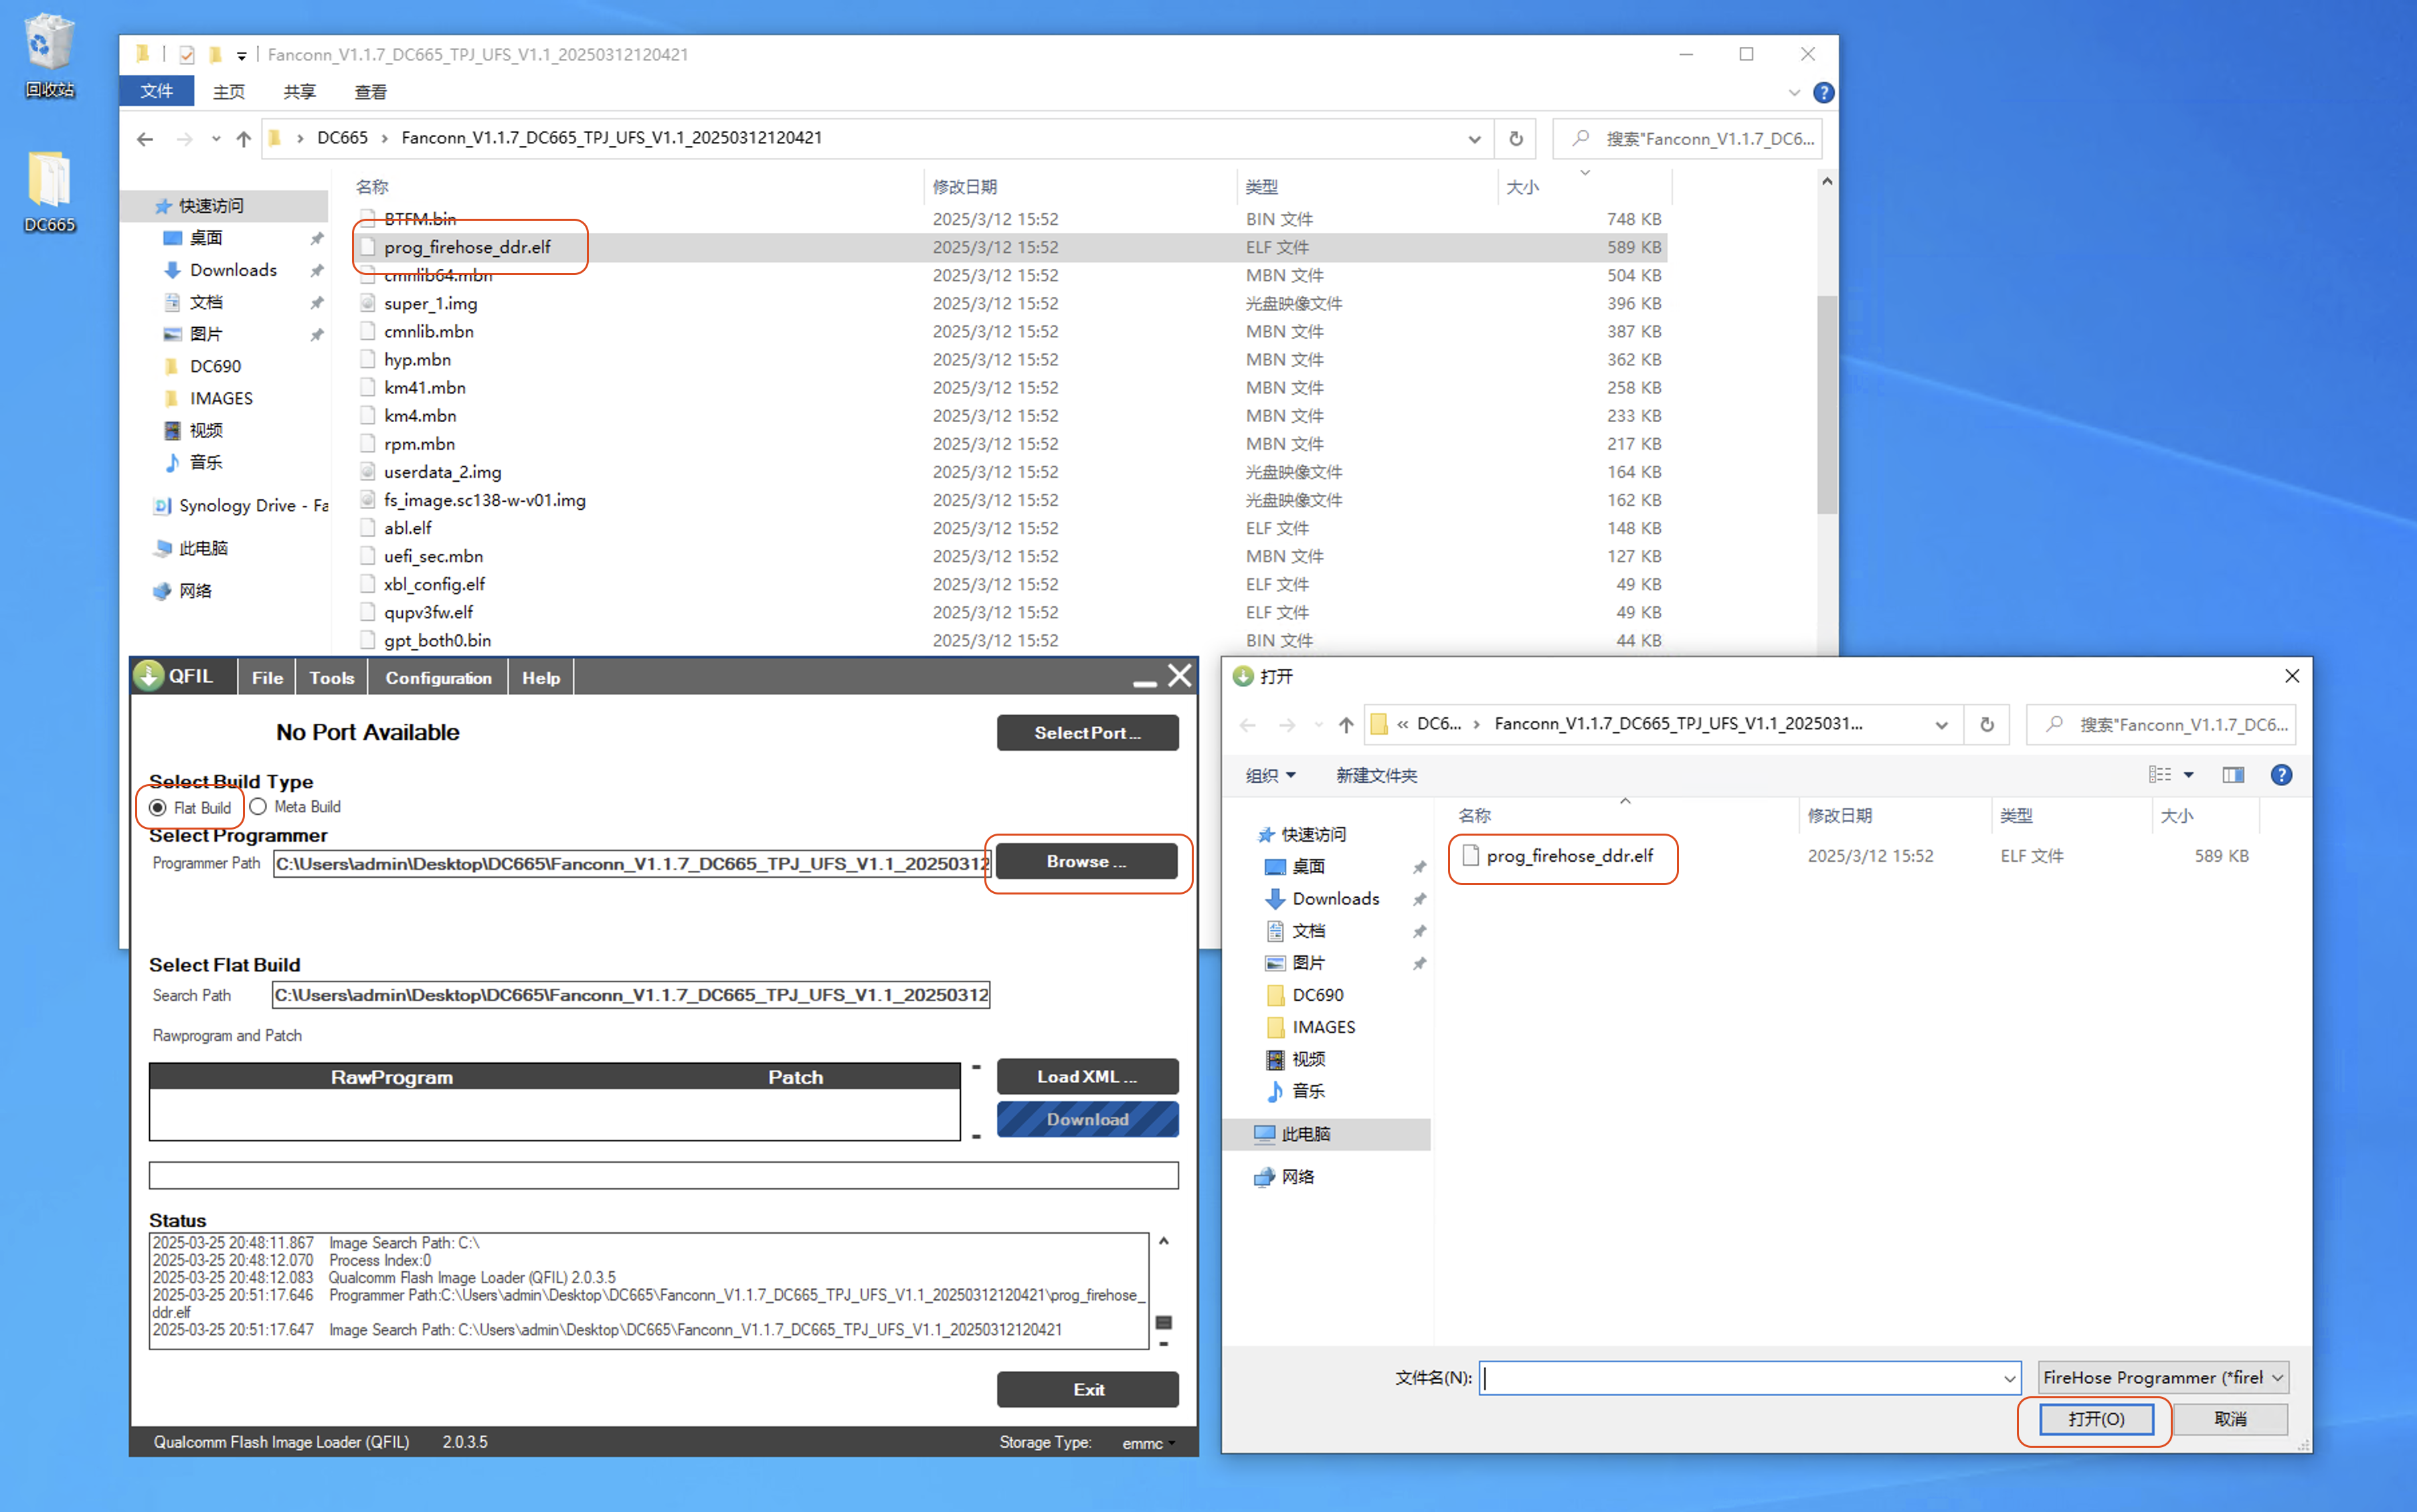
Select Partitions
- Click
Load XML ...again, selectFanconn_V1.1.7_DC665_TPJ_UFS_V1.1_20250312120421\rawprogram0_update_sparse.xmland clickOpen
Select
rawprogram0_update_sparse.xml
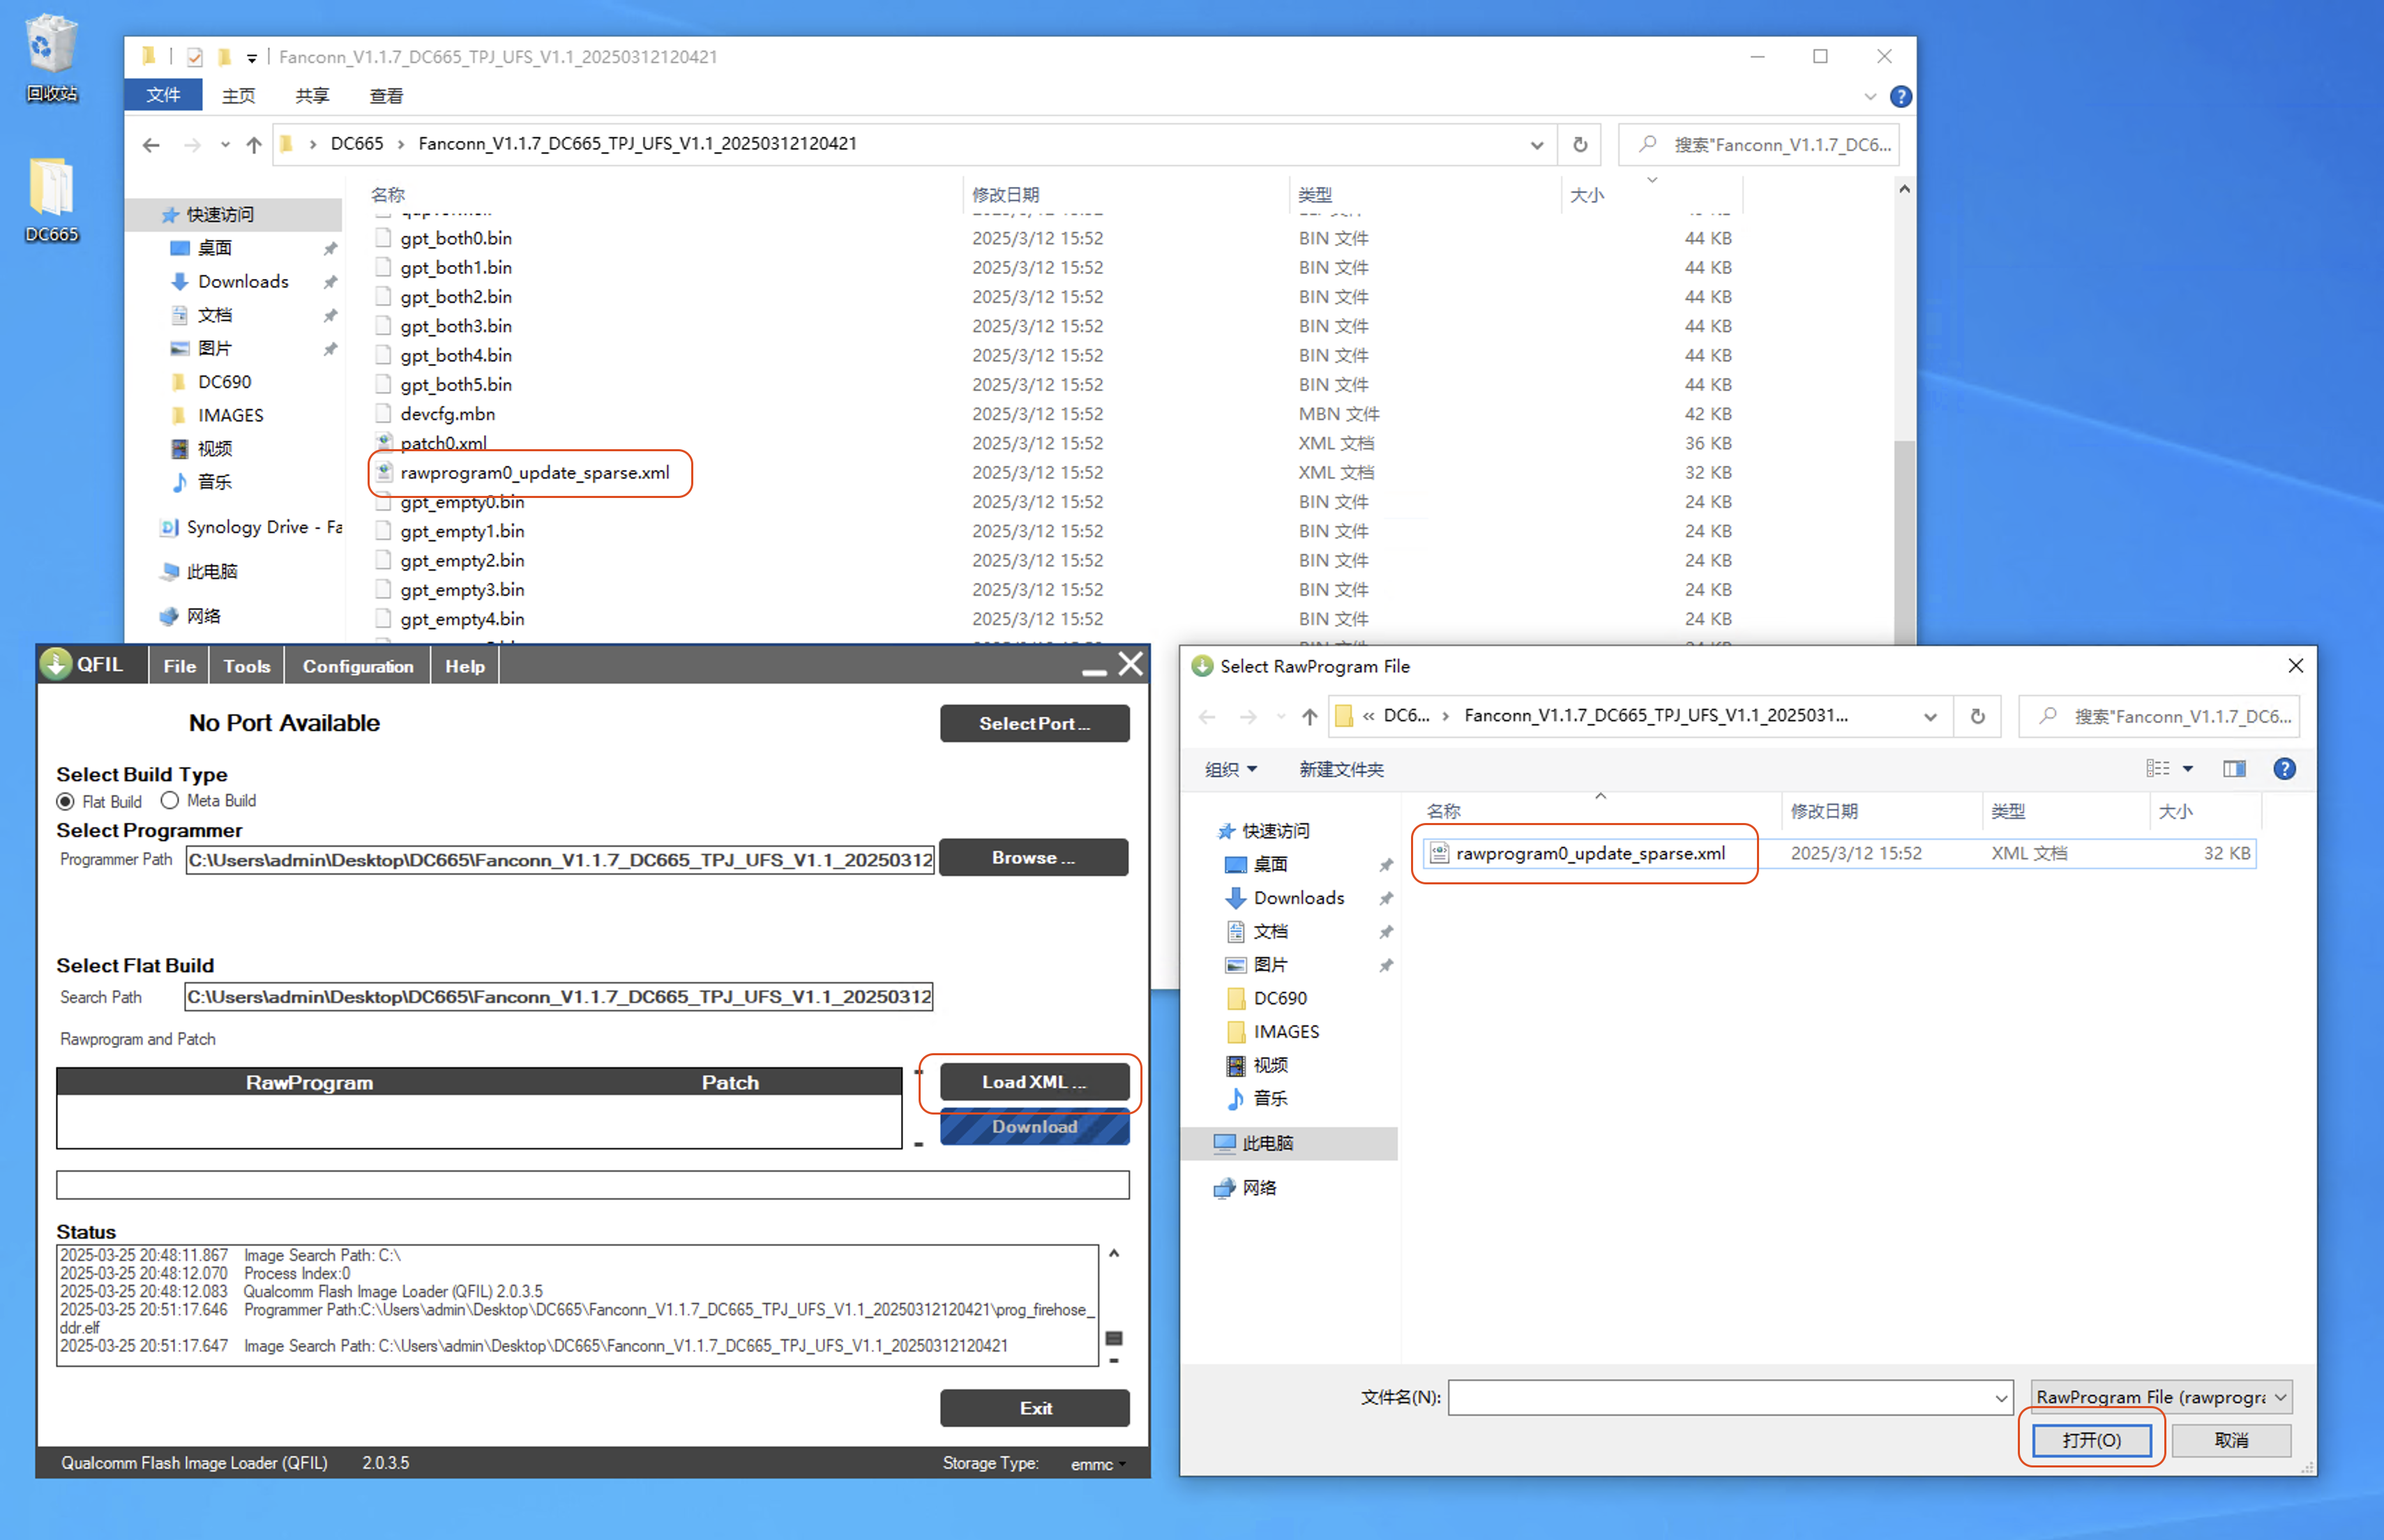
- In the dialog that appears, select
Fanconn_V1.1.7_DC665_TPJ_UFS_V1.1_20250312120421\patch0.xmland clickOpen
Select
patch0.xmlagain
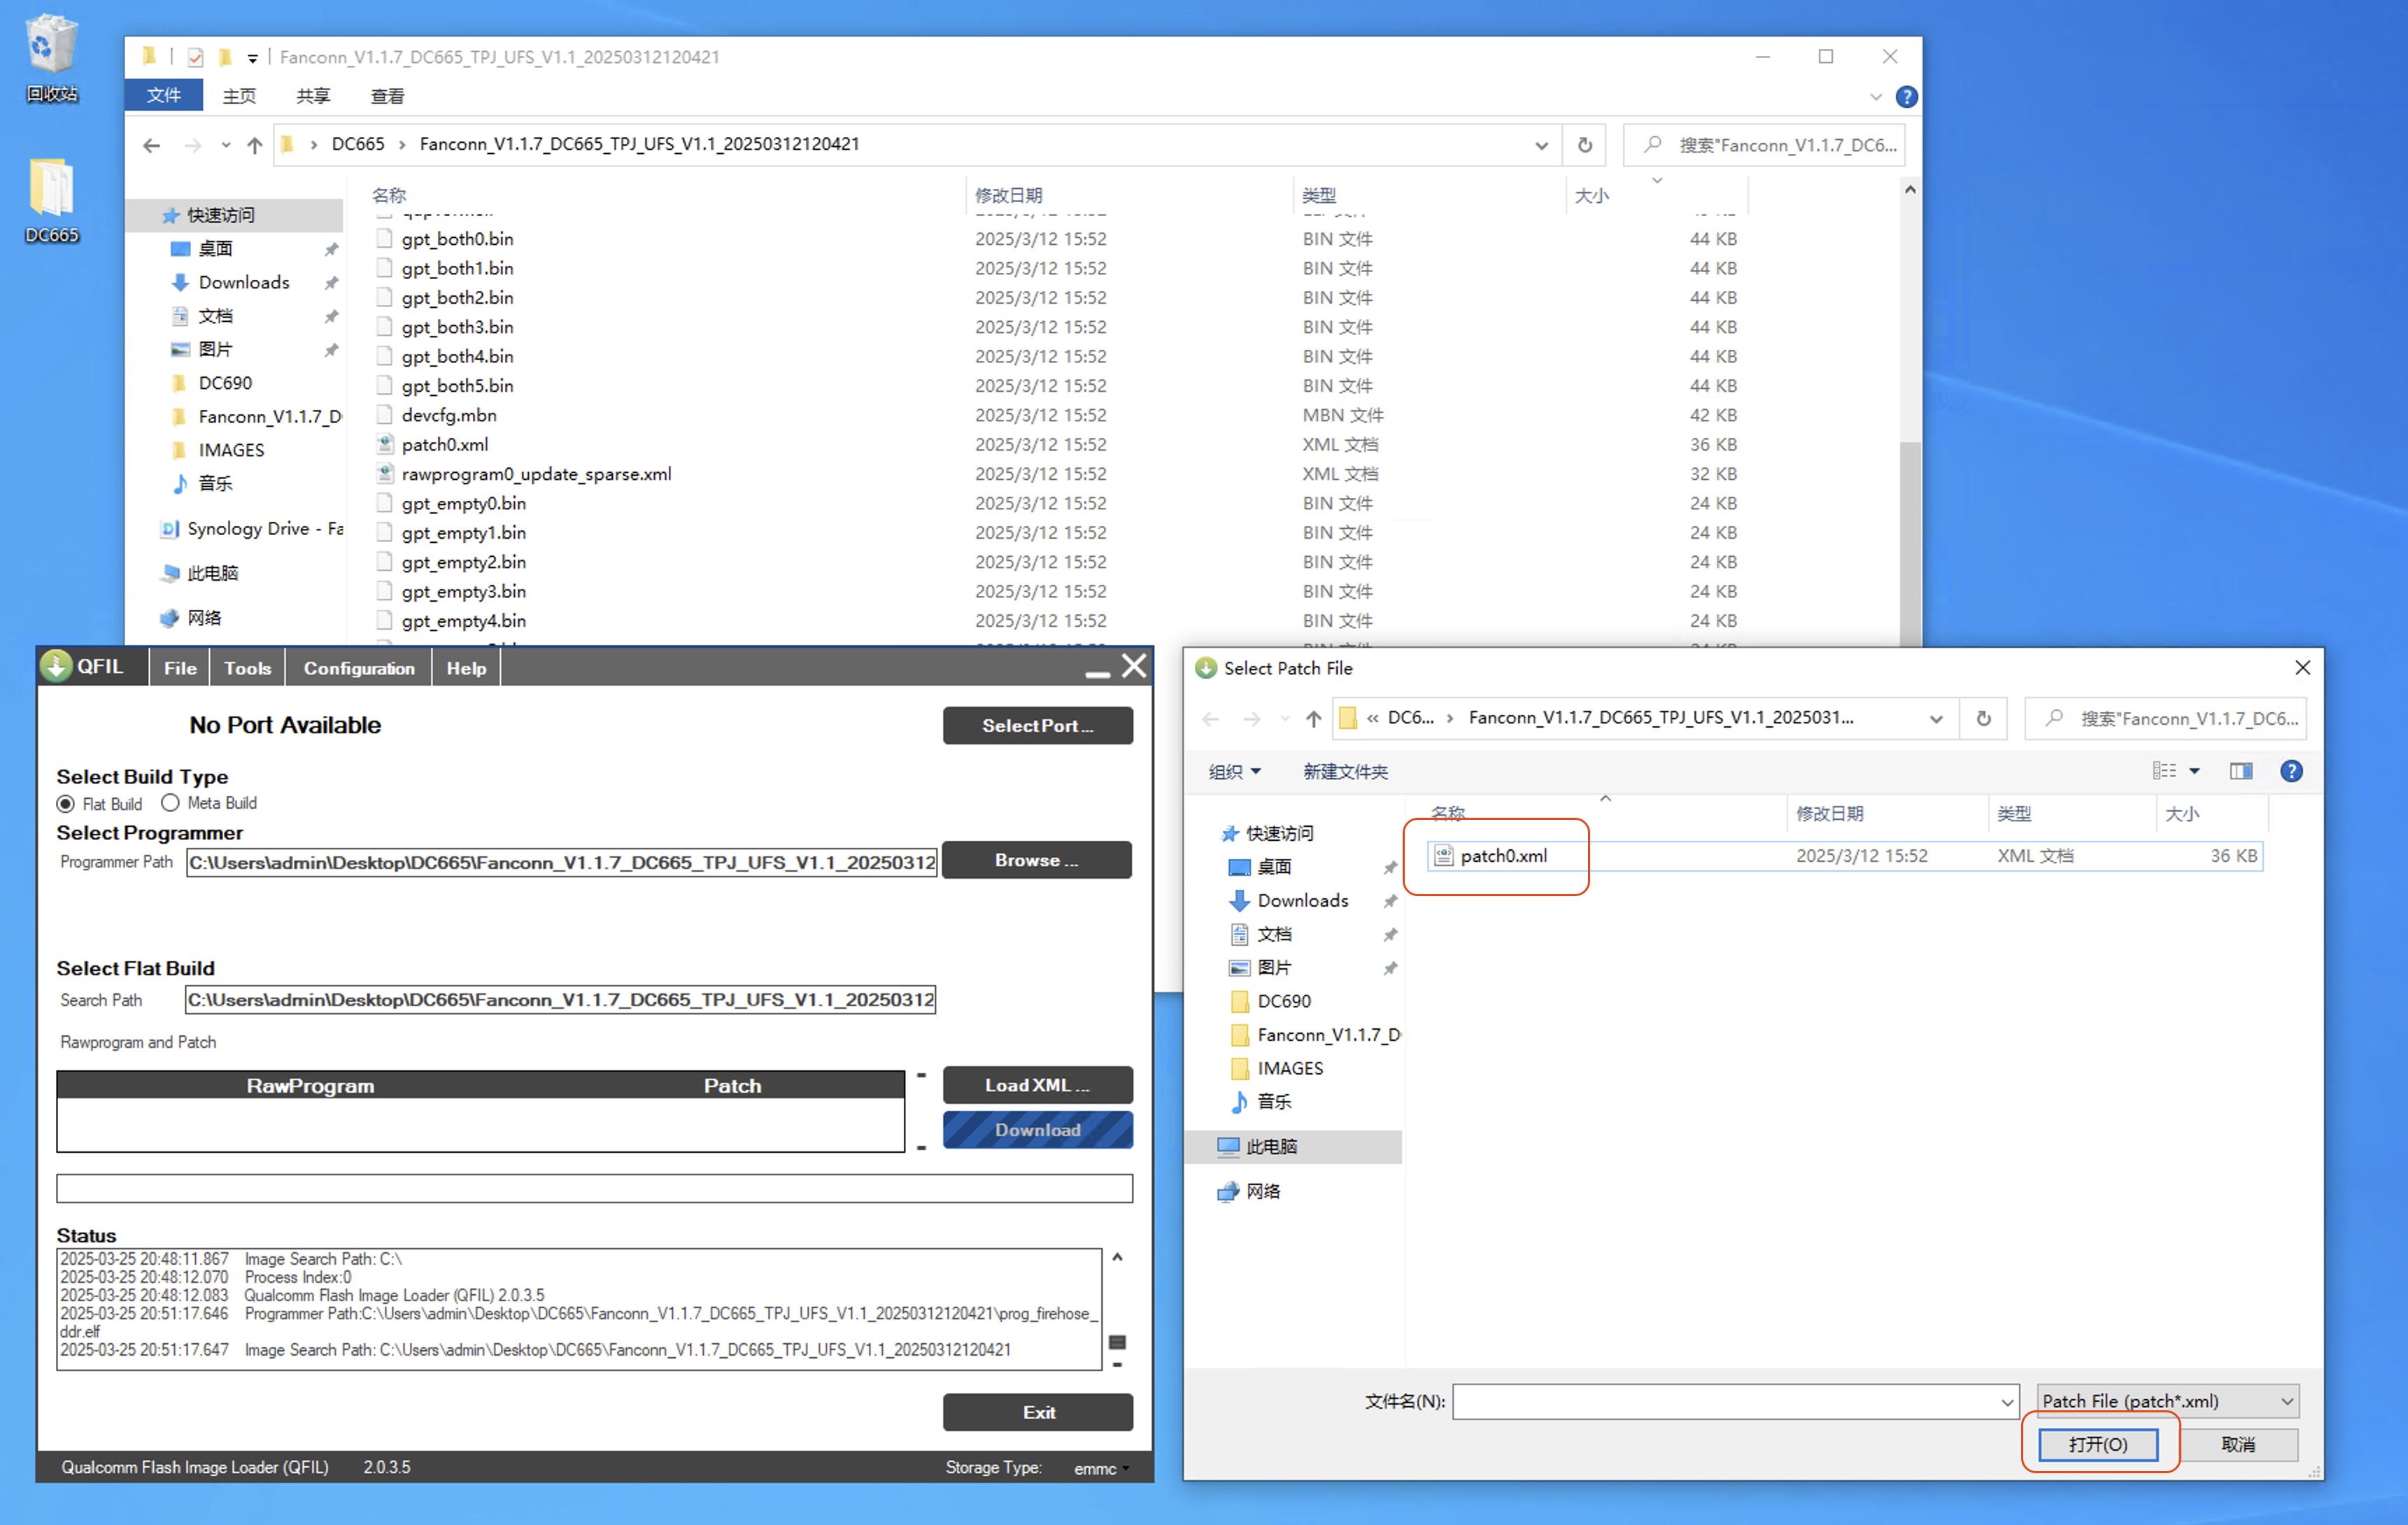
Enter Upgrade Mode
Mainboard/Device Diagram
Wiring diagram
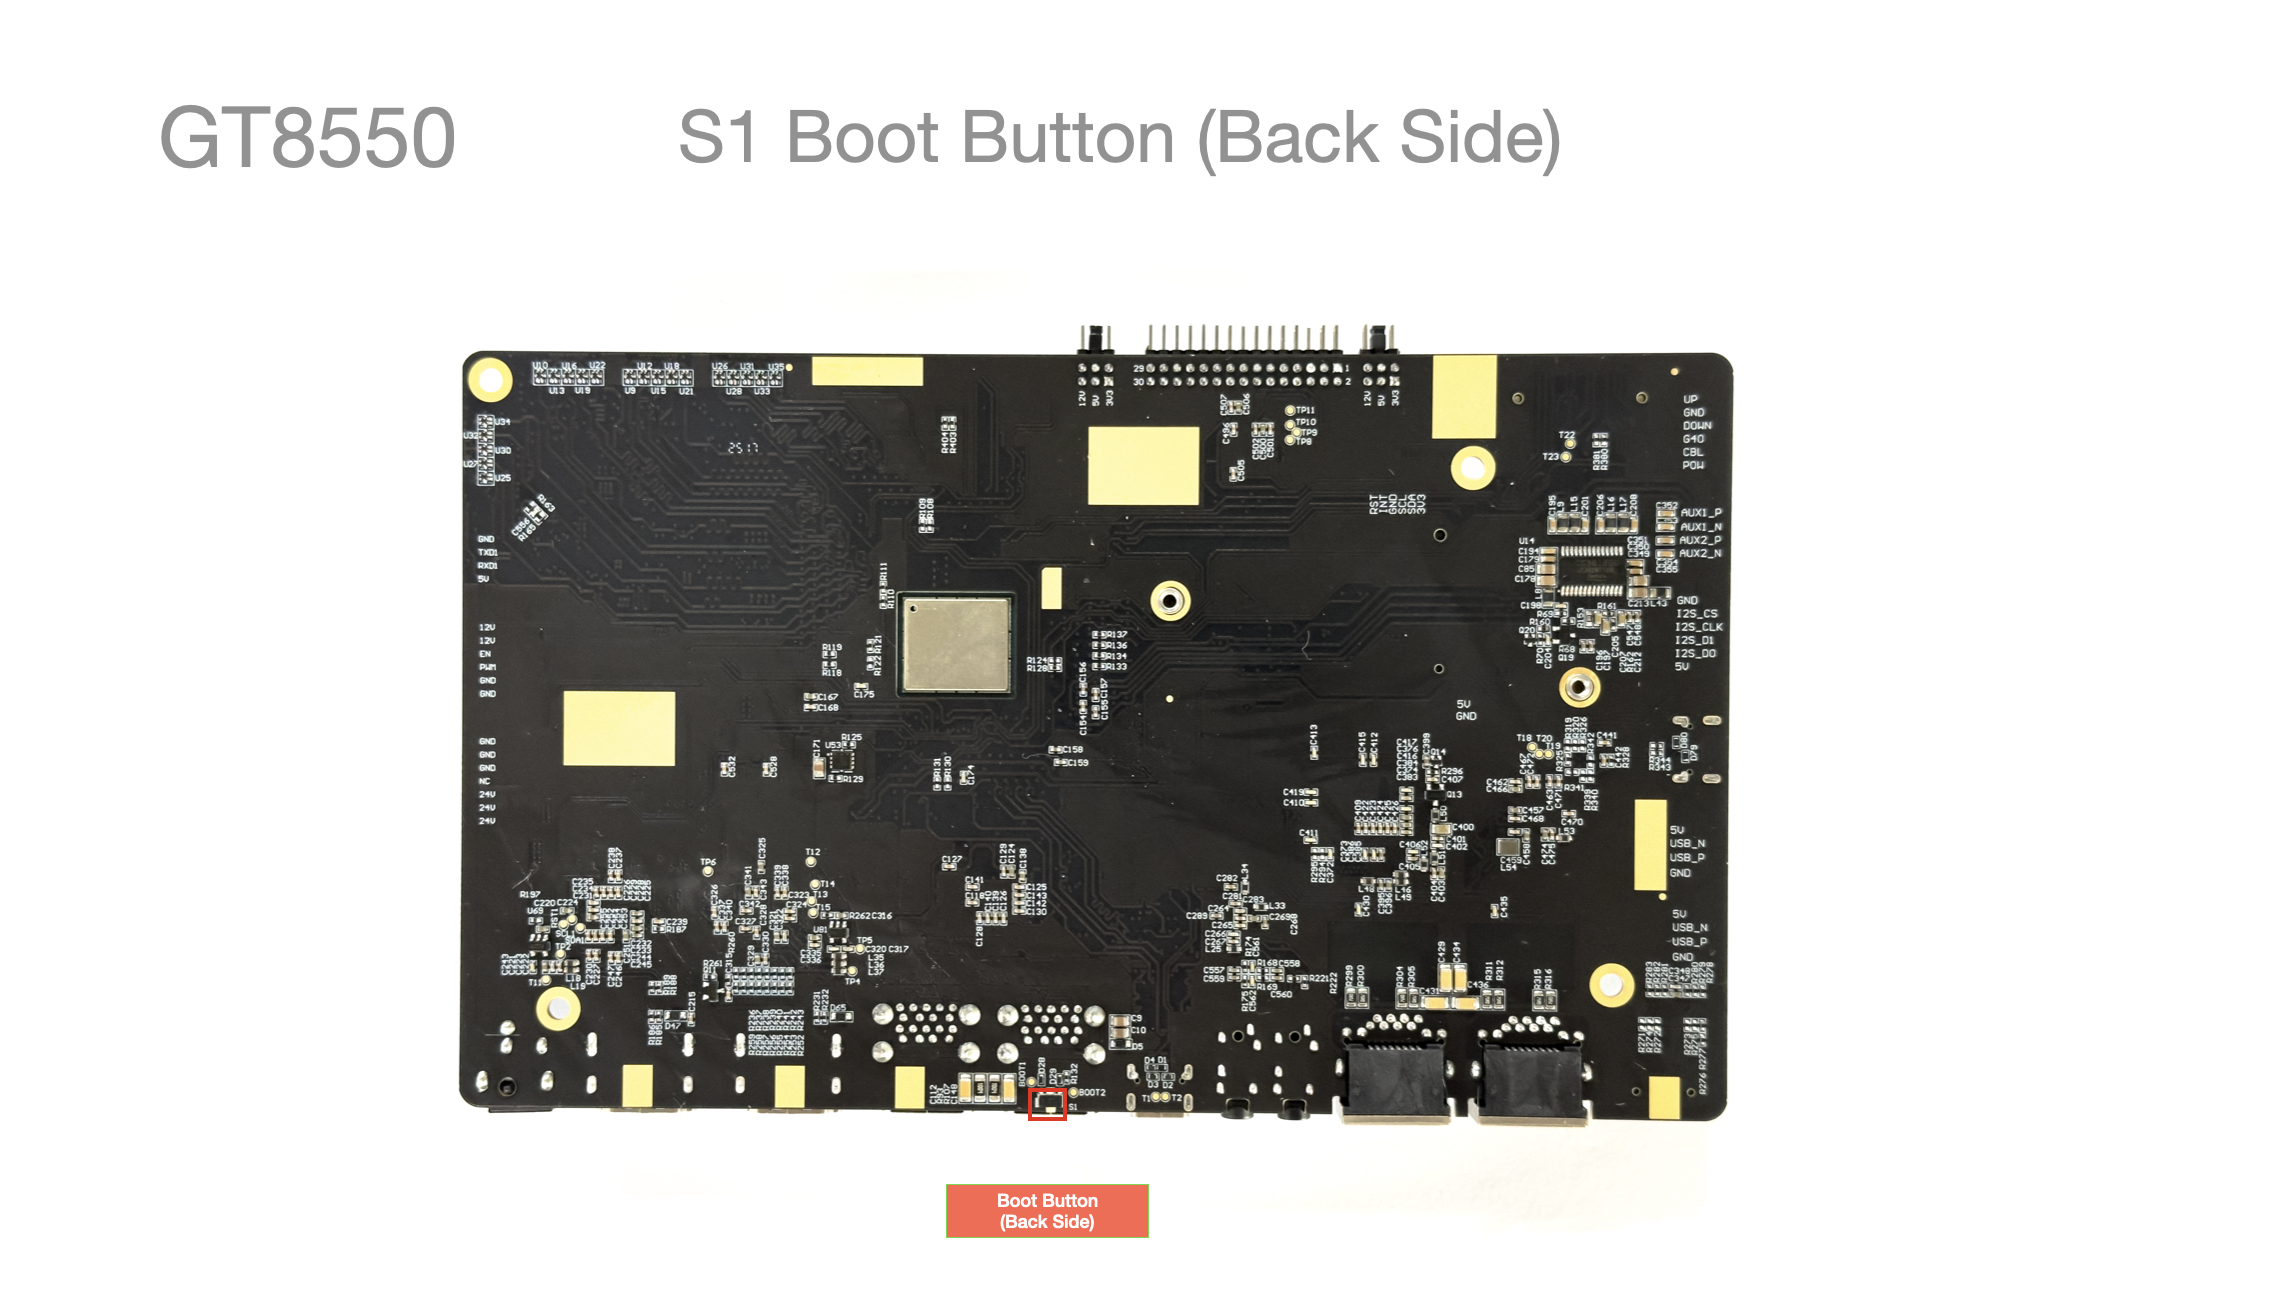
If the device has a housing, you can press the
BOOT buttonhere with a toothpick or similar
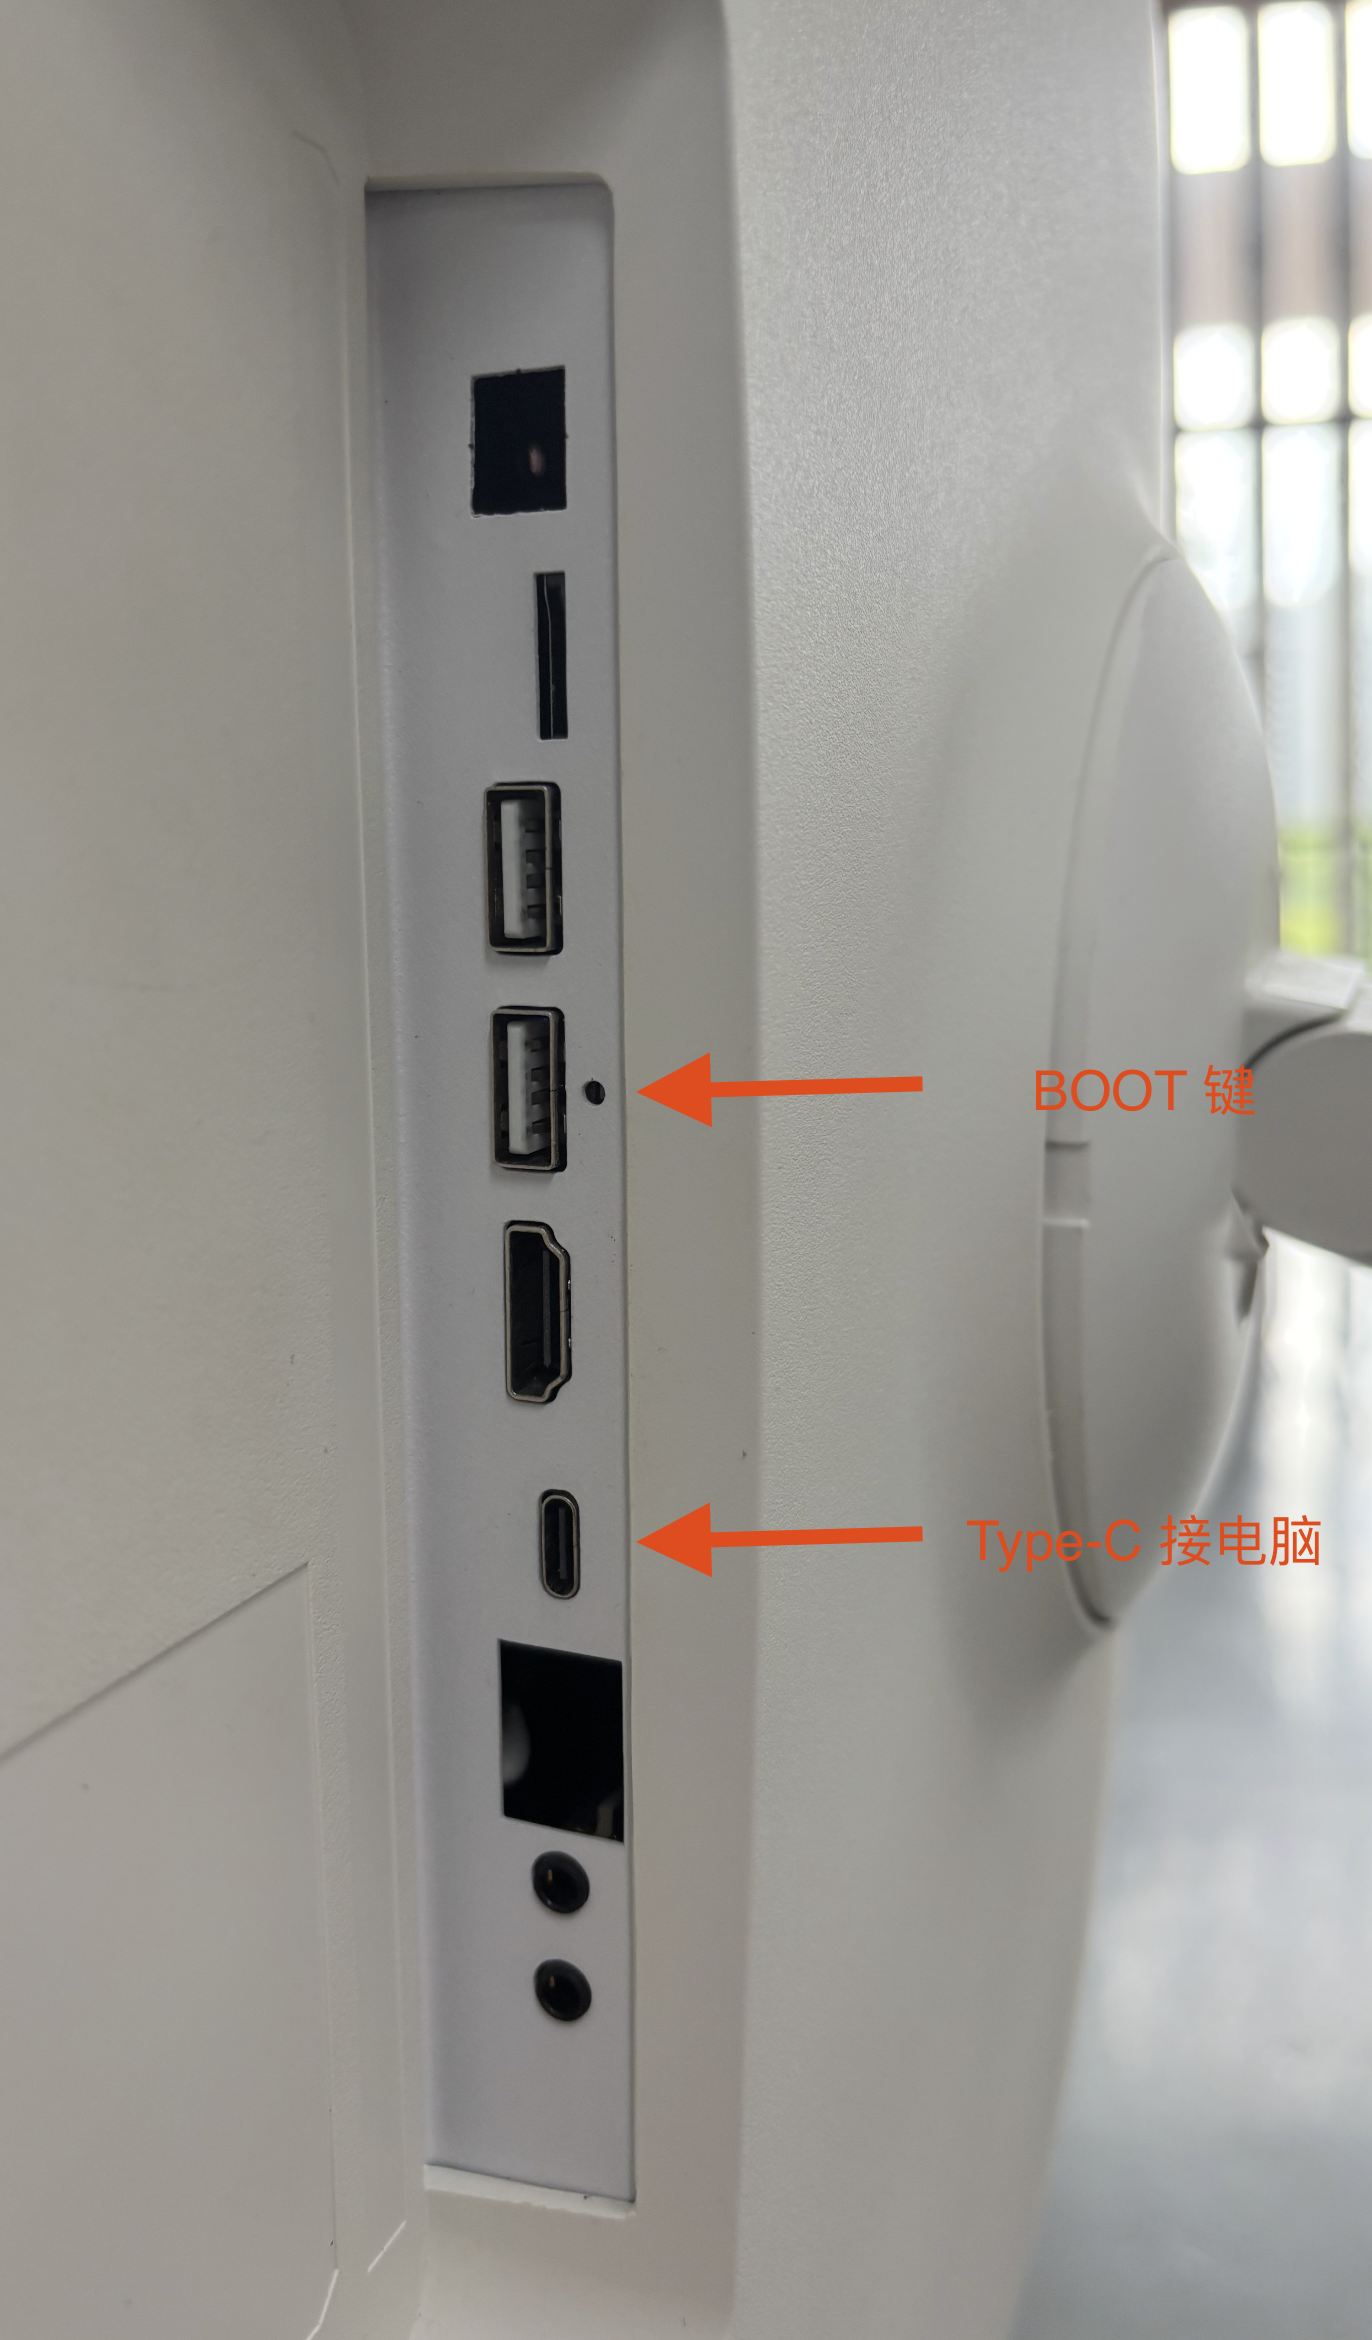
Auto Power-on Mainboard Entering Upgrade Mode
An auto power-on mainboard powers on automatically once connected to power
-
Connect the
USB TYPE-Cdata cable to the mainboard -
Press and hold the
Boot button -
Connect the
DC12Vpower supply to the mainboard -
Release the button after entering
boot mode
Manual Power-on Mainboard Entering Upgrade Mode
For a non-auto power-on mainboard, you need to power it on manually after connecting power
-
Connect the
USB TYPE-Cdata cable to the mainboard -
Connect the
DC12Vpower supply to the mainboard -
Press and hold the
Boot button -
Press and hold the
Power button, and release after enteringboot mode
adb shell Entering Loader Mode
When the device is in normal state, you can also enter upgrade mode by entering the following commands directly in adb
# Check whether the device is connected
adb devices
# List of devices attached (list of connected devices)

# Reboot into QDLoader mode
adb reboot edl
If you see error: closed during debugging, it indicates that a password is required to continue debugging
error: closed

# Verify the password
adb shell password
# Reboot into loader mode
adb reboot edl
Enter the password to debug normally. Note that password is not the actual password; contact technical support to obtain the actual password
Note: The password is not publicly released; please contact technical support to obtain it
For details, see
Parameter Settings
Select the Device to Upgrade
When Please Select an Existing Port is displayed, click Select Port, then select Qualcomm HS- USBQDloader 9008(COM3) and click OK
Select
Qualcomm HS- USBQDloader 9008(COM3)
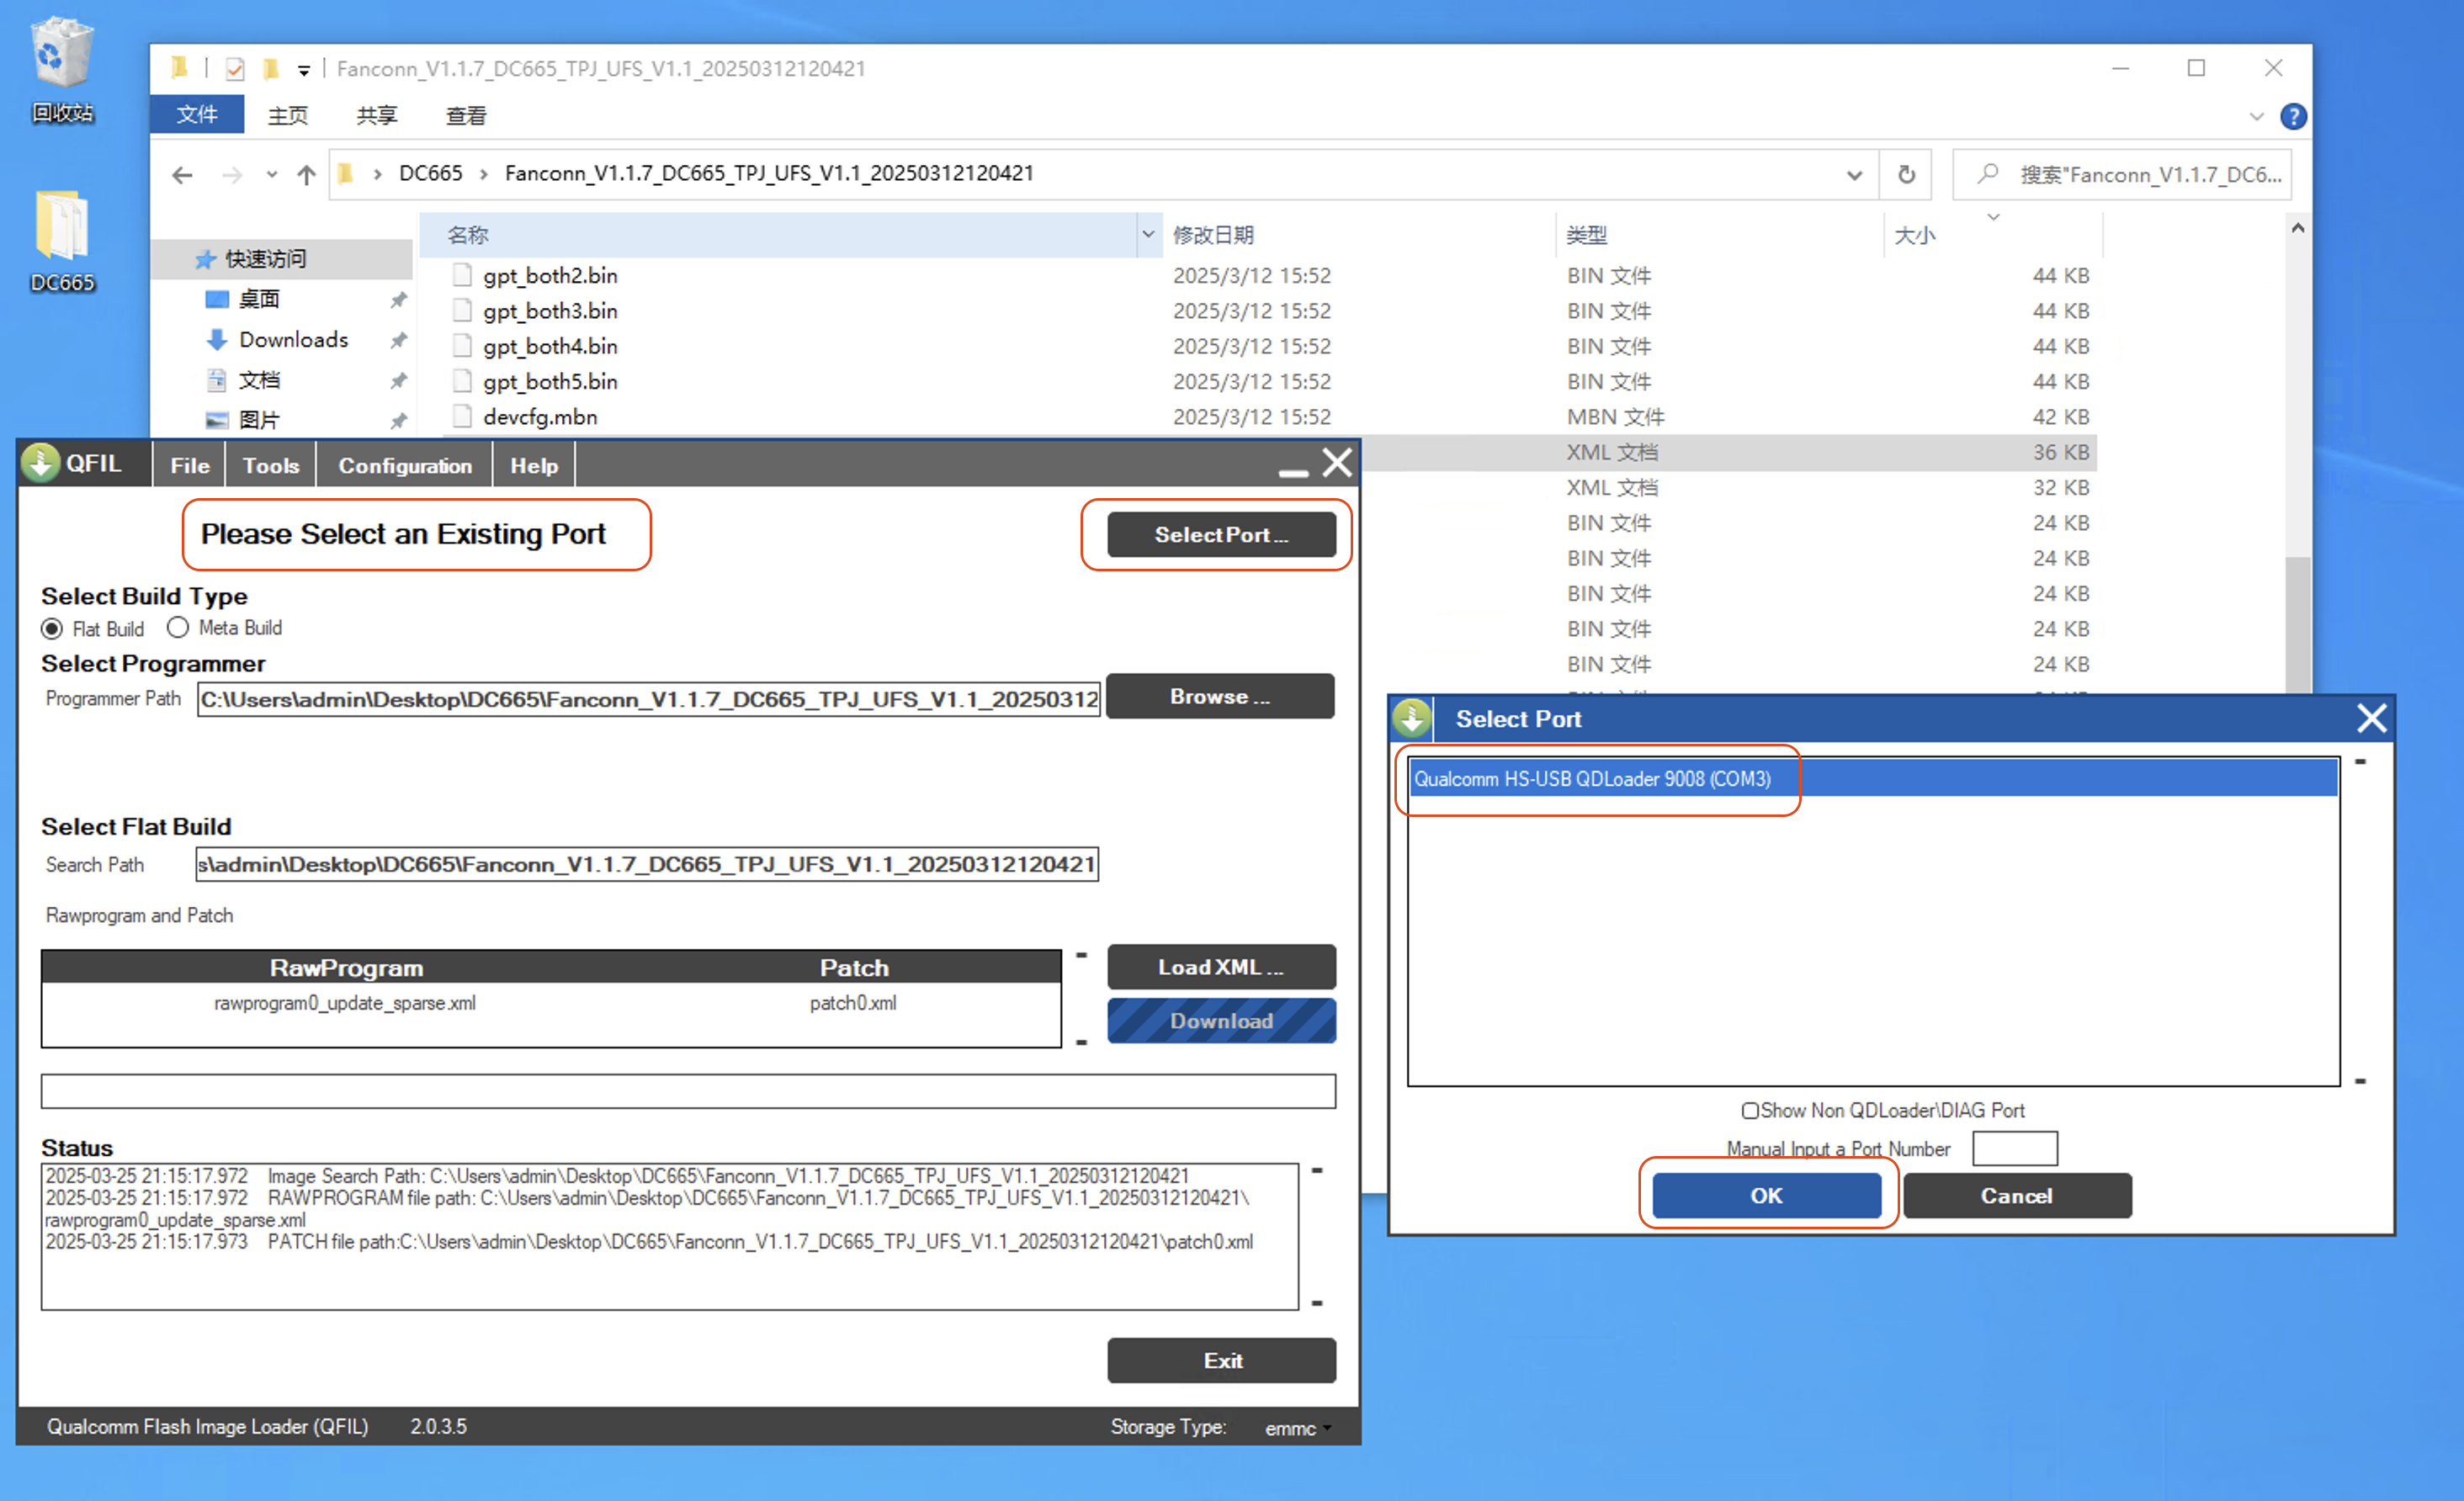
Select the Device Flash Type
Refer to the sticker on the back of the mainboard, and finally select Storage Type: - ufs
Select
Storage Type:-ufs
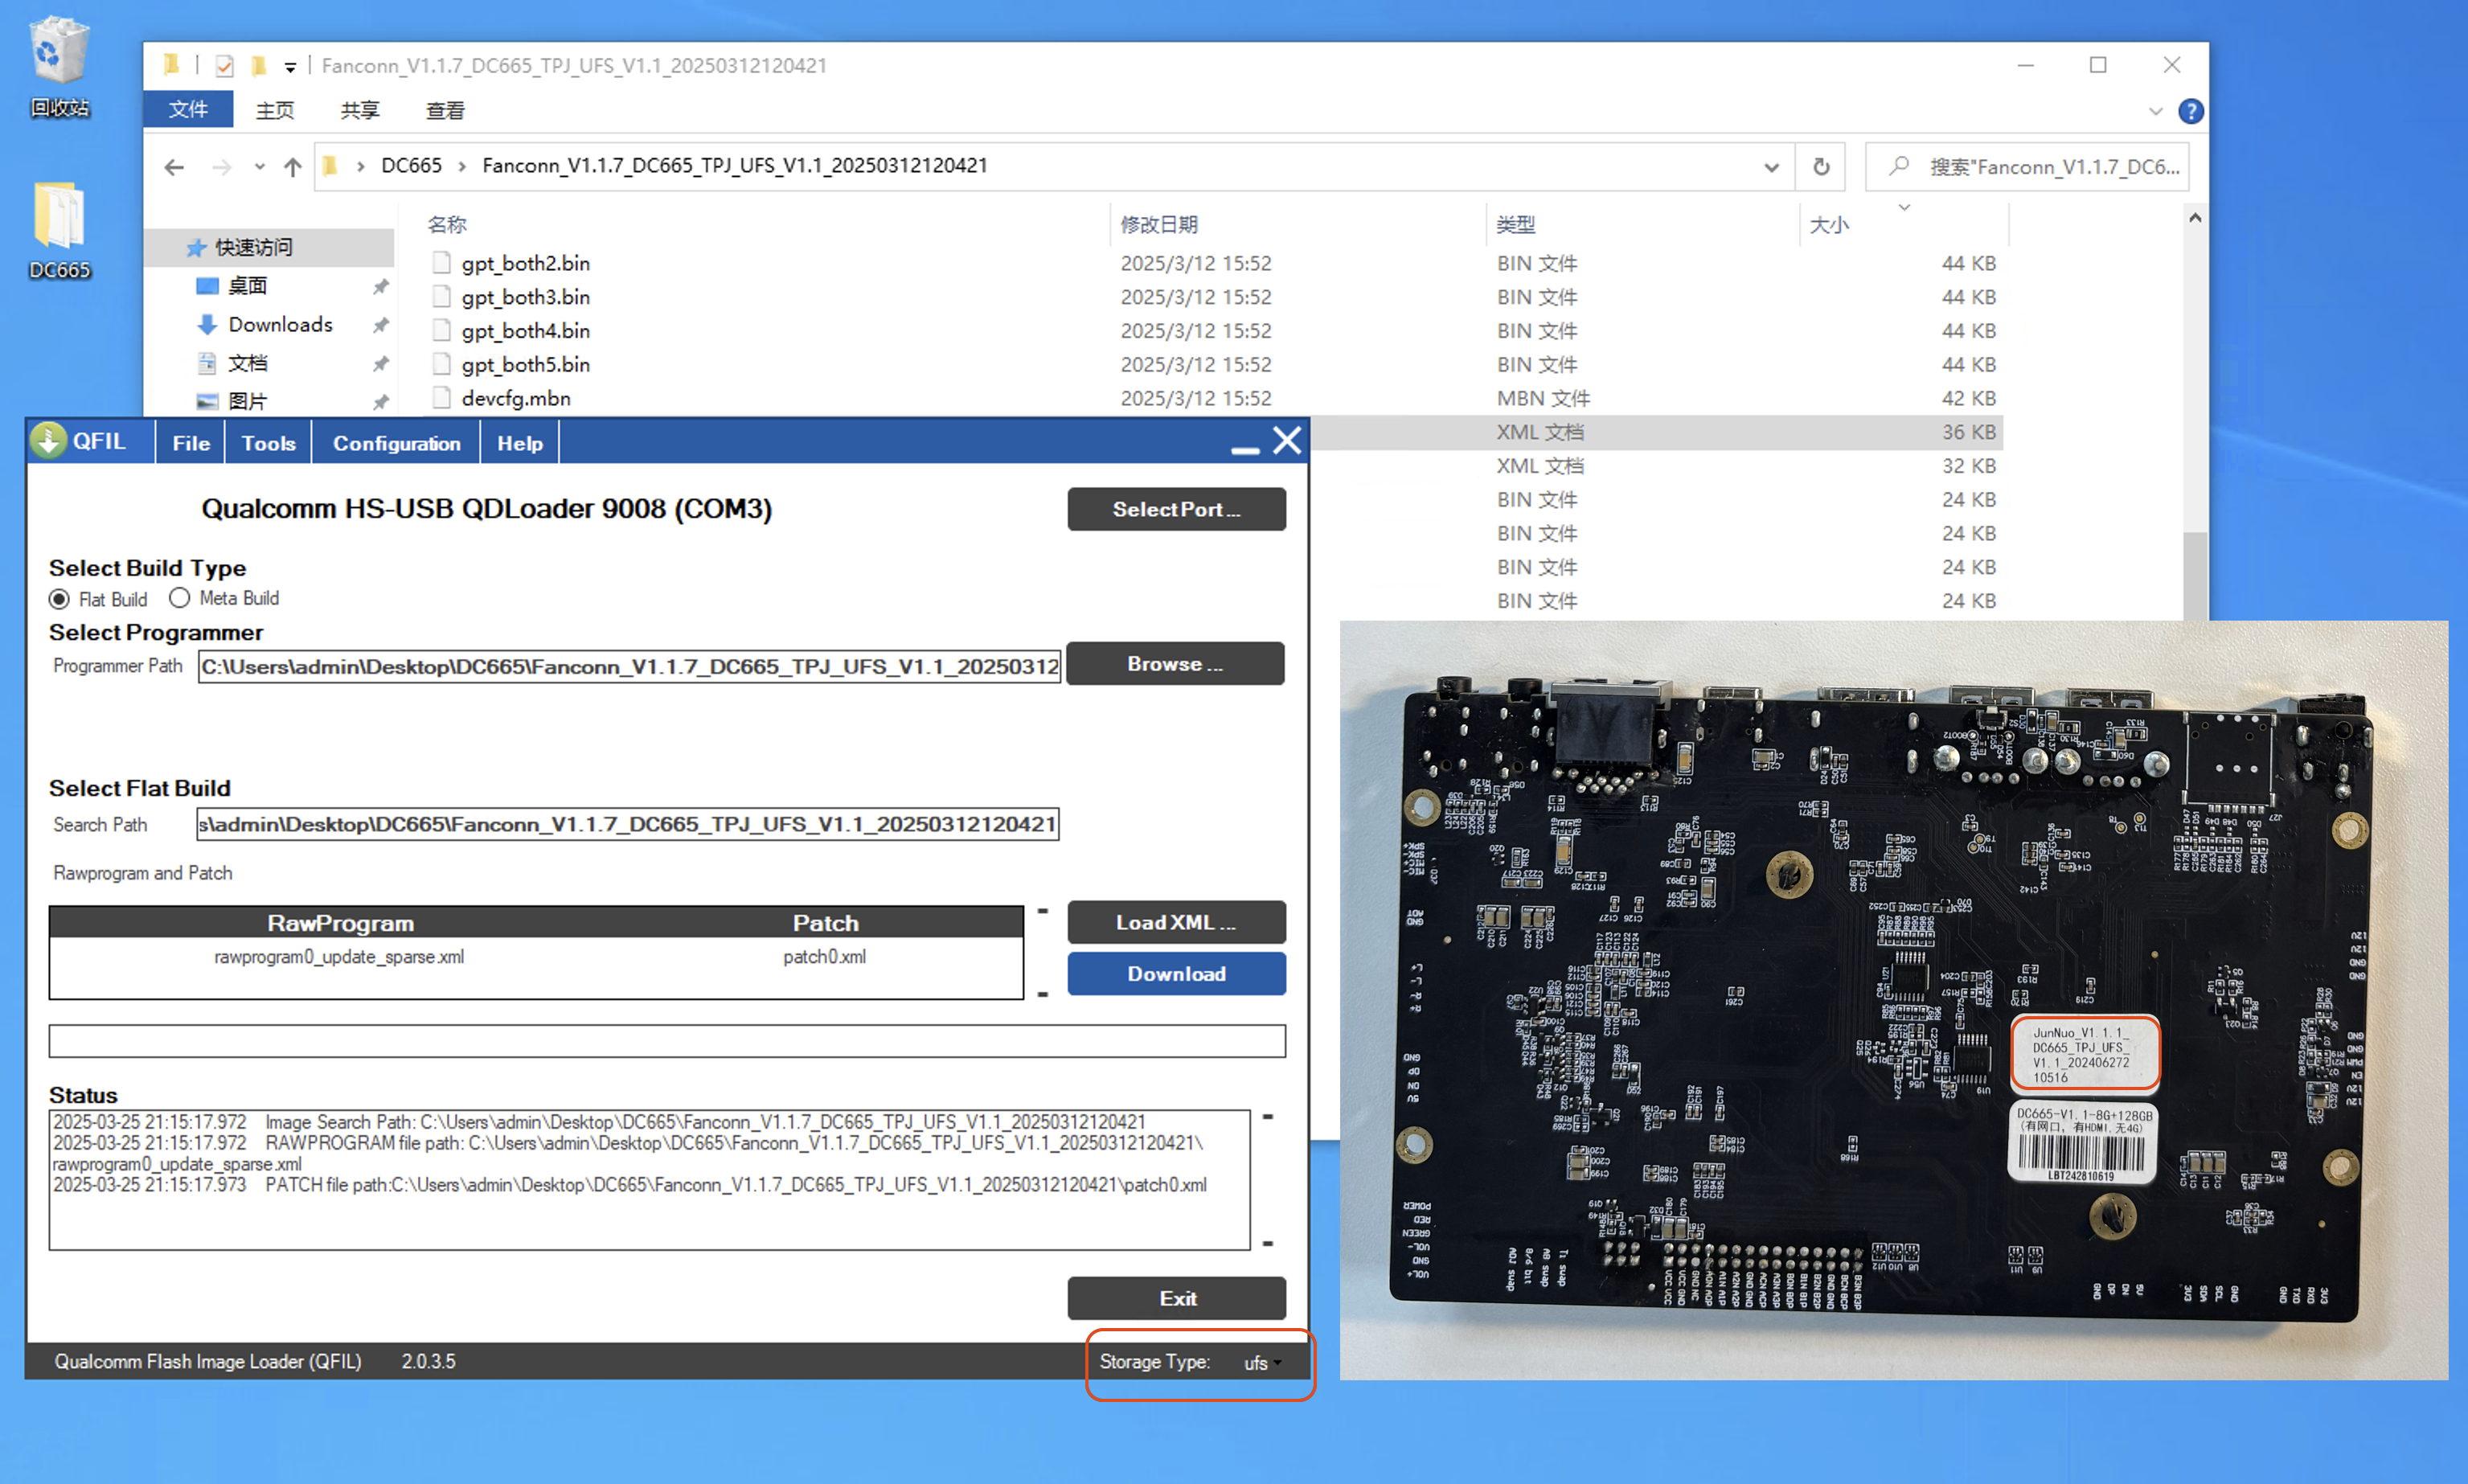
Start the Upgrade
After confirming that the information is correct
Click Download and wait for the blue progress bar to complete
Wait for the
blue progress barto reach 100%
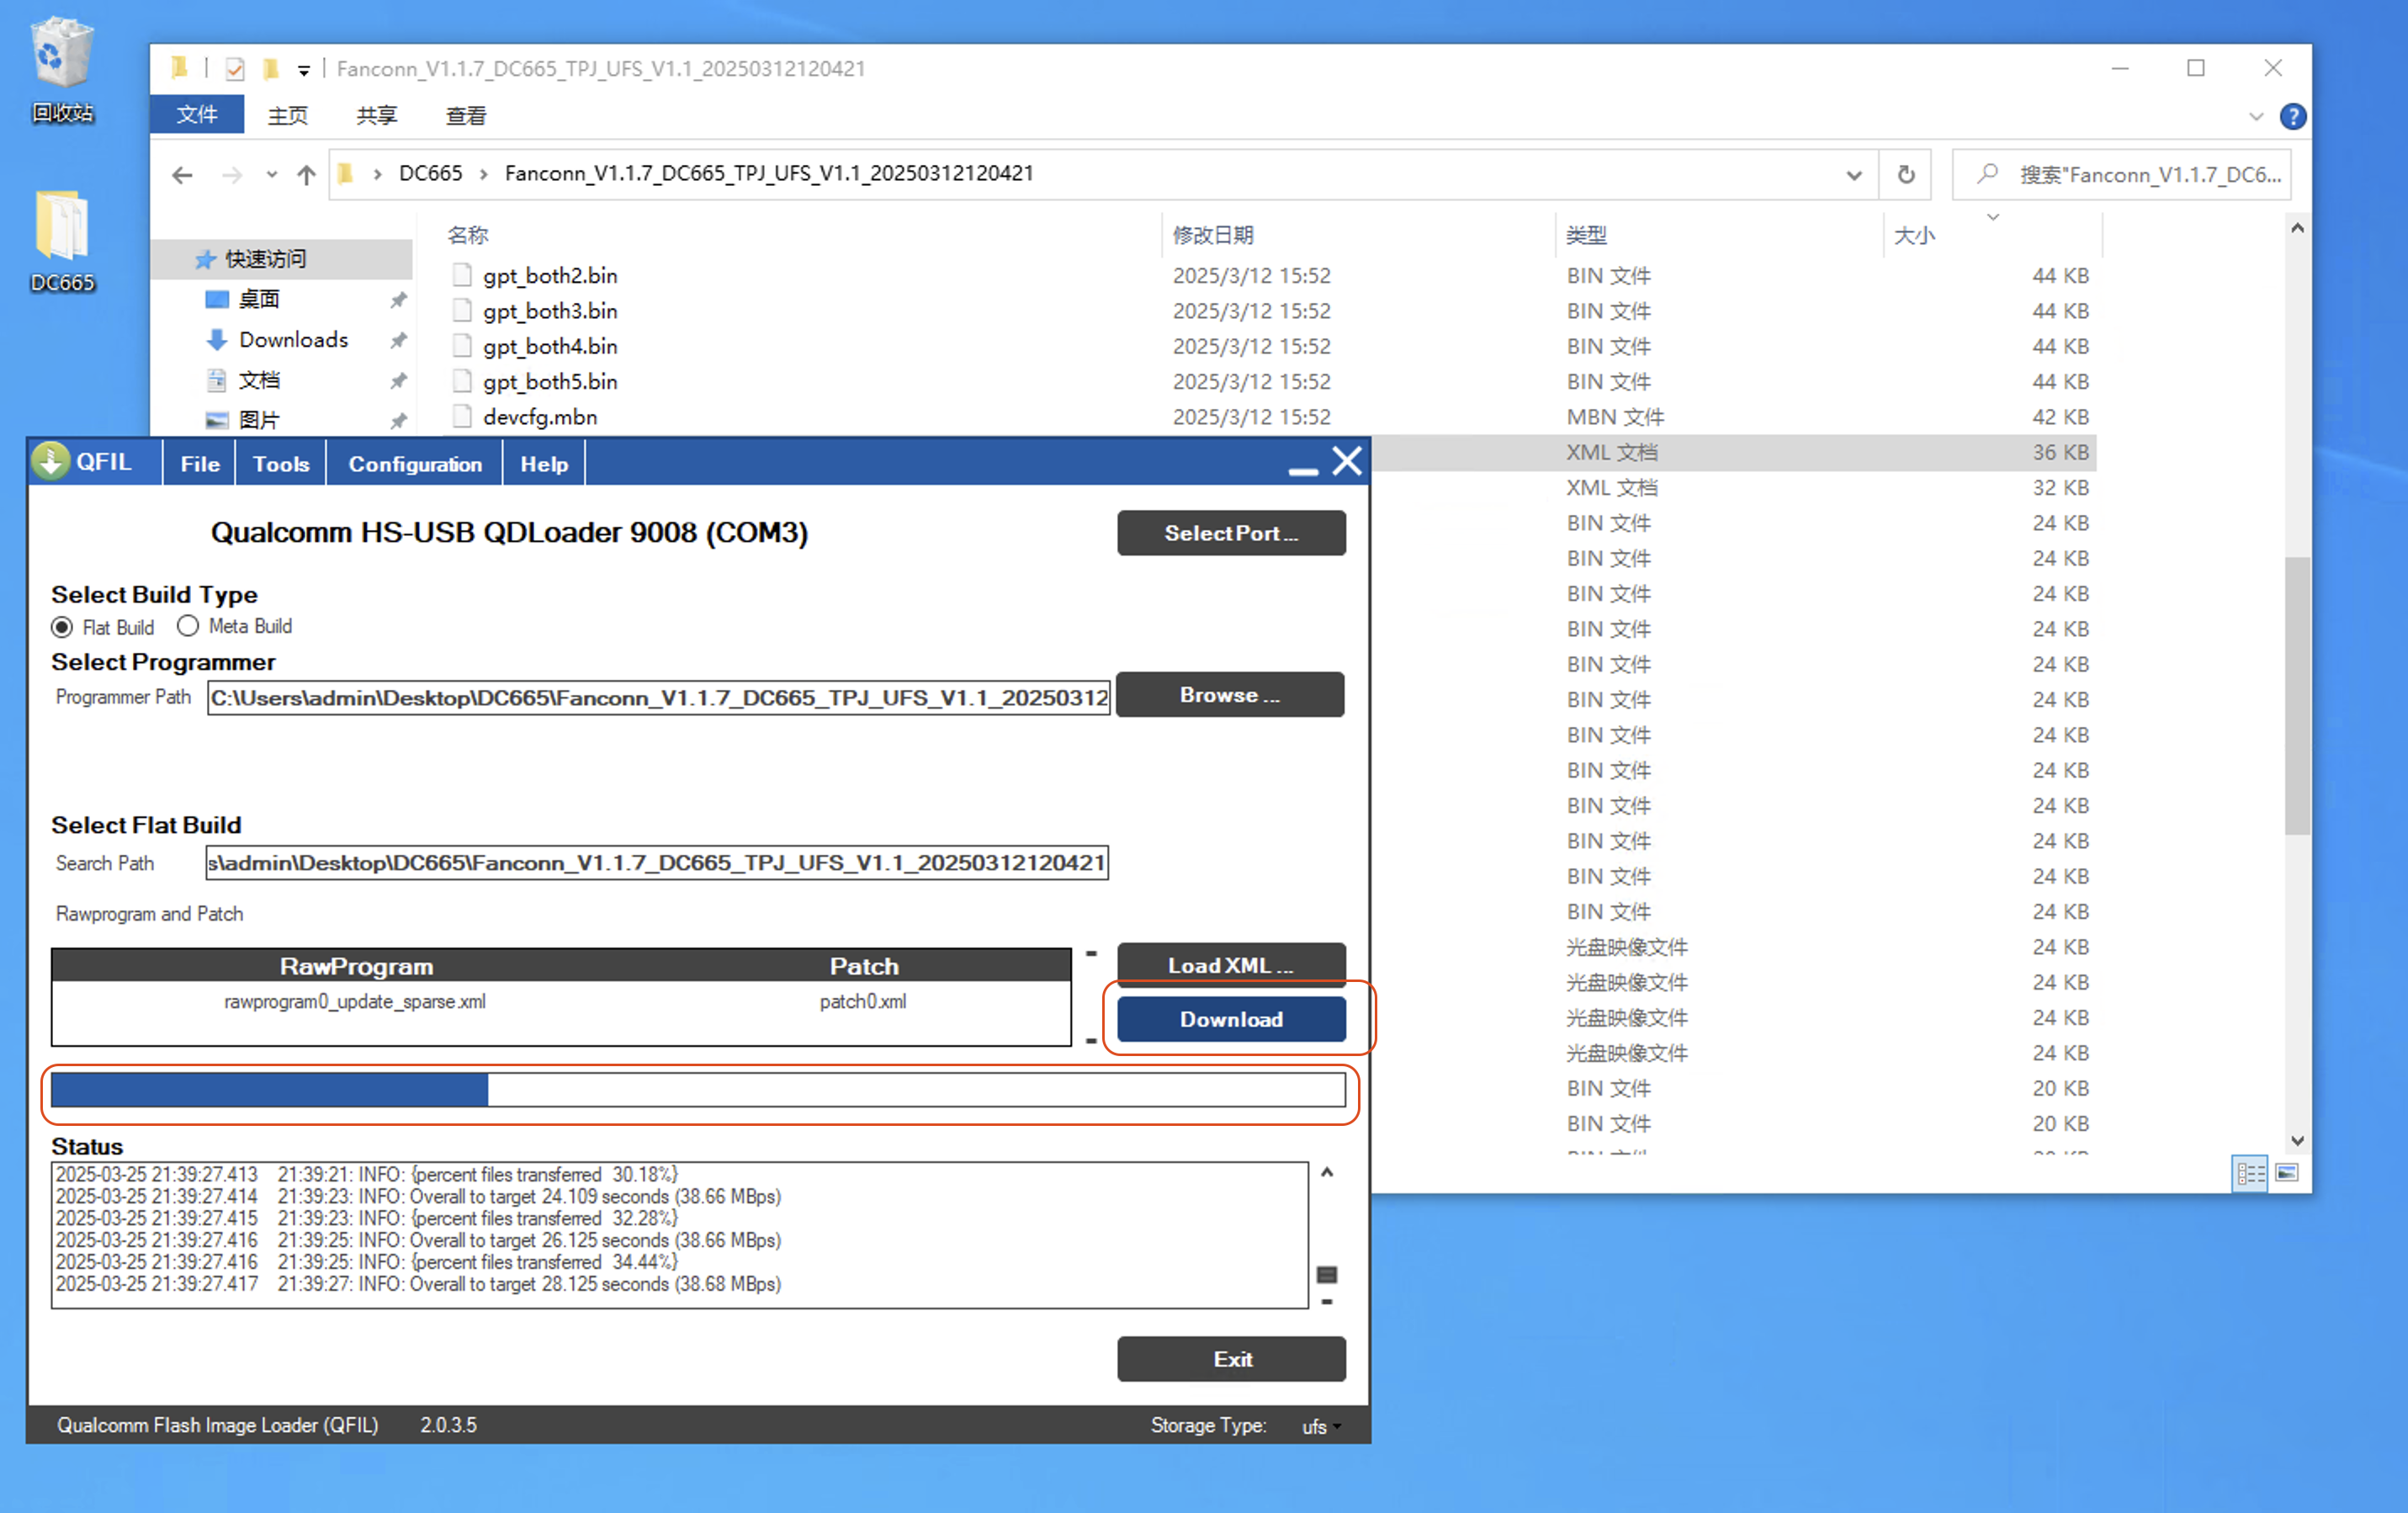
When Download Succeed / Finish Download is displayed, the upgrade is complete
Completing the Upgrade
The upgrade is only successful when blue Succeed is displayed!
Upgrade completed
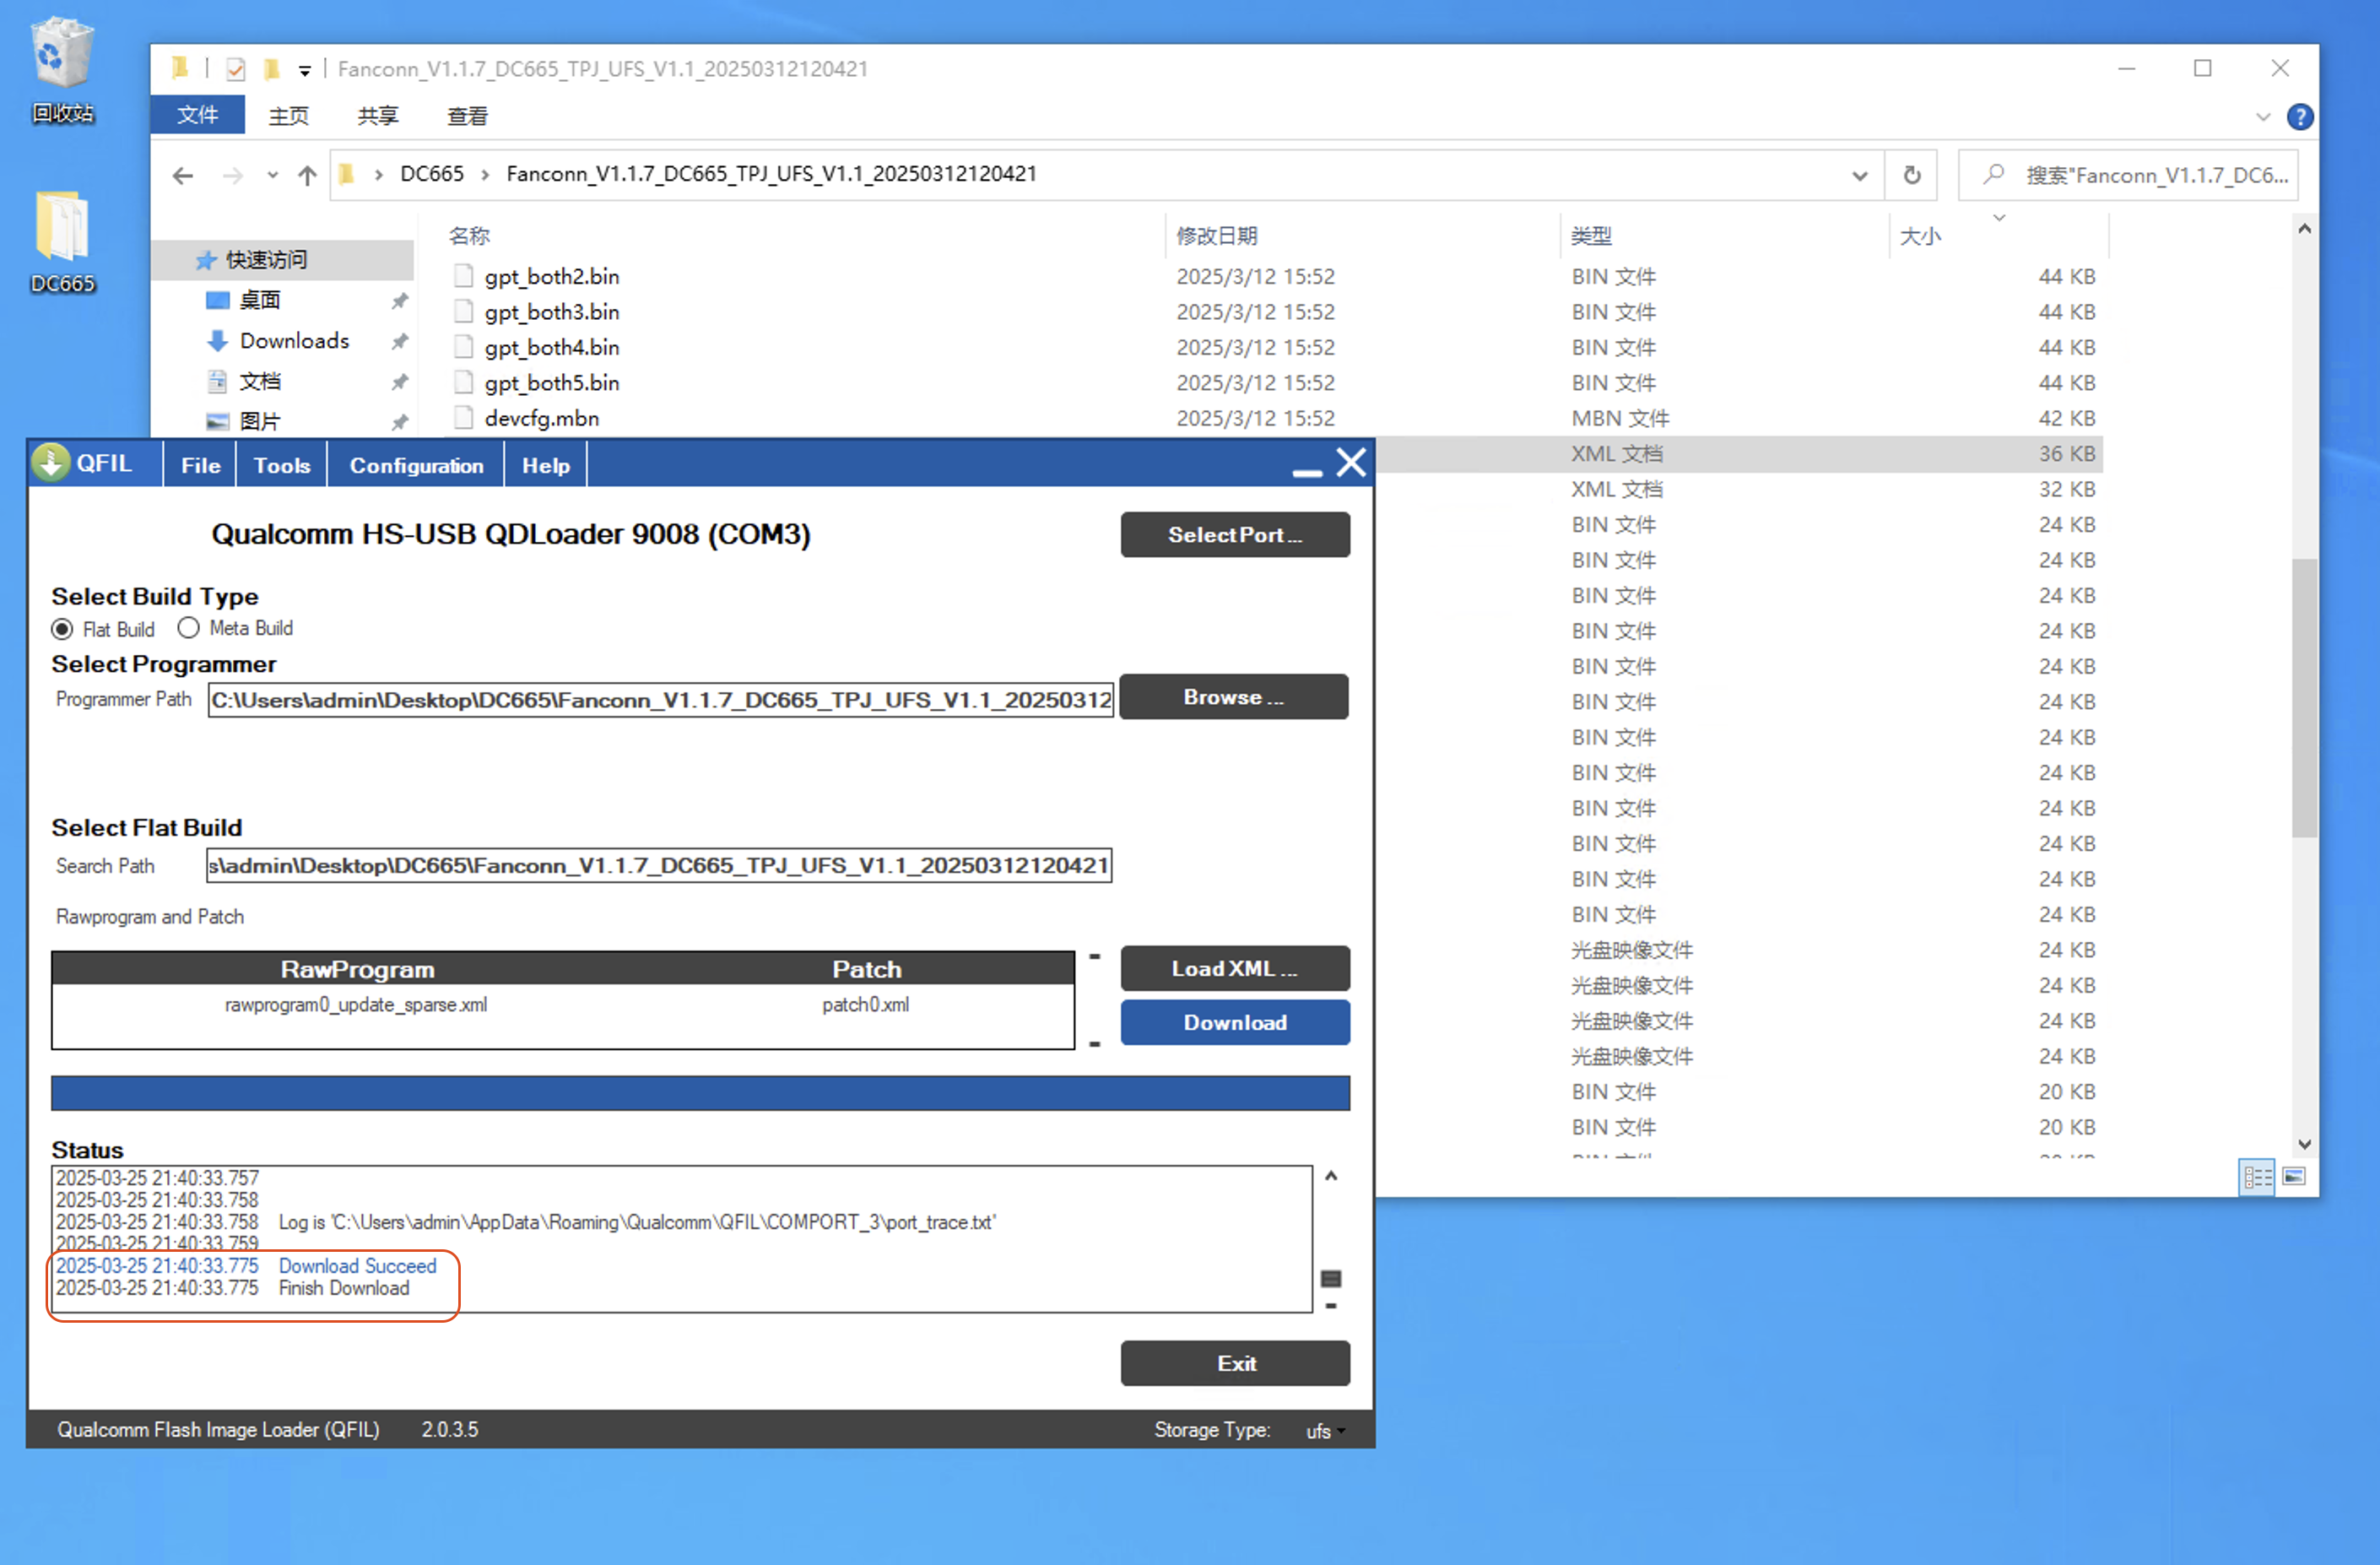
Automatic Restart After the Upgrade
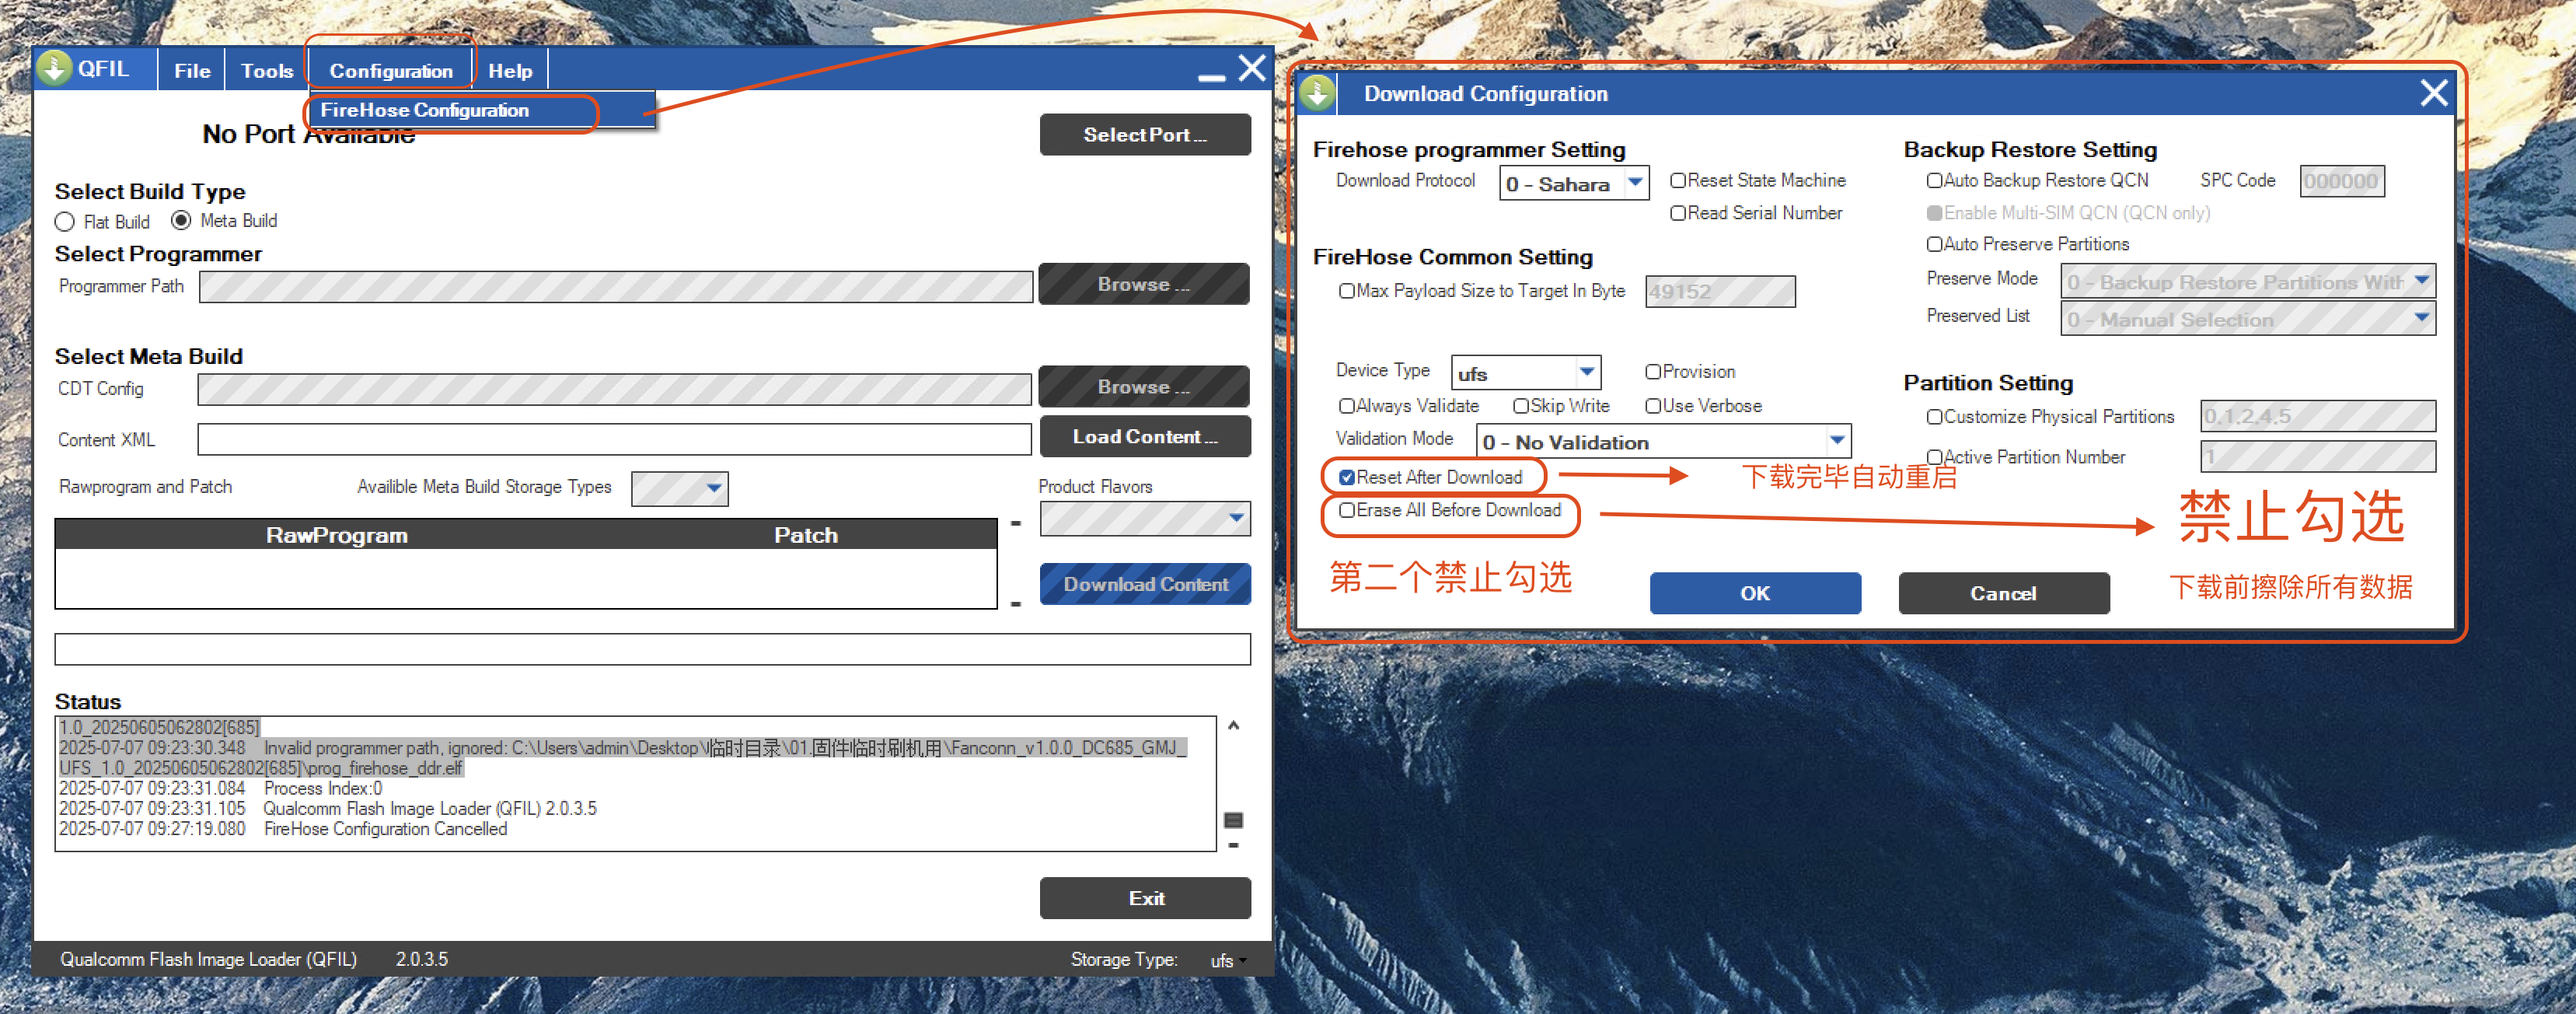
Under Configuration - FireHose Configuration - Download Configuration
Check Reset After Download
This means automatically restart after download is complete
Notes
Wipe Flash Option Erase All Before Download
Erase All Before DownloadWarning
Risk of system software failure!
-
Only for professional personnel to completely wipe/restore an entire device
-
Unless specifically required when
flashing the base firmware,do not check Erase All Before Download -
If it is needed in special cases,
immediately uncheck the wipe optionafter use
Be careful not to check it by mistake