Interface Definitions

The DC665 provides a rich set of interfaces, as shown in the following diagram:
Overall Interface Diagram
Overall Device Interfaces
J1 I2C Port
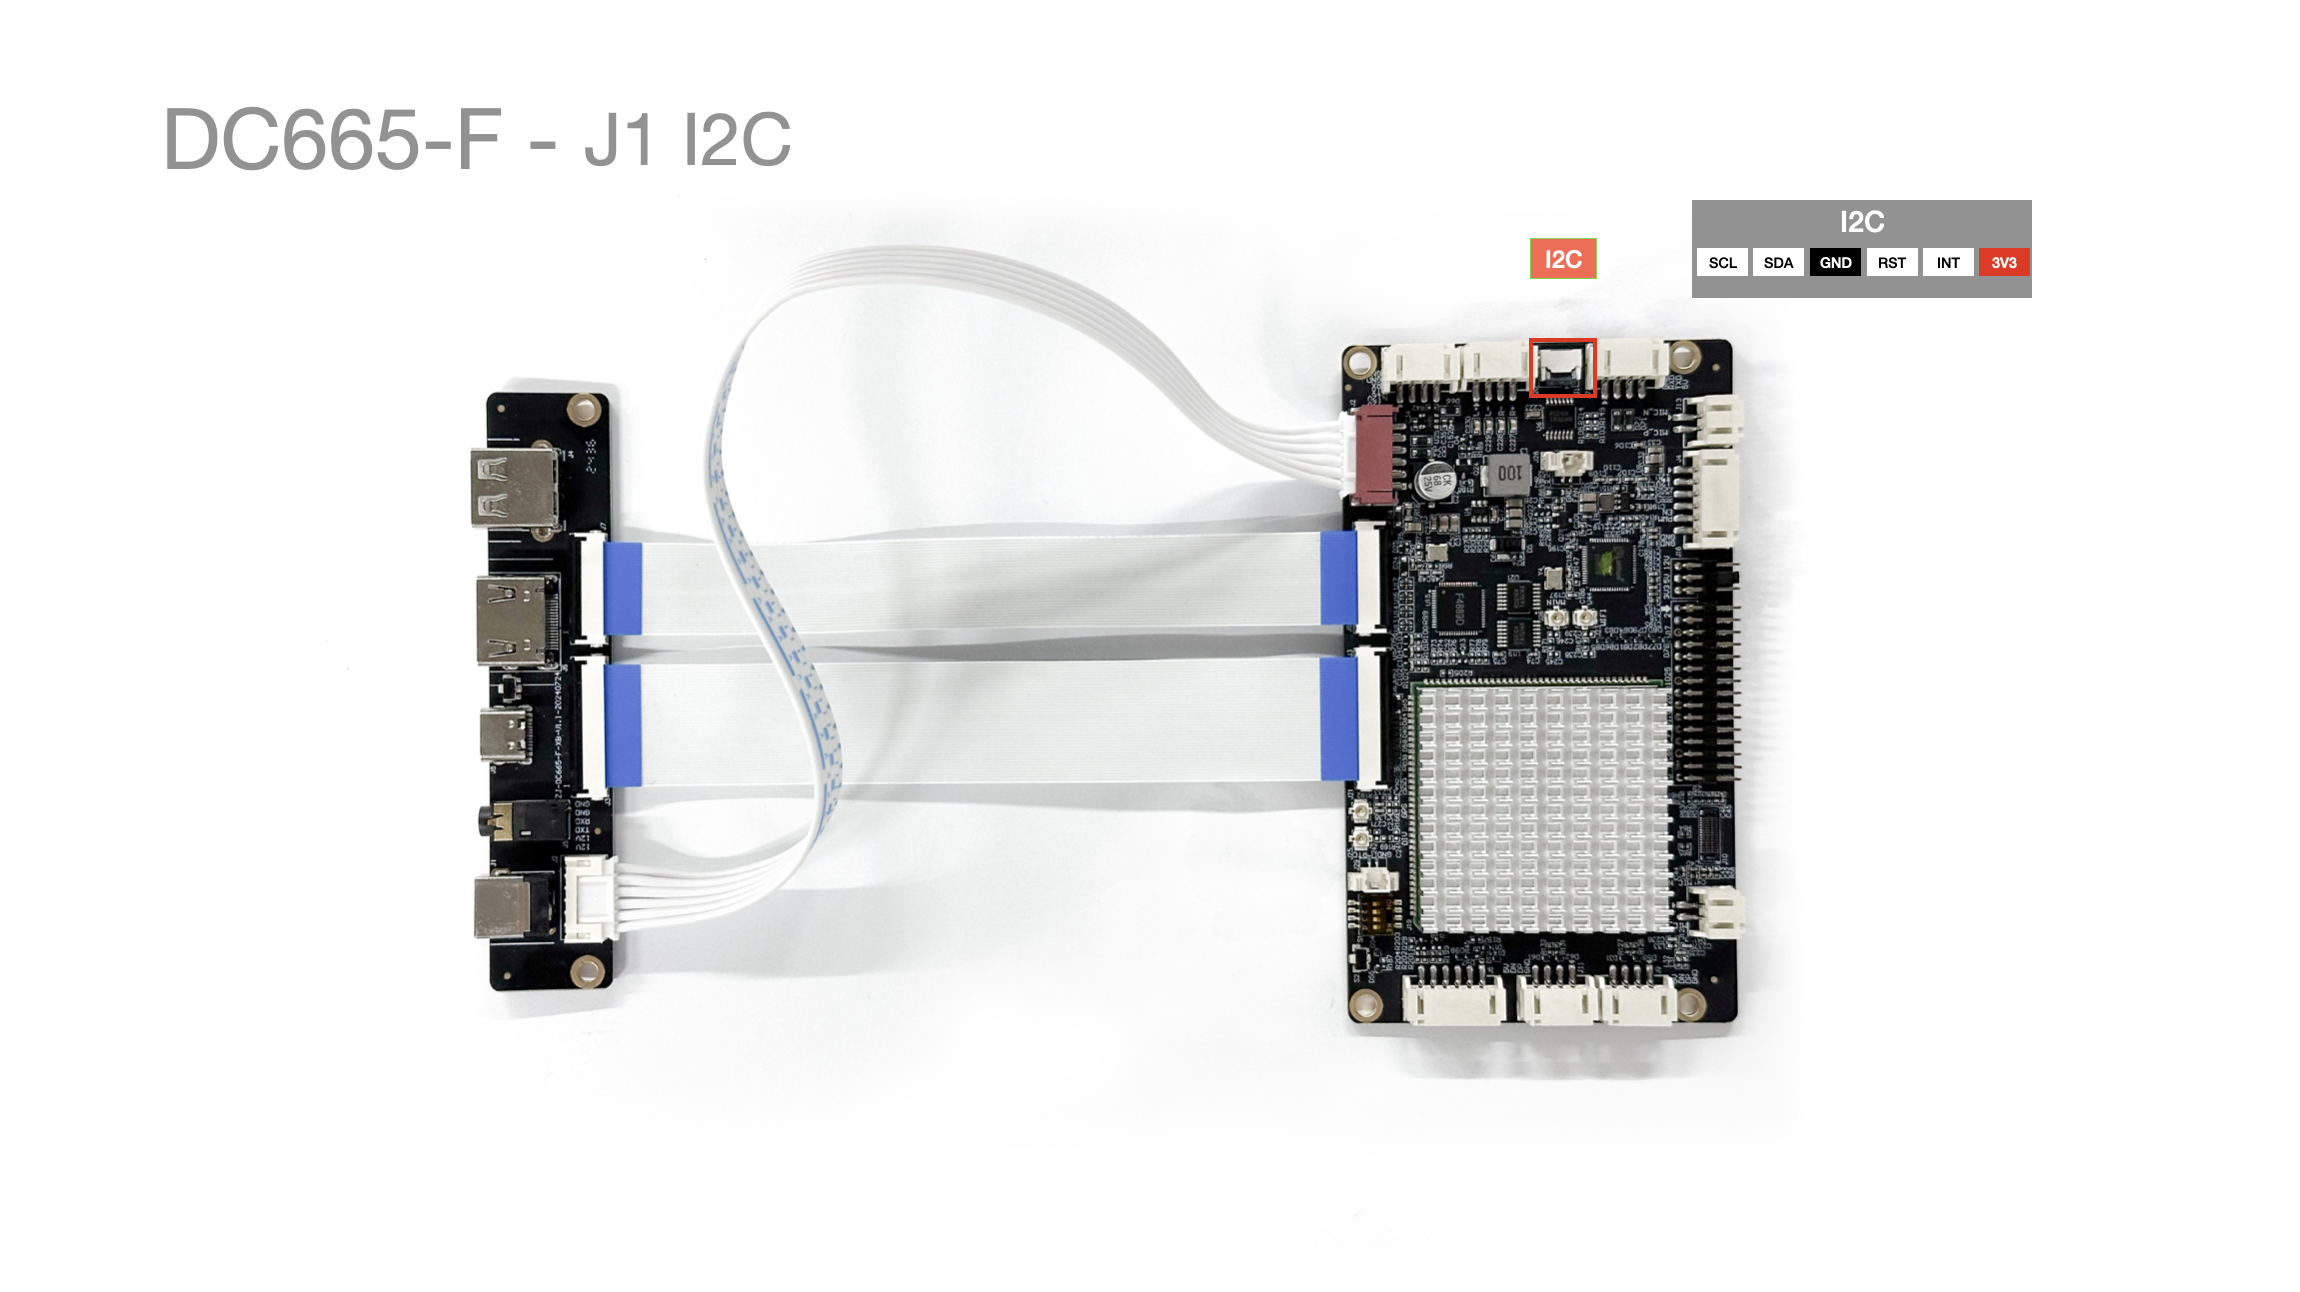
| Pin No. | Pin Description | Notes |
|---|---|---|
| 1 | 3V3 | |
| 2 | INT | |
| 3 | RESET | |
| 4 | GND | Ground |
| 5 | SDA 3 | |
| 6 | SCL 3 |
J2 Power Supply
Connection Method
Pin Definitions
| Pin No. | Pin Description | Notes |
|---|---|---|
| 1 | 12V | Operating Voltage 12V |
| 2 | 12V | Operating Voltage 12V |
| 3 | TX | UART TTL/RS232 Battery Communication |
| 4 | RX | UART TTL/RS232 Battery Communication |
| 5 | GND | Ground |
| 6 | GND | Ground |
J1 TYPE-C Multifunctional Port
- TYPE-C Port: Debug.
Connect to a 12V Power Supply
- Supports
DC 12V 4PINpower connector
Measured Power Consumption
-
Test Method:
-
Flash the default
Androidfirmware. -
Power on normally, unlock the screen, and perform no other operations.
-
Measure only the motherboard power; the backlight is not connected.
-
| State | Voltage | Current | Power | Notes |
|---|---|---|---|---|
| Normal boot, no screen connected | 12.4V | 0.2A | Standby 2.3-3.1W | Measurement accuracy 0.1 |
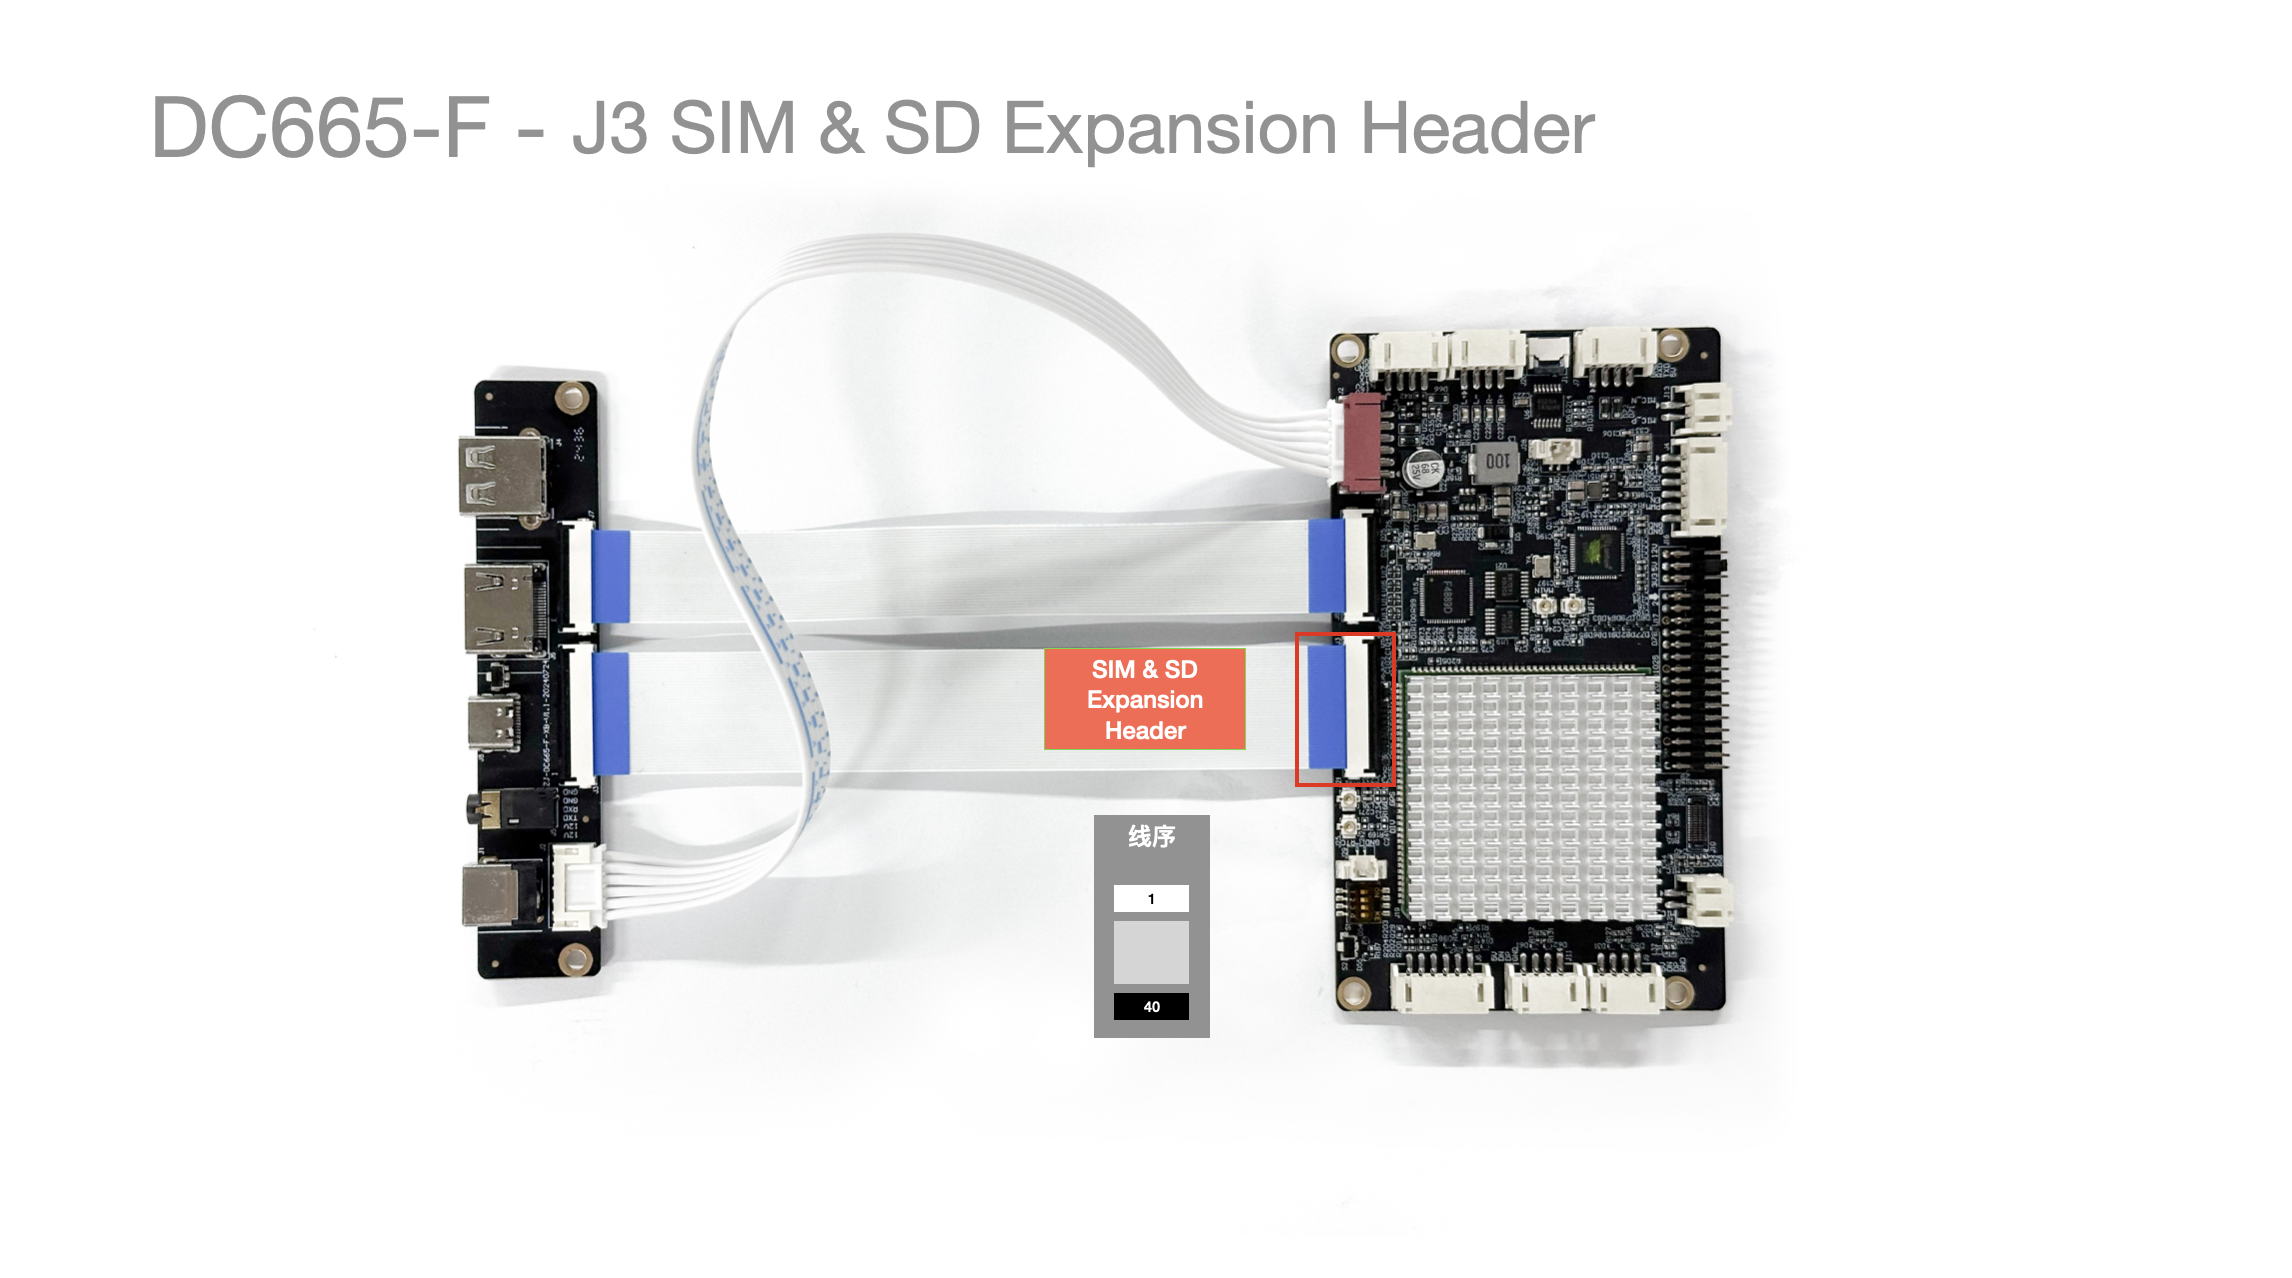
J3 40PIN FPC Expansion
The expansion interface requires connecting a daughter board, including one USB expansion.
J4 Backlight Power Supply
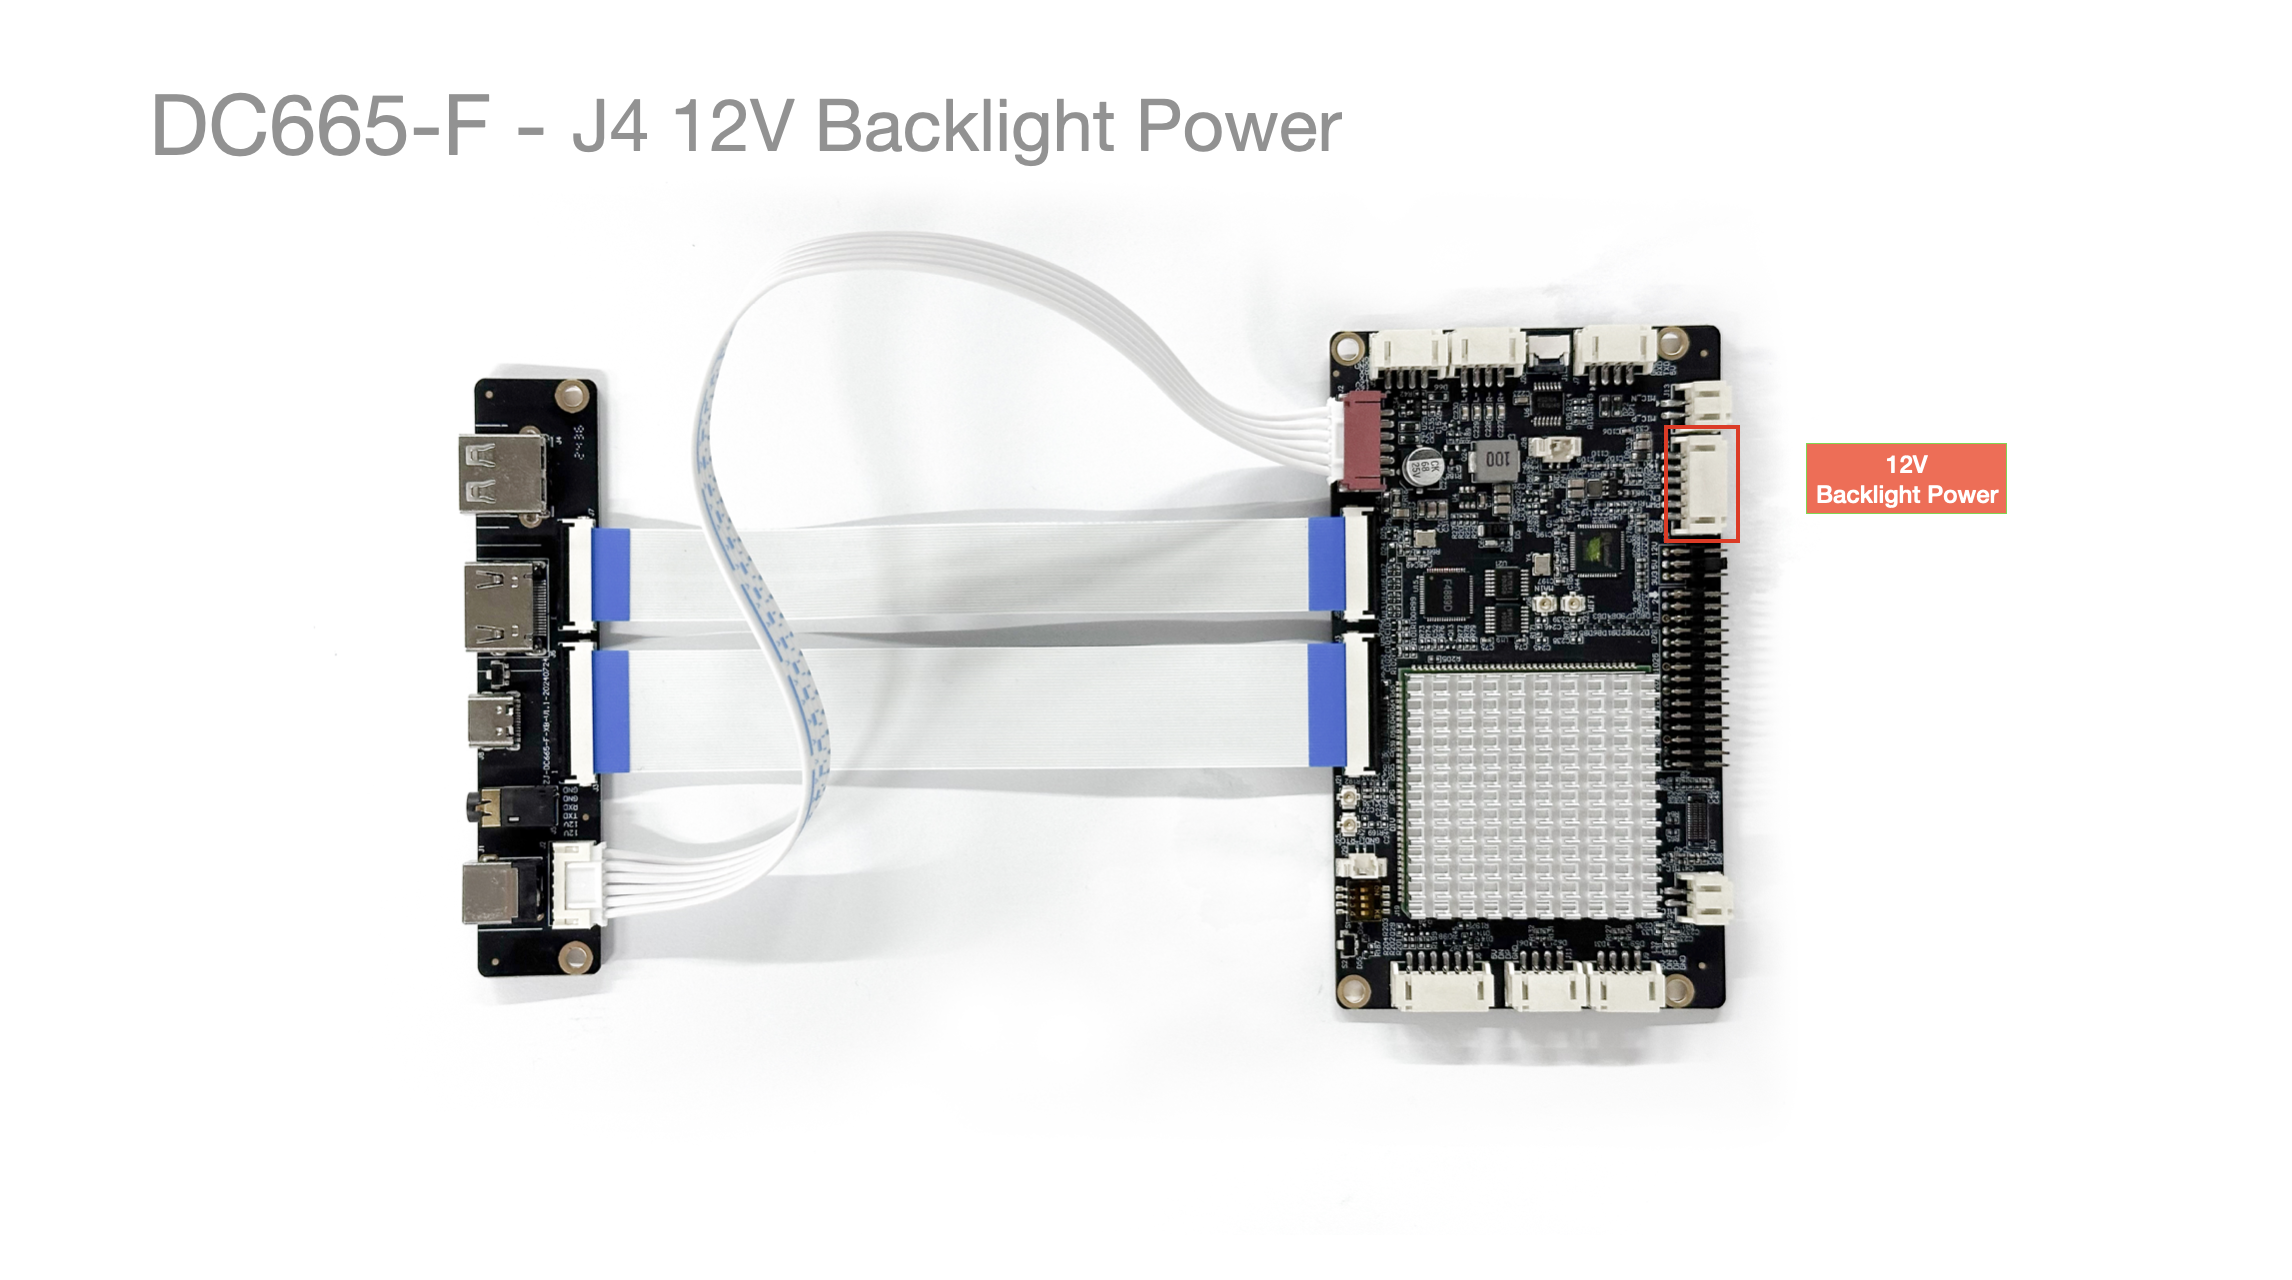
| Pin No. | Pin Description | Wire Color (Reference) | Notes |
|---|---|---|---|
| 1 | 12V | Red | Operating Voltage 12V |
| 2 | 12V | Red | Operating Voltage 12V |
| 3 | BL EN | Yellow | Backlight Control |
| 4 | BL PWM | Yellow | Backlight Control |
| 5 | GND | Black | Ground |
| 6 | GND | Black | Ground |
- Maximum
3A Max
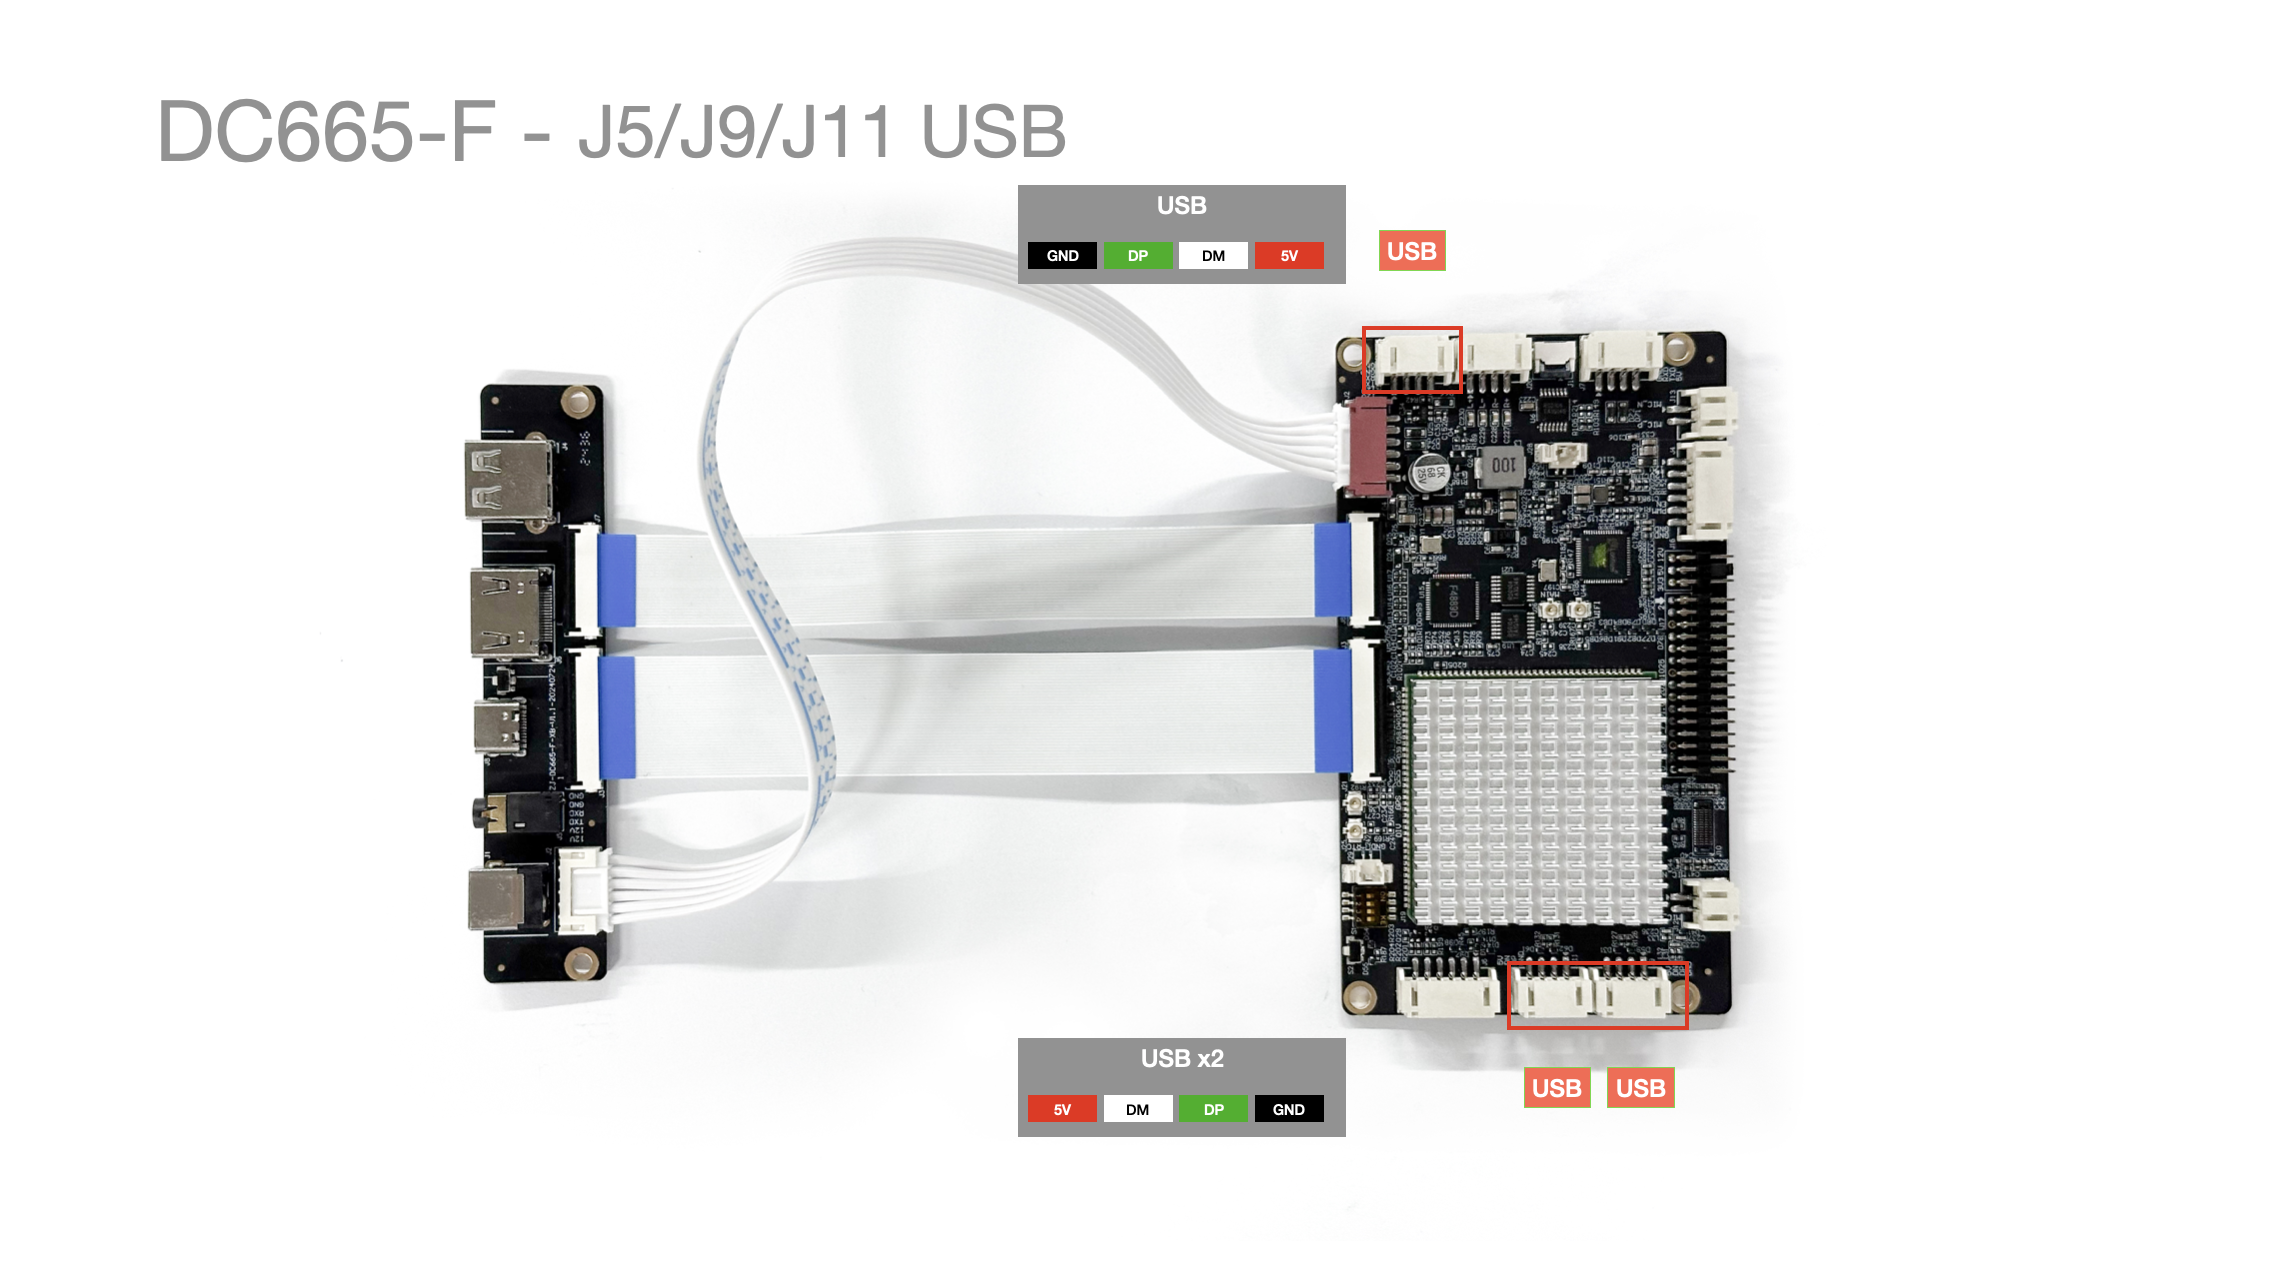
J5/J9/J11 USB Ports
-
Supports 3x USB PH2.0 ports.
-
J12 and J15 are outputs from the same USB HUB port, so
J12 USB and J15 Ethernet port are mutually exclusive .
| Pin No. | Pin Description | Wire Color (Reference) | Notes |
|---|---|---|---|
| 1 | GND | Black | Ground |
| 2 | DP | Green | |
| 3 | DM | White | |
| 4 | 5V | Red | 5V |
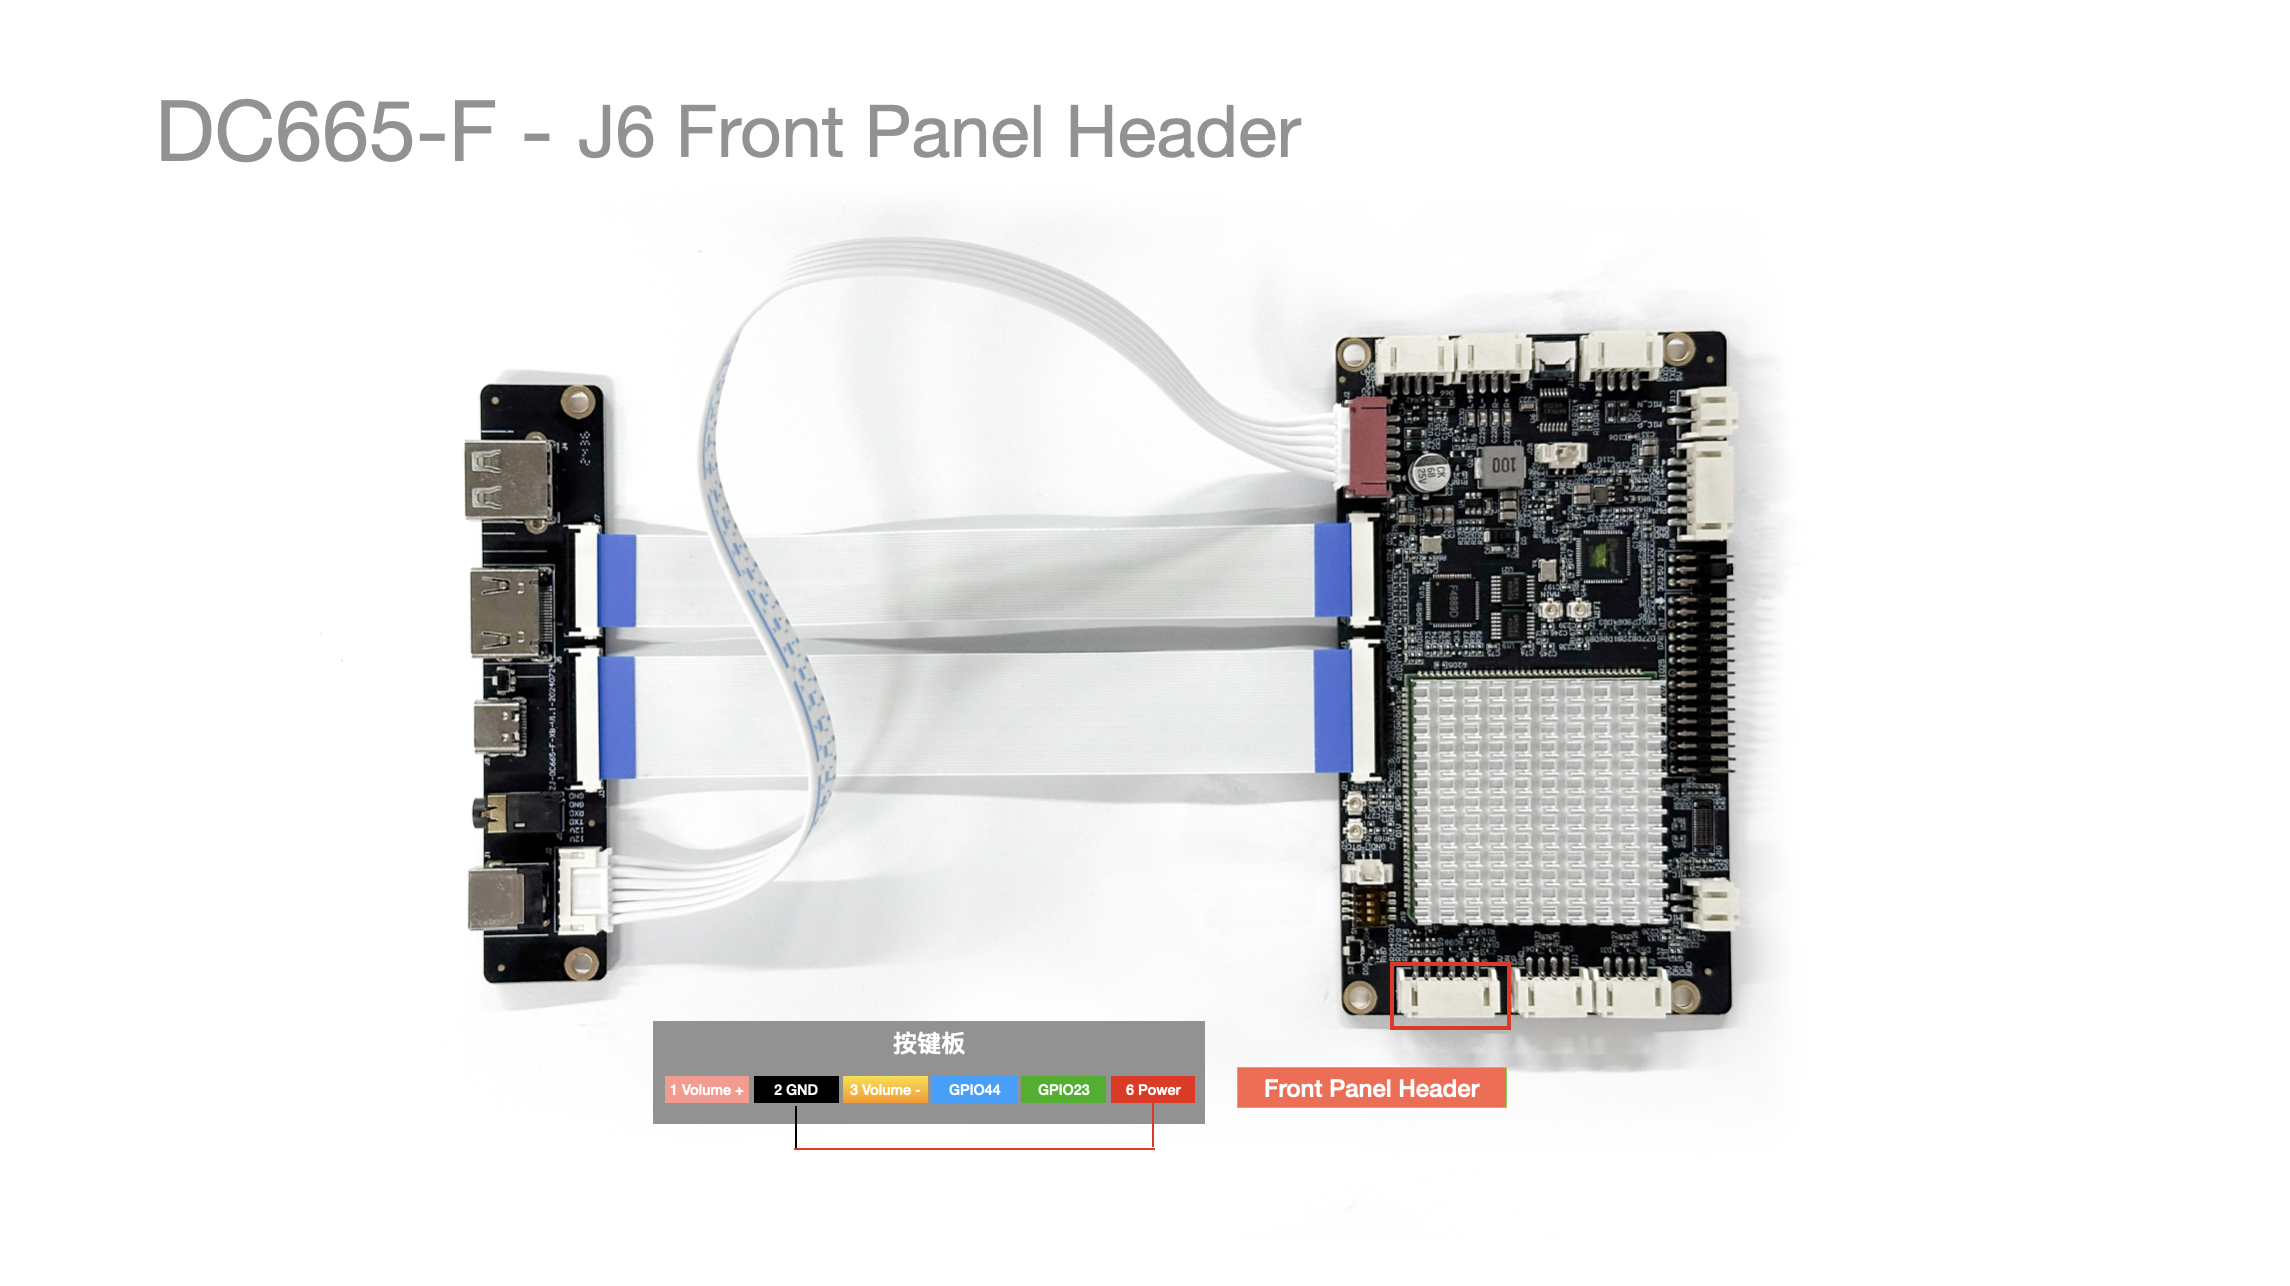
J6 Panel Button Interface
| Pin No. | Pin Description | Wire Color (Reference) | Notes |
|---|---|---|---|
| 1 | Power Key | None | Short to 5 GND for power button |
| 2 | GPIO23_3V3 | None | |
| 3 | GPIO44_3V3 | None | |
| 4 | Volume - | None | Short to 5 GND for Volume - |
| 5 | GND | Black | Ground |
| 6 | Volume + | None | Short to 5 GND for Volume + |
- Press and hold
Volume + during startup to enter Loader upgrade mode .
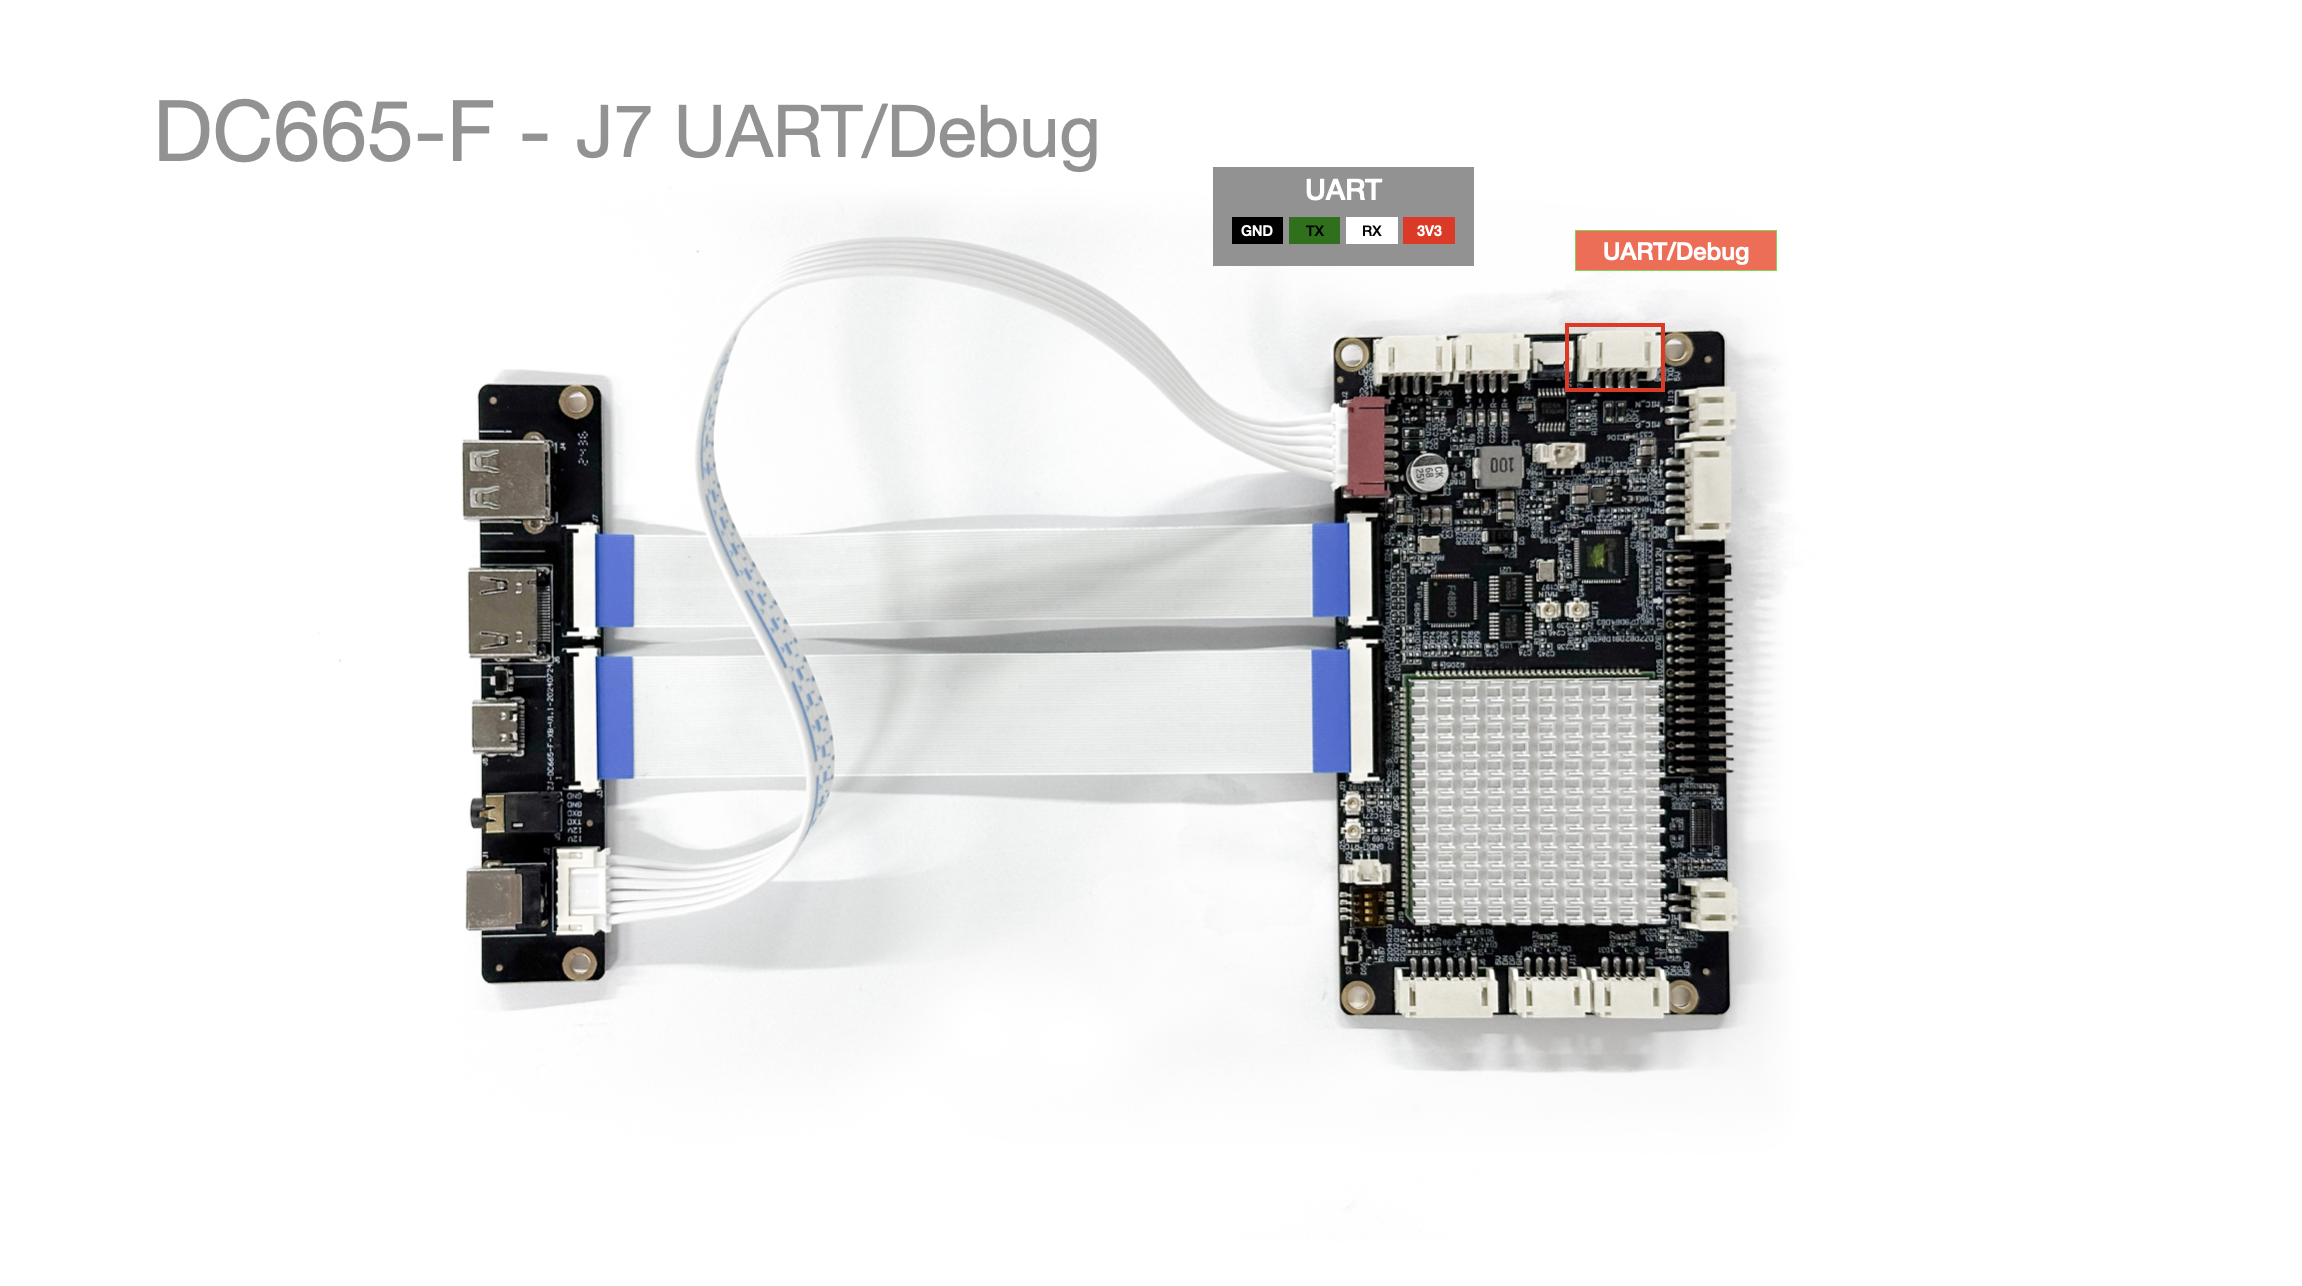
J7 UART/Debug Port
| Pin No. | Pin Description | Notes |
|---|---|---|
| 1 | GND | Ground |
| 2 | RX | TTL/RS232 |
| 3 | TX | TTL/RS232 |
| 4 | 3V3 |
J8 HDMI and Expansion Component Interface
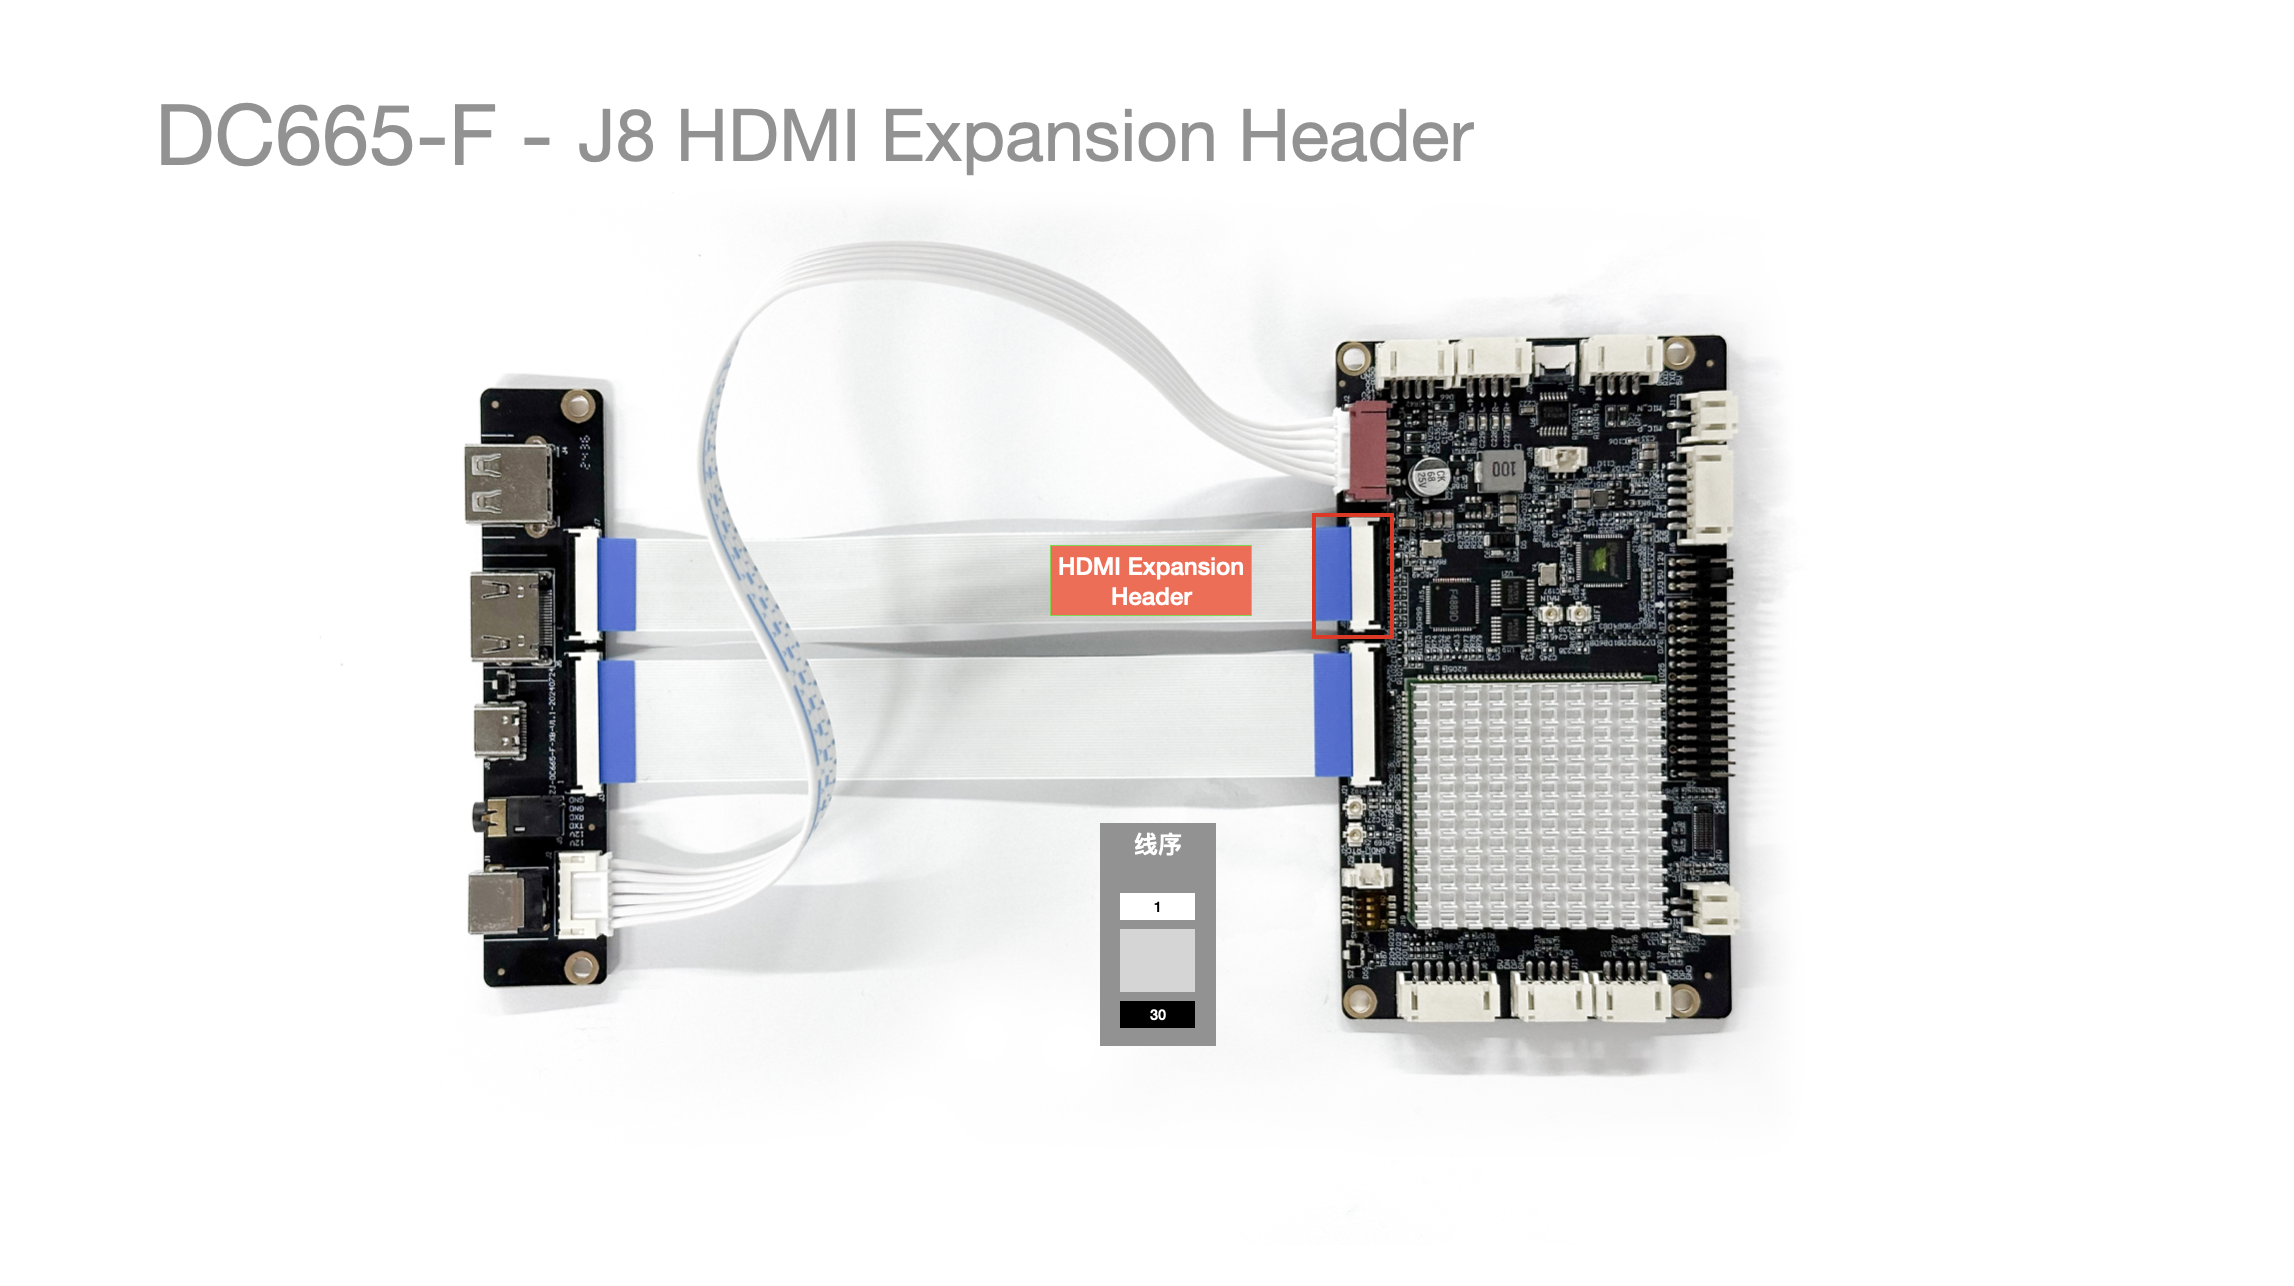
- 1x HDMI IN: Supports resolutions up to 19201080@60 / 38402160@30.
J10 MIPI Camera Interface
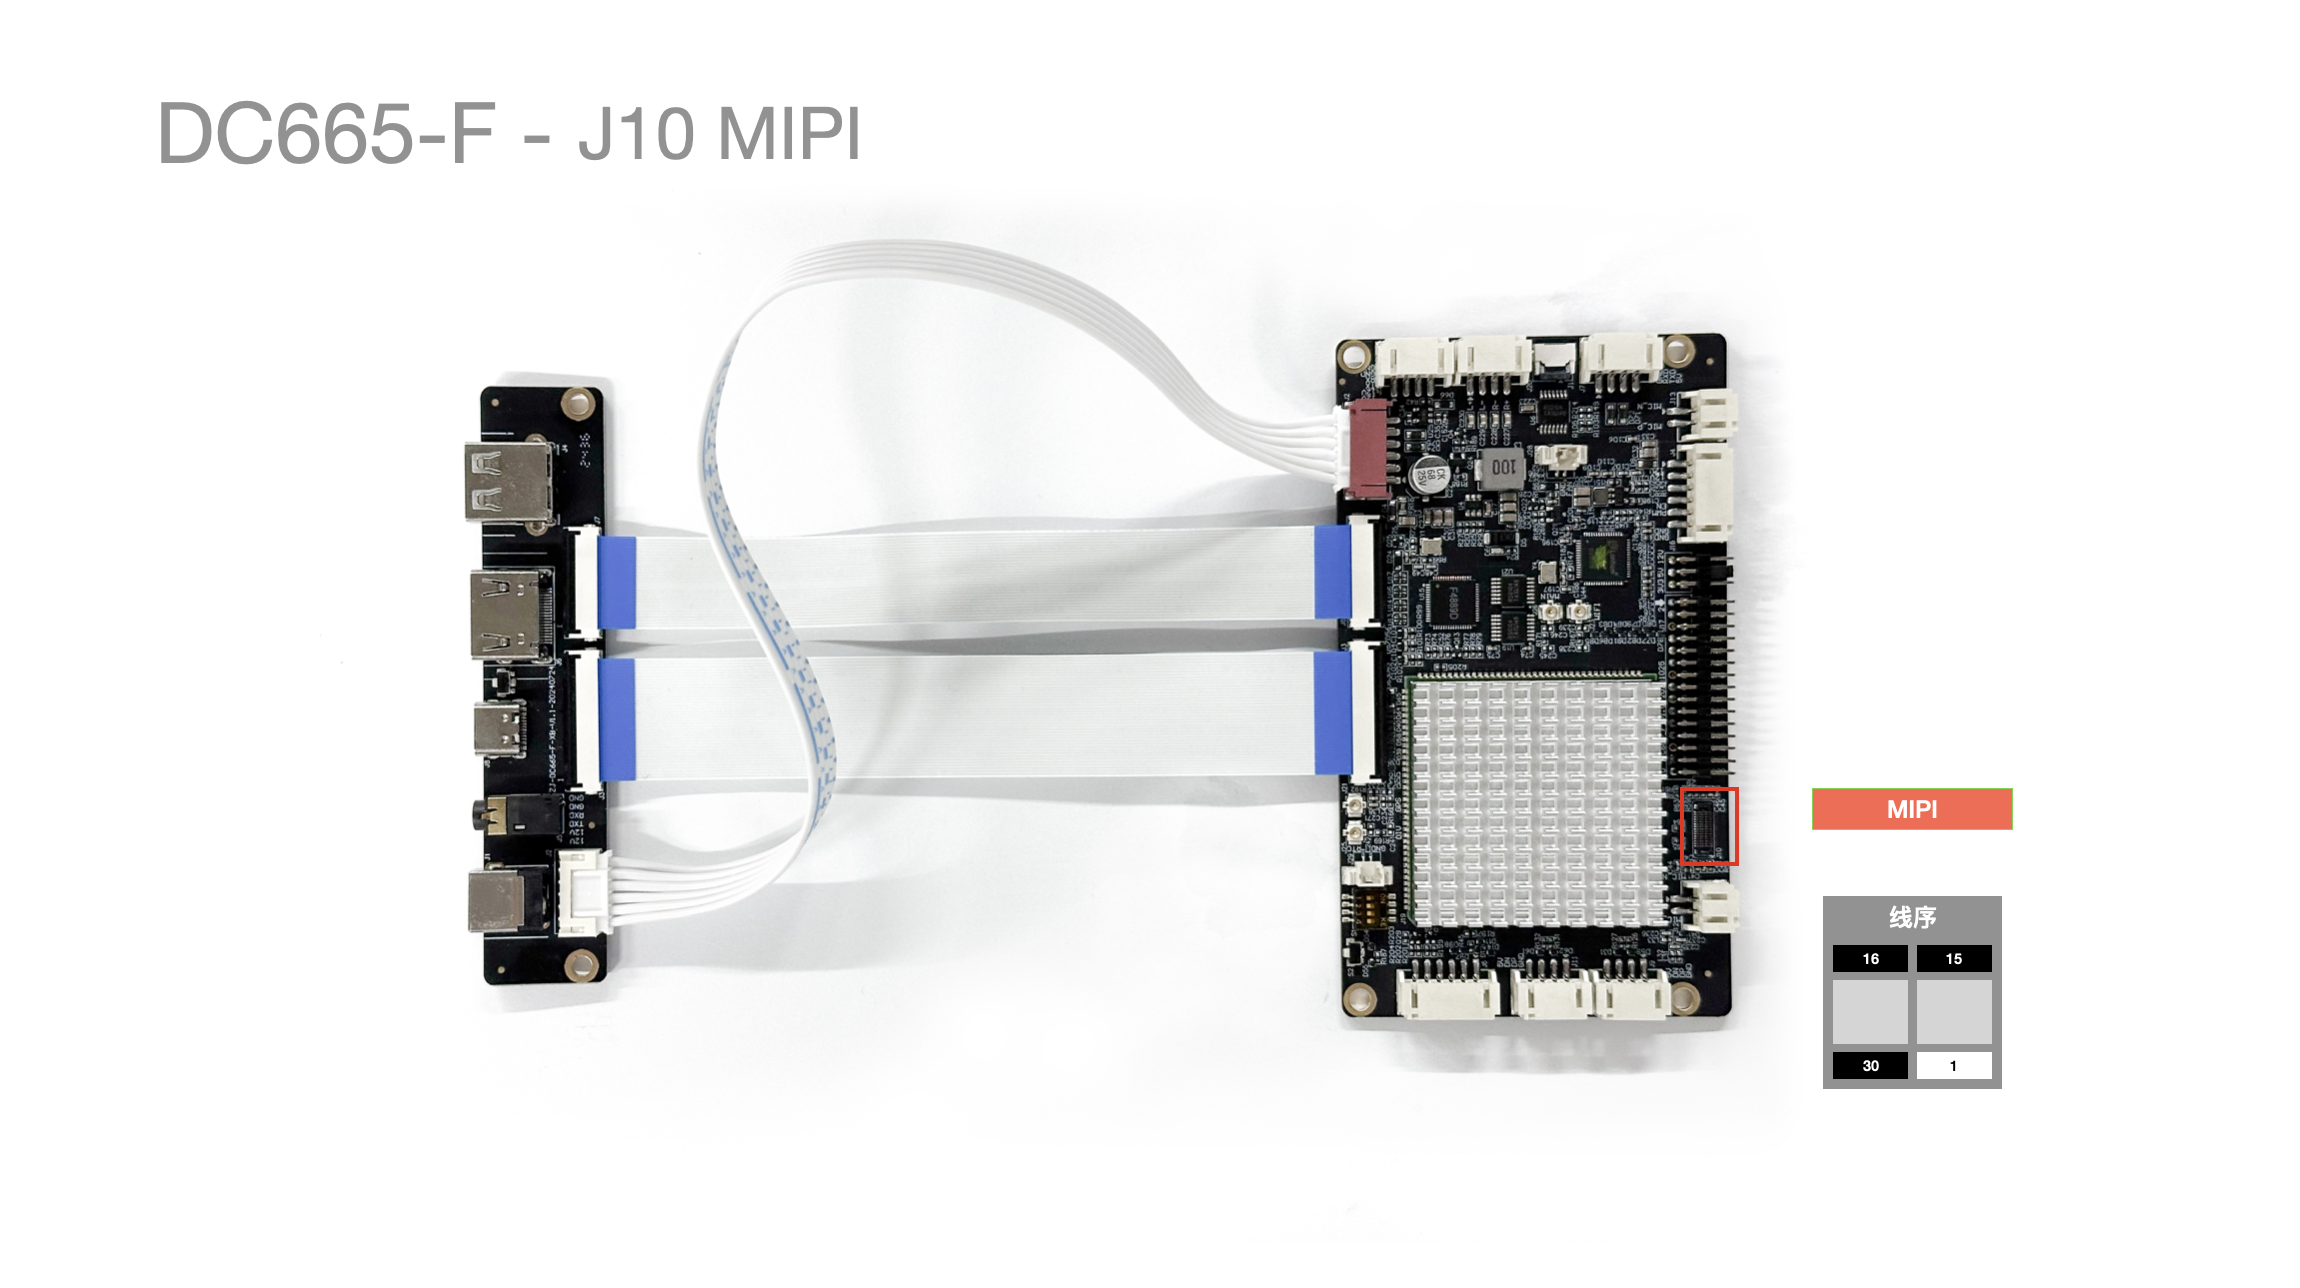
- Connector Model: YXT-BB10-30S-02
J12/J13 Microphone Input
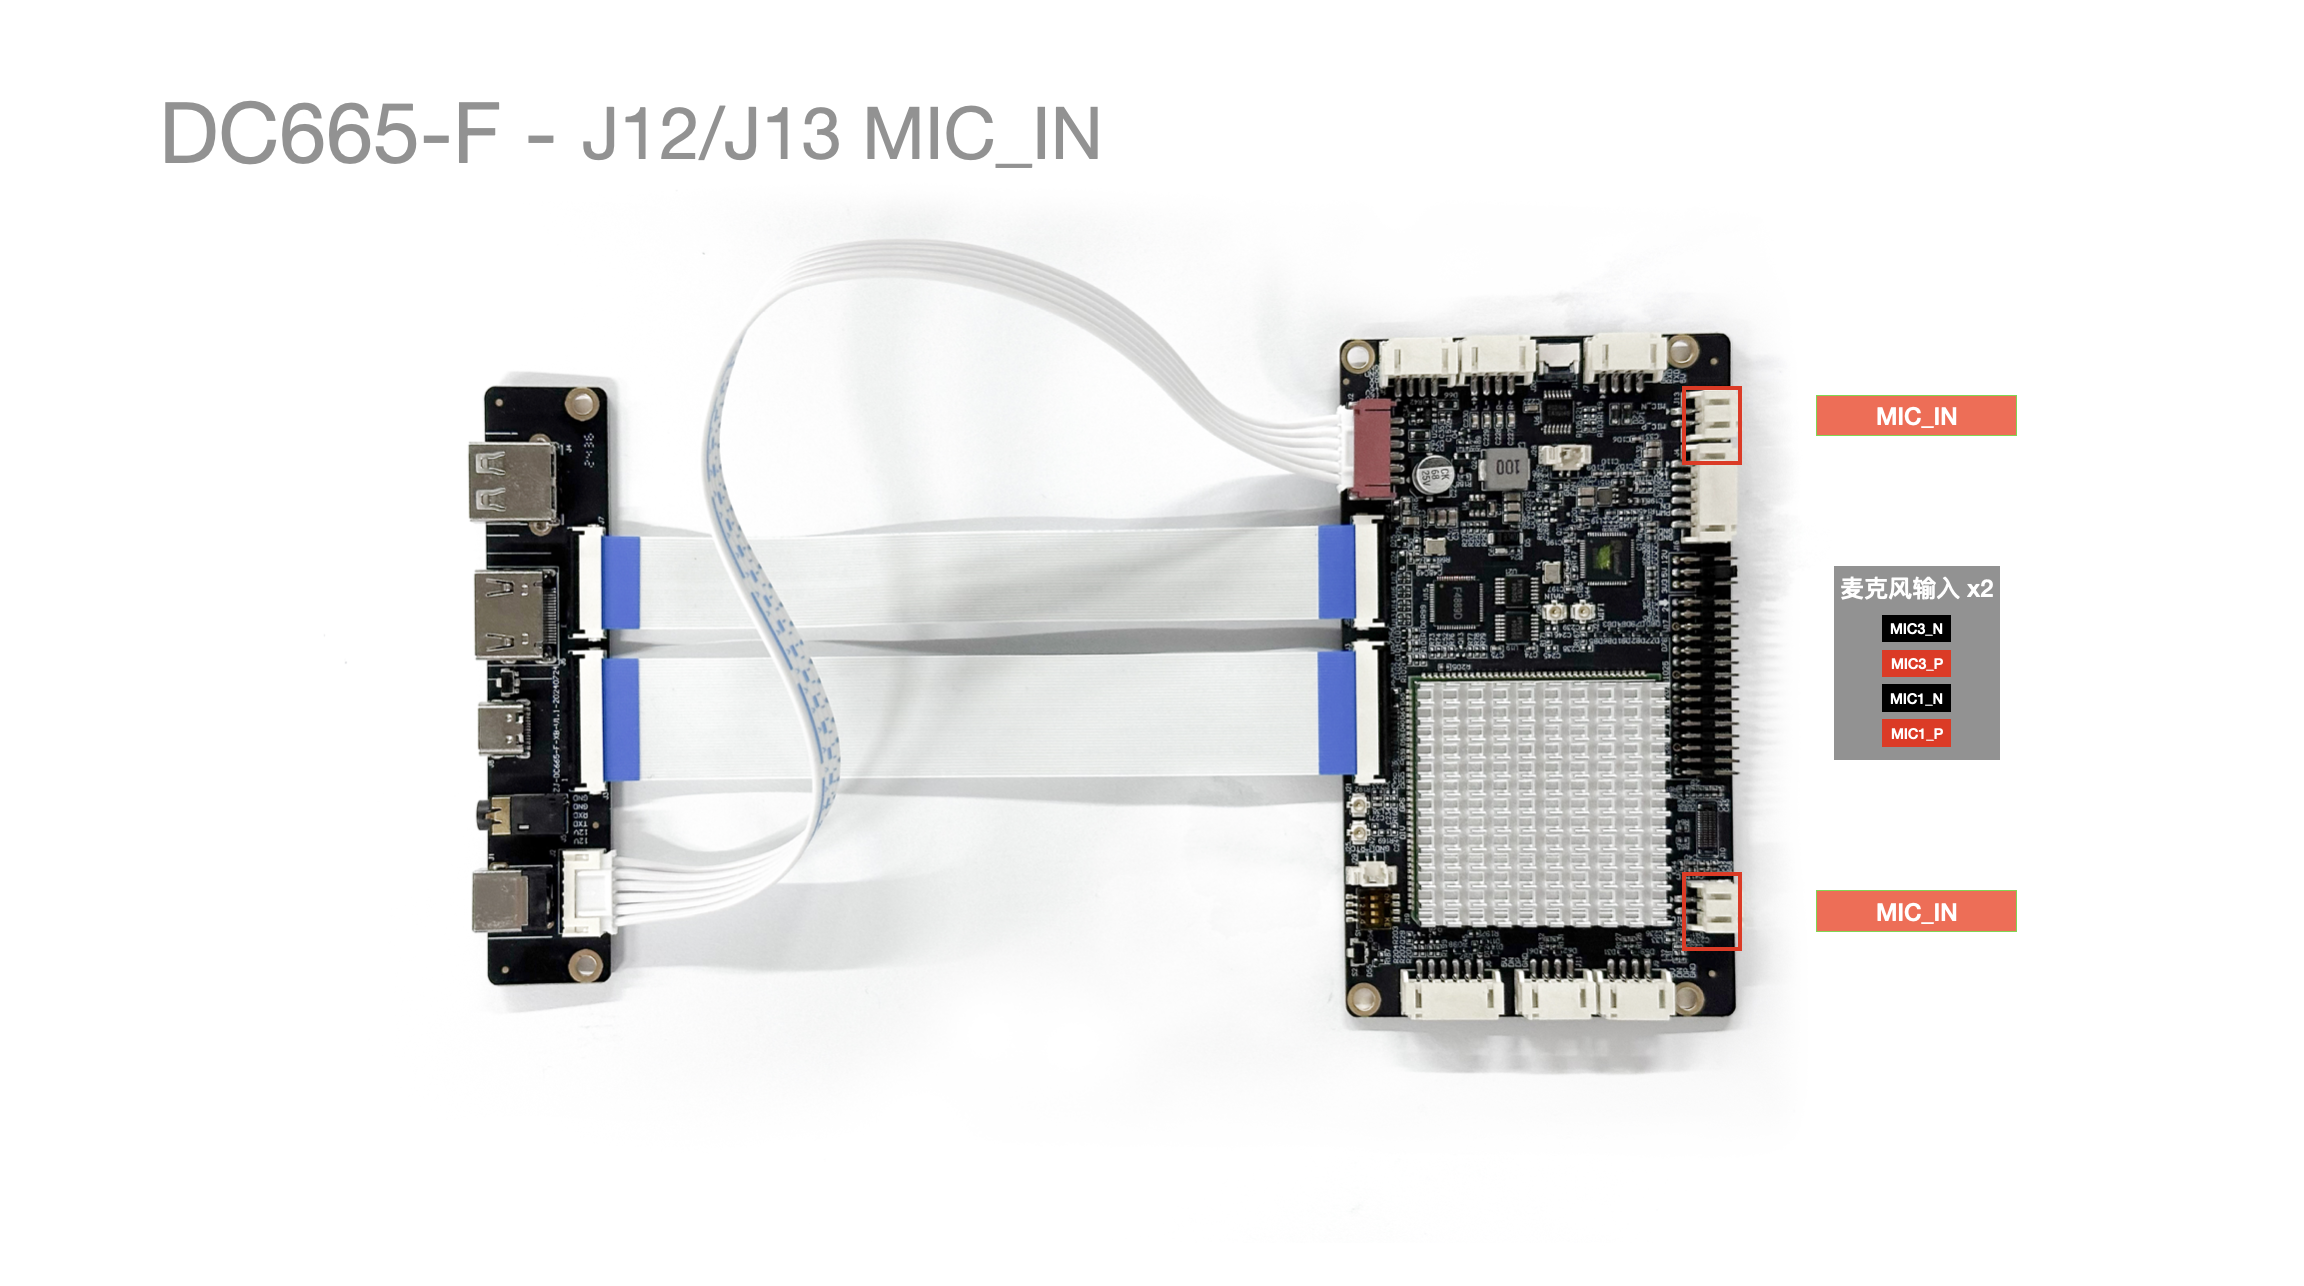
| Pin No. | Pin Description | Wire Color (Reference) |
|---|---|---|
| 1 | MIC1_N / MIC3_N | Black |
| 2 | MIC1_P / MIC3_P | Red |
J16 LVDS Power Selection
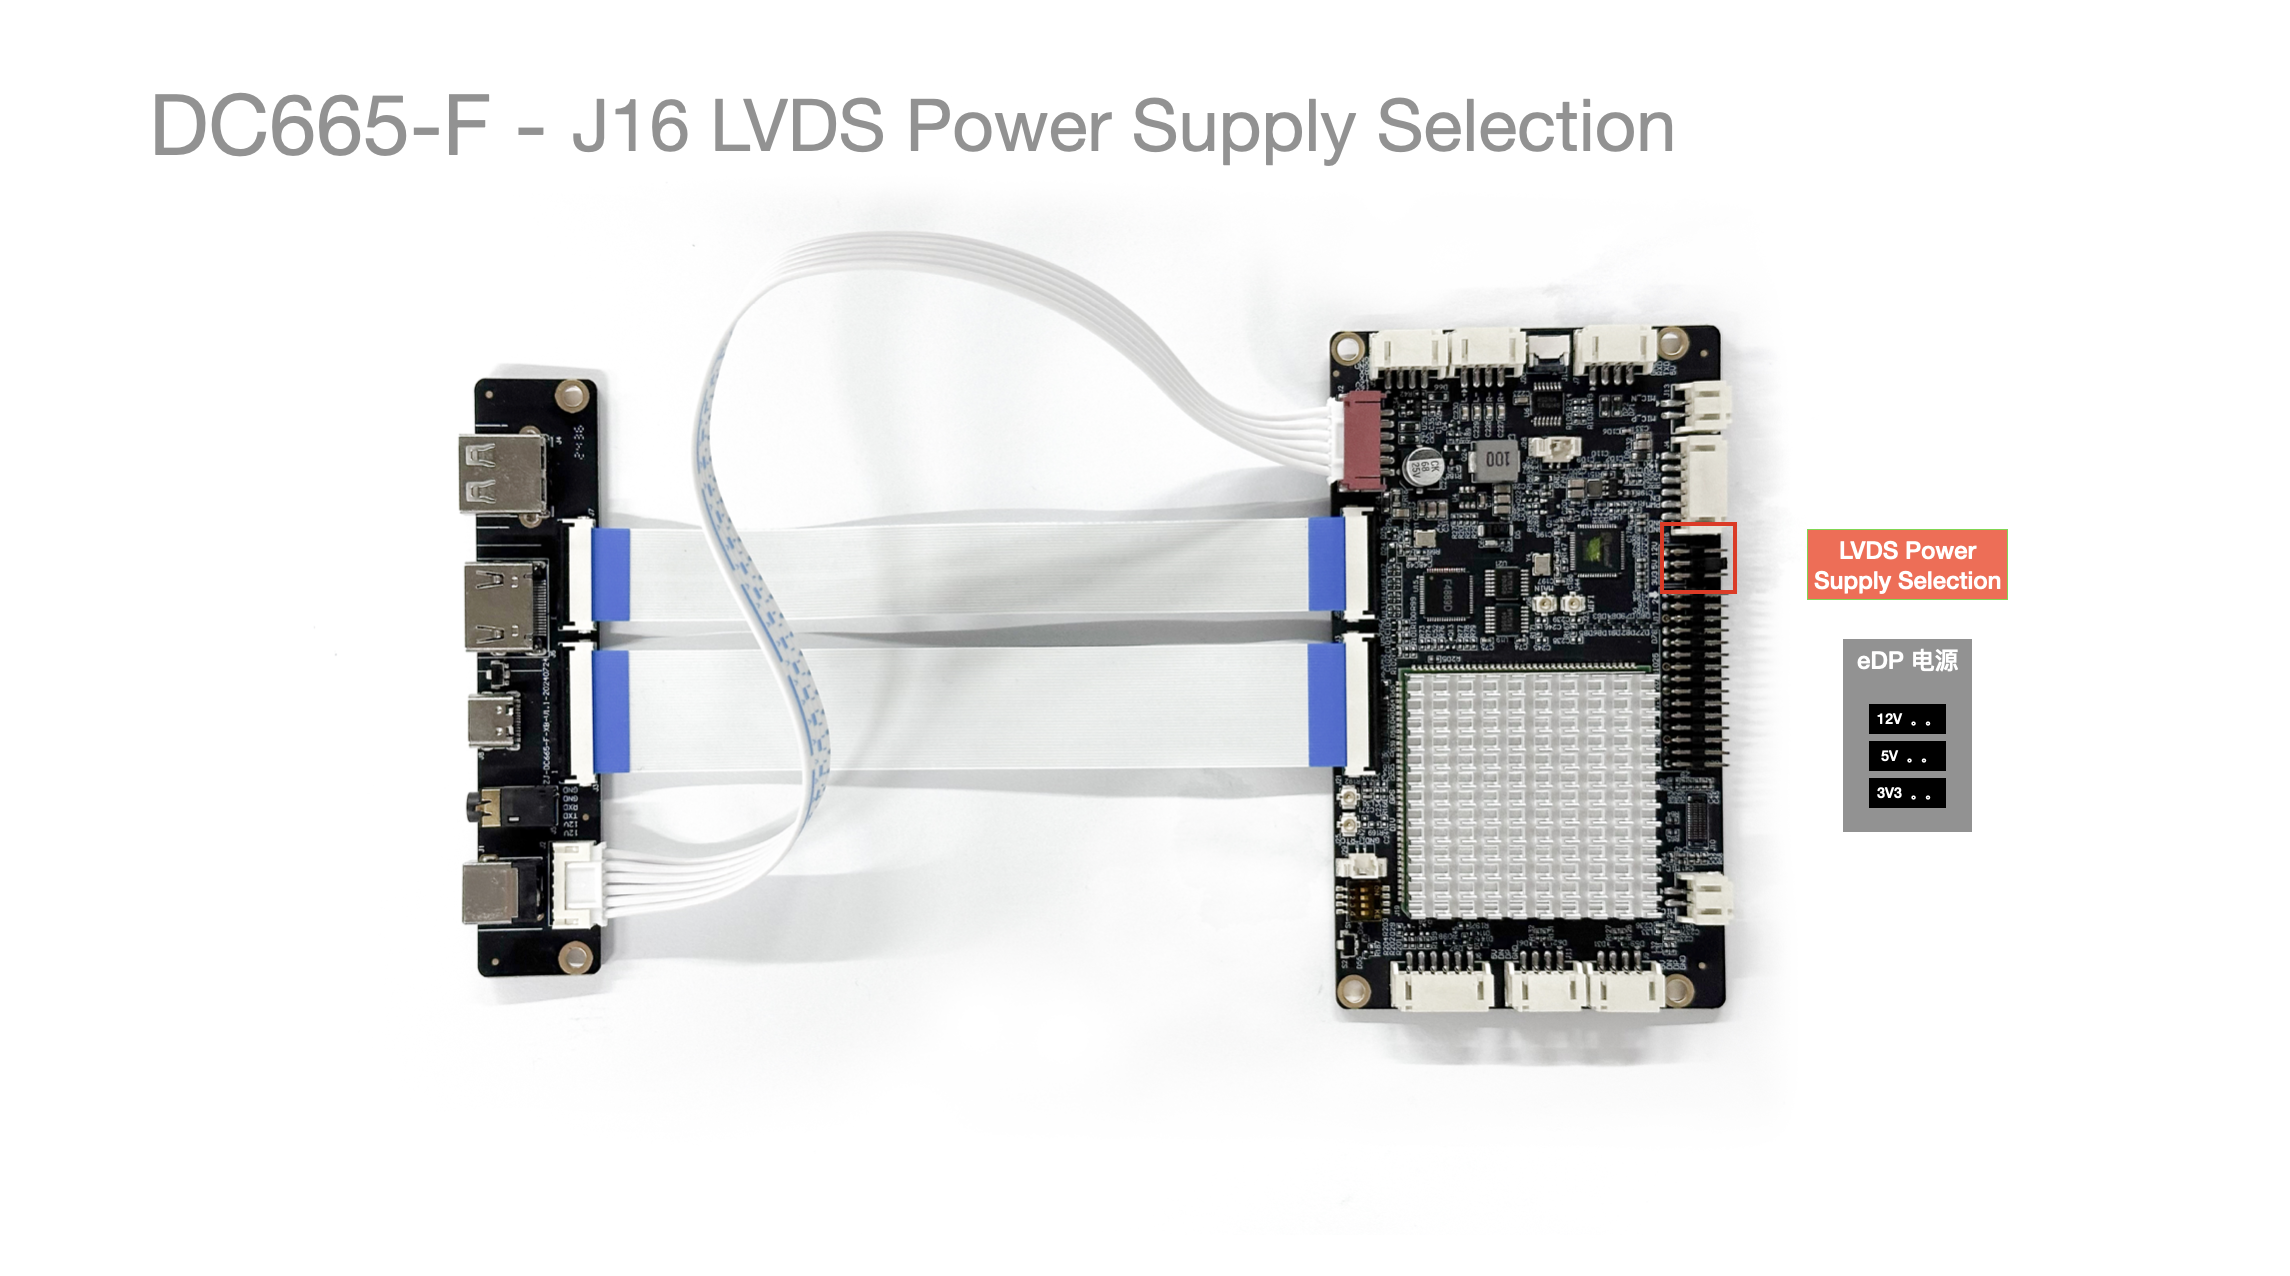
- Pay attention to the
output voltage to avoiddamaging the screen .
J17 LVDS Interface
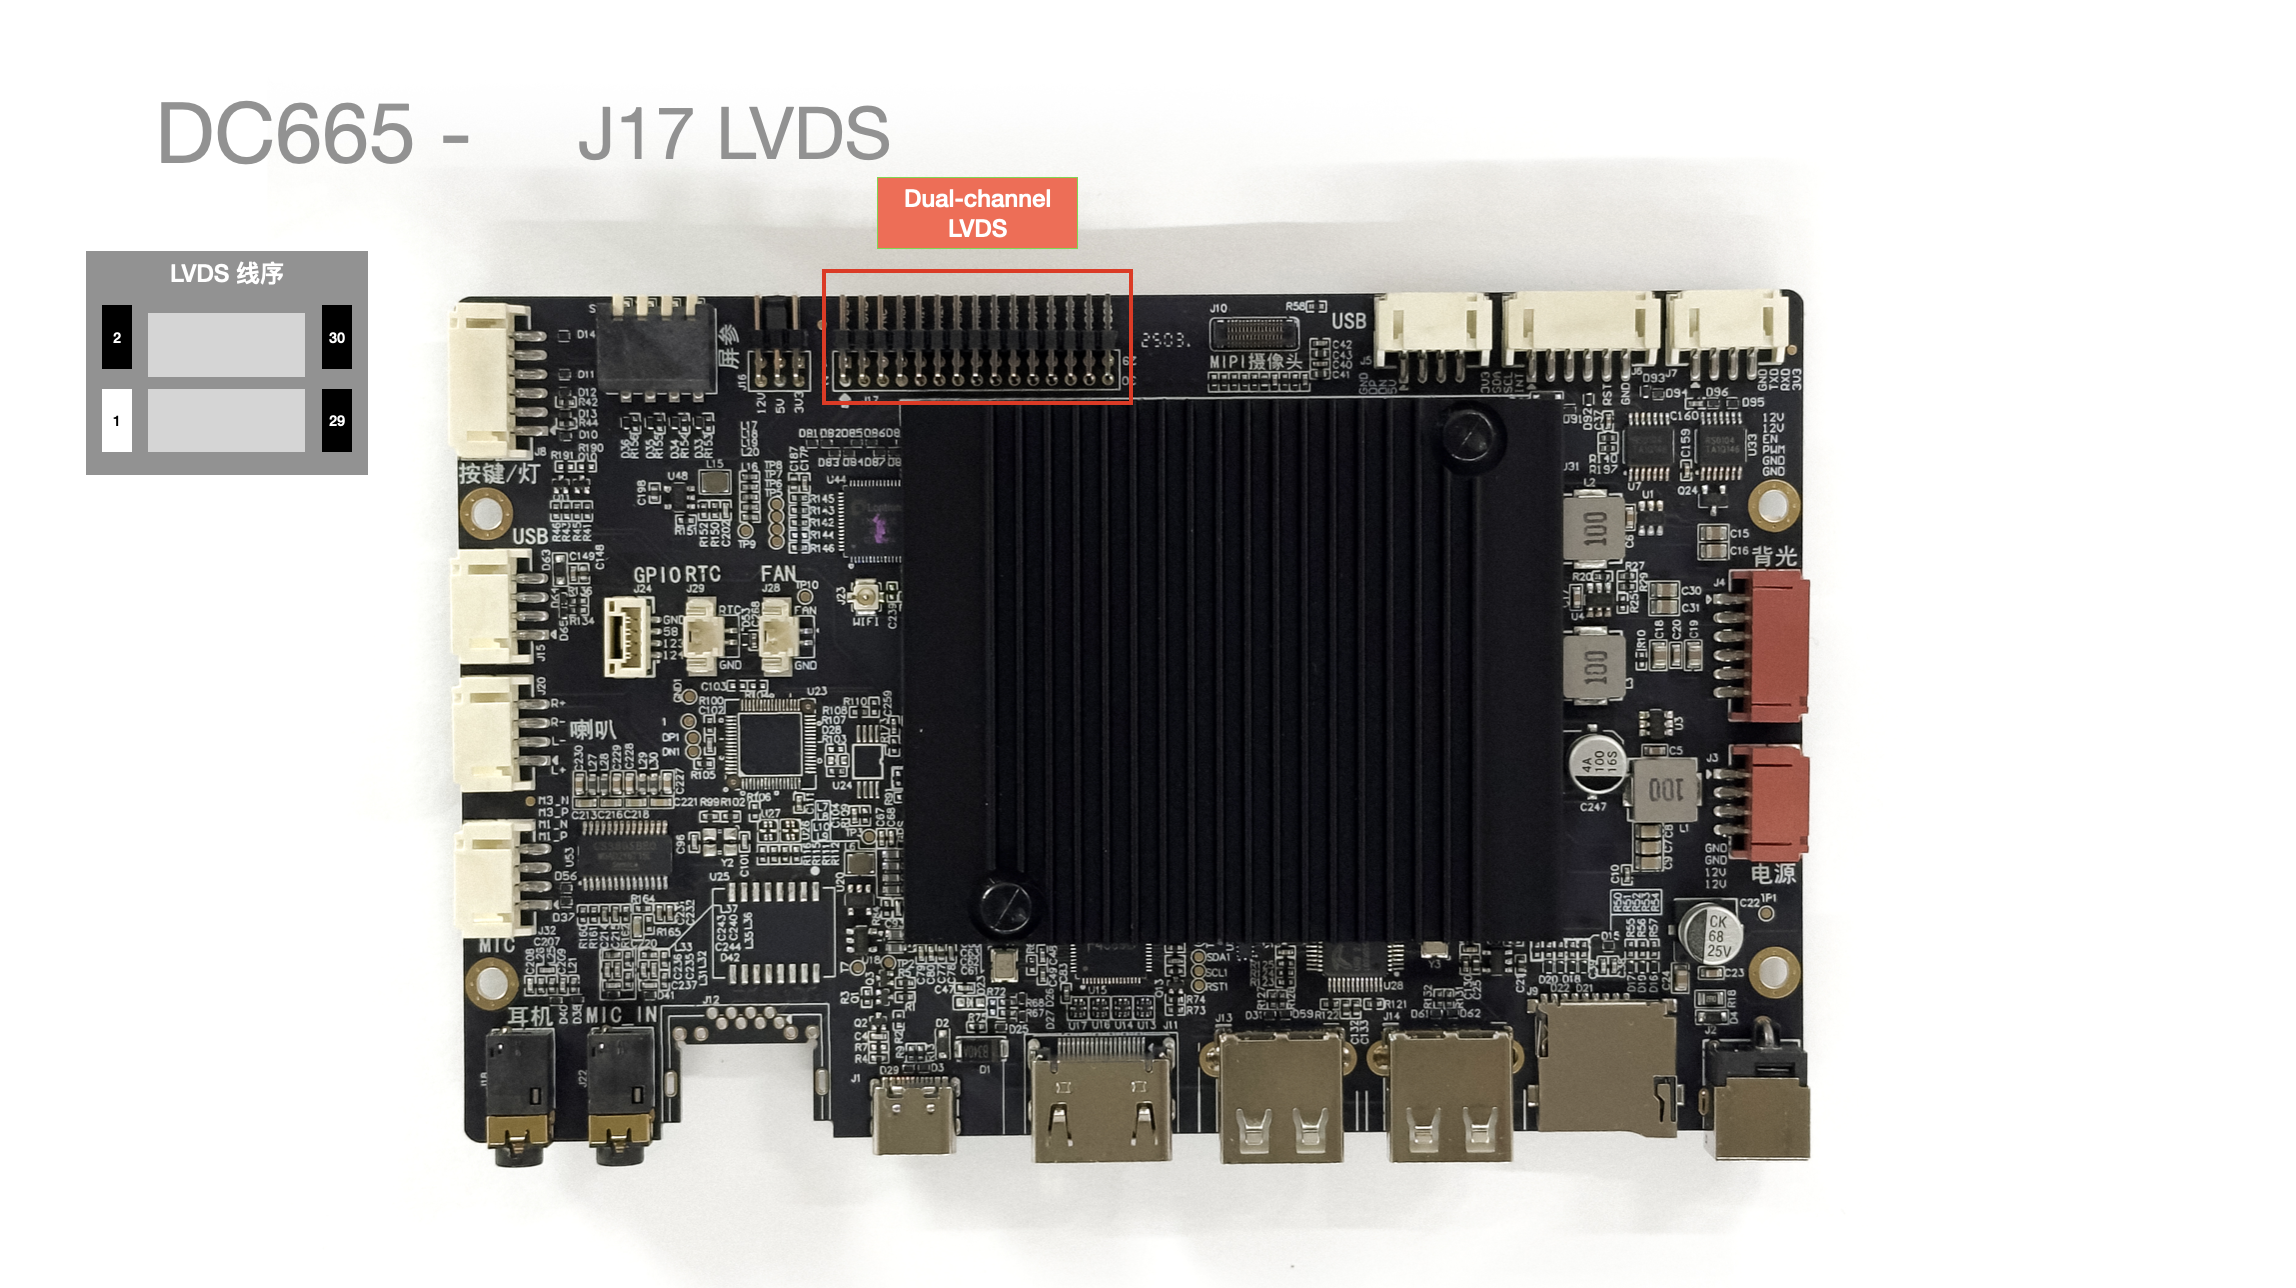
- LVDS interface.
J20 Speaker / Audio Amplifier Output
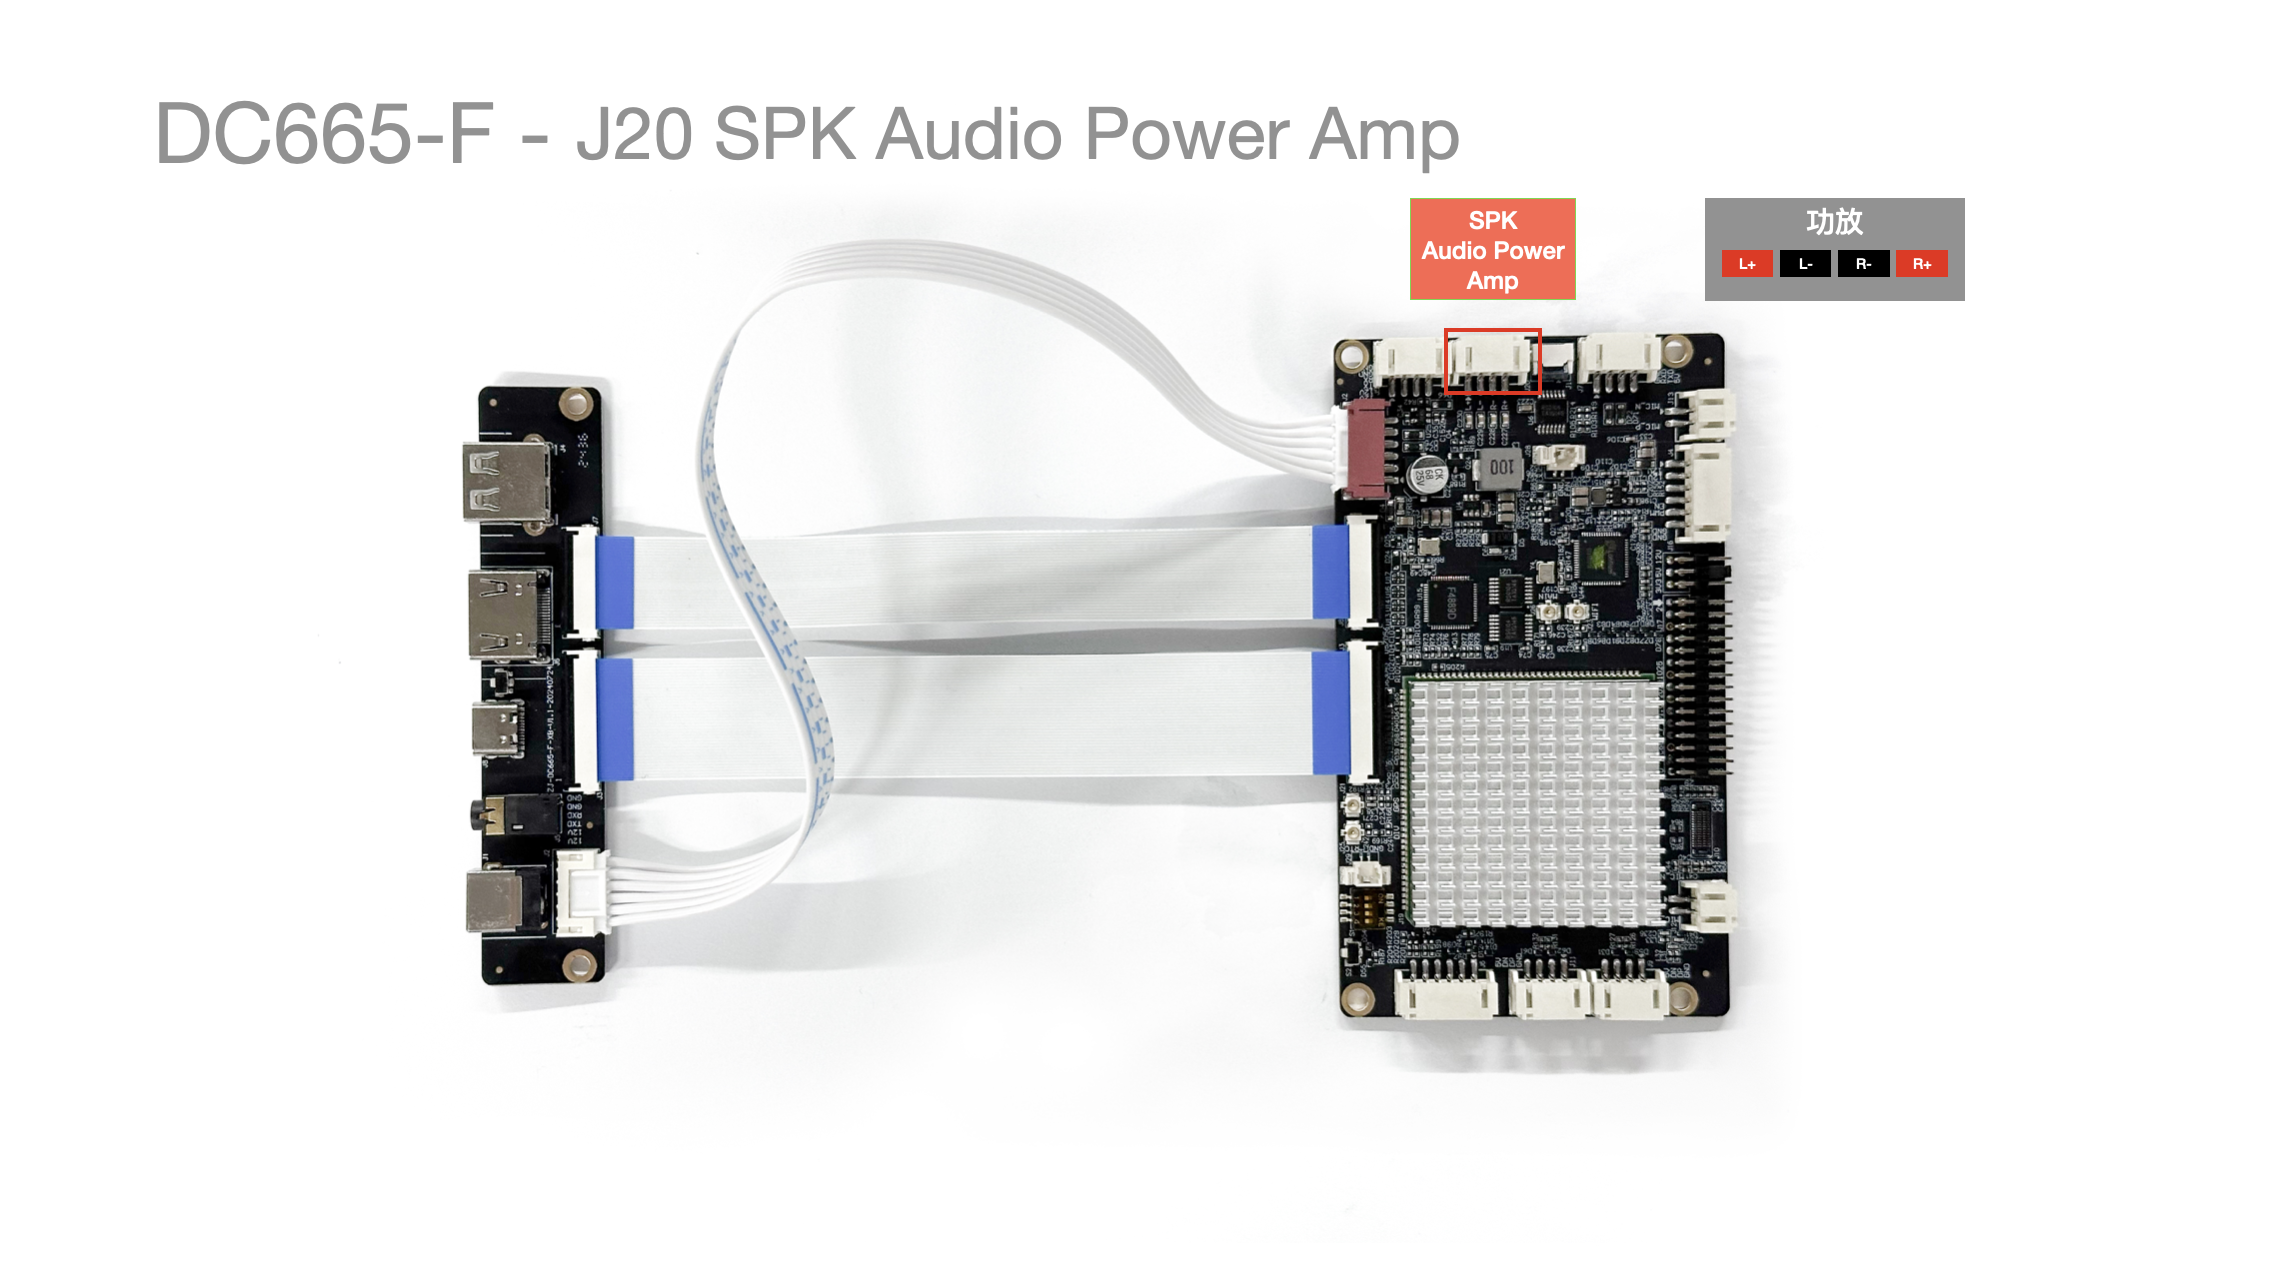
| Pin No. | Pin Description | Wire Color (Reference) |
|---|---|---|
| 1 | L+ | Red |
| 2 | L- | Black |
| 3 | R- | Black |
| 4 | R+ | Red |
J21/J23/J25/J26 Antennas
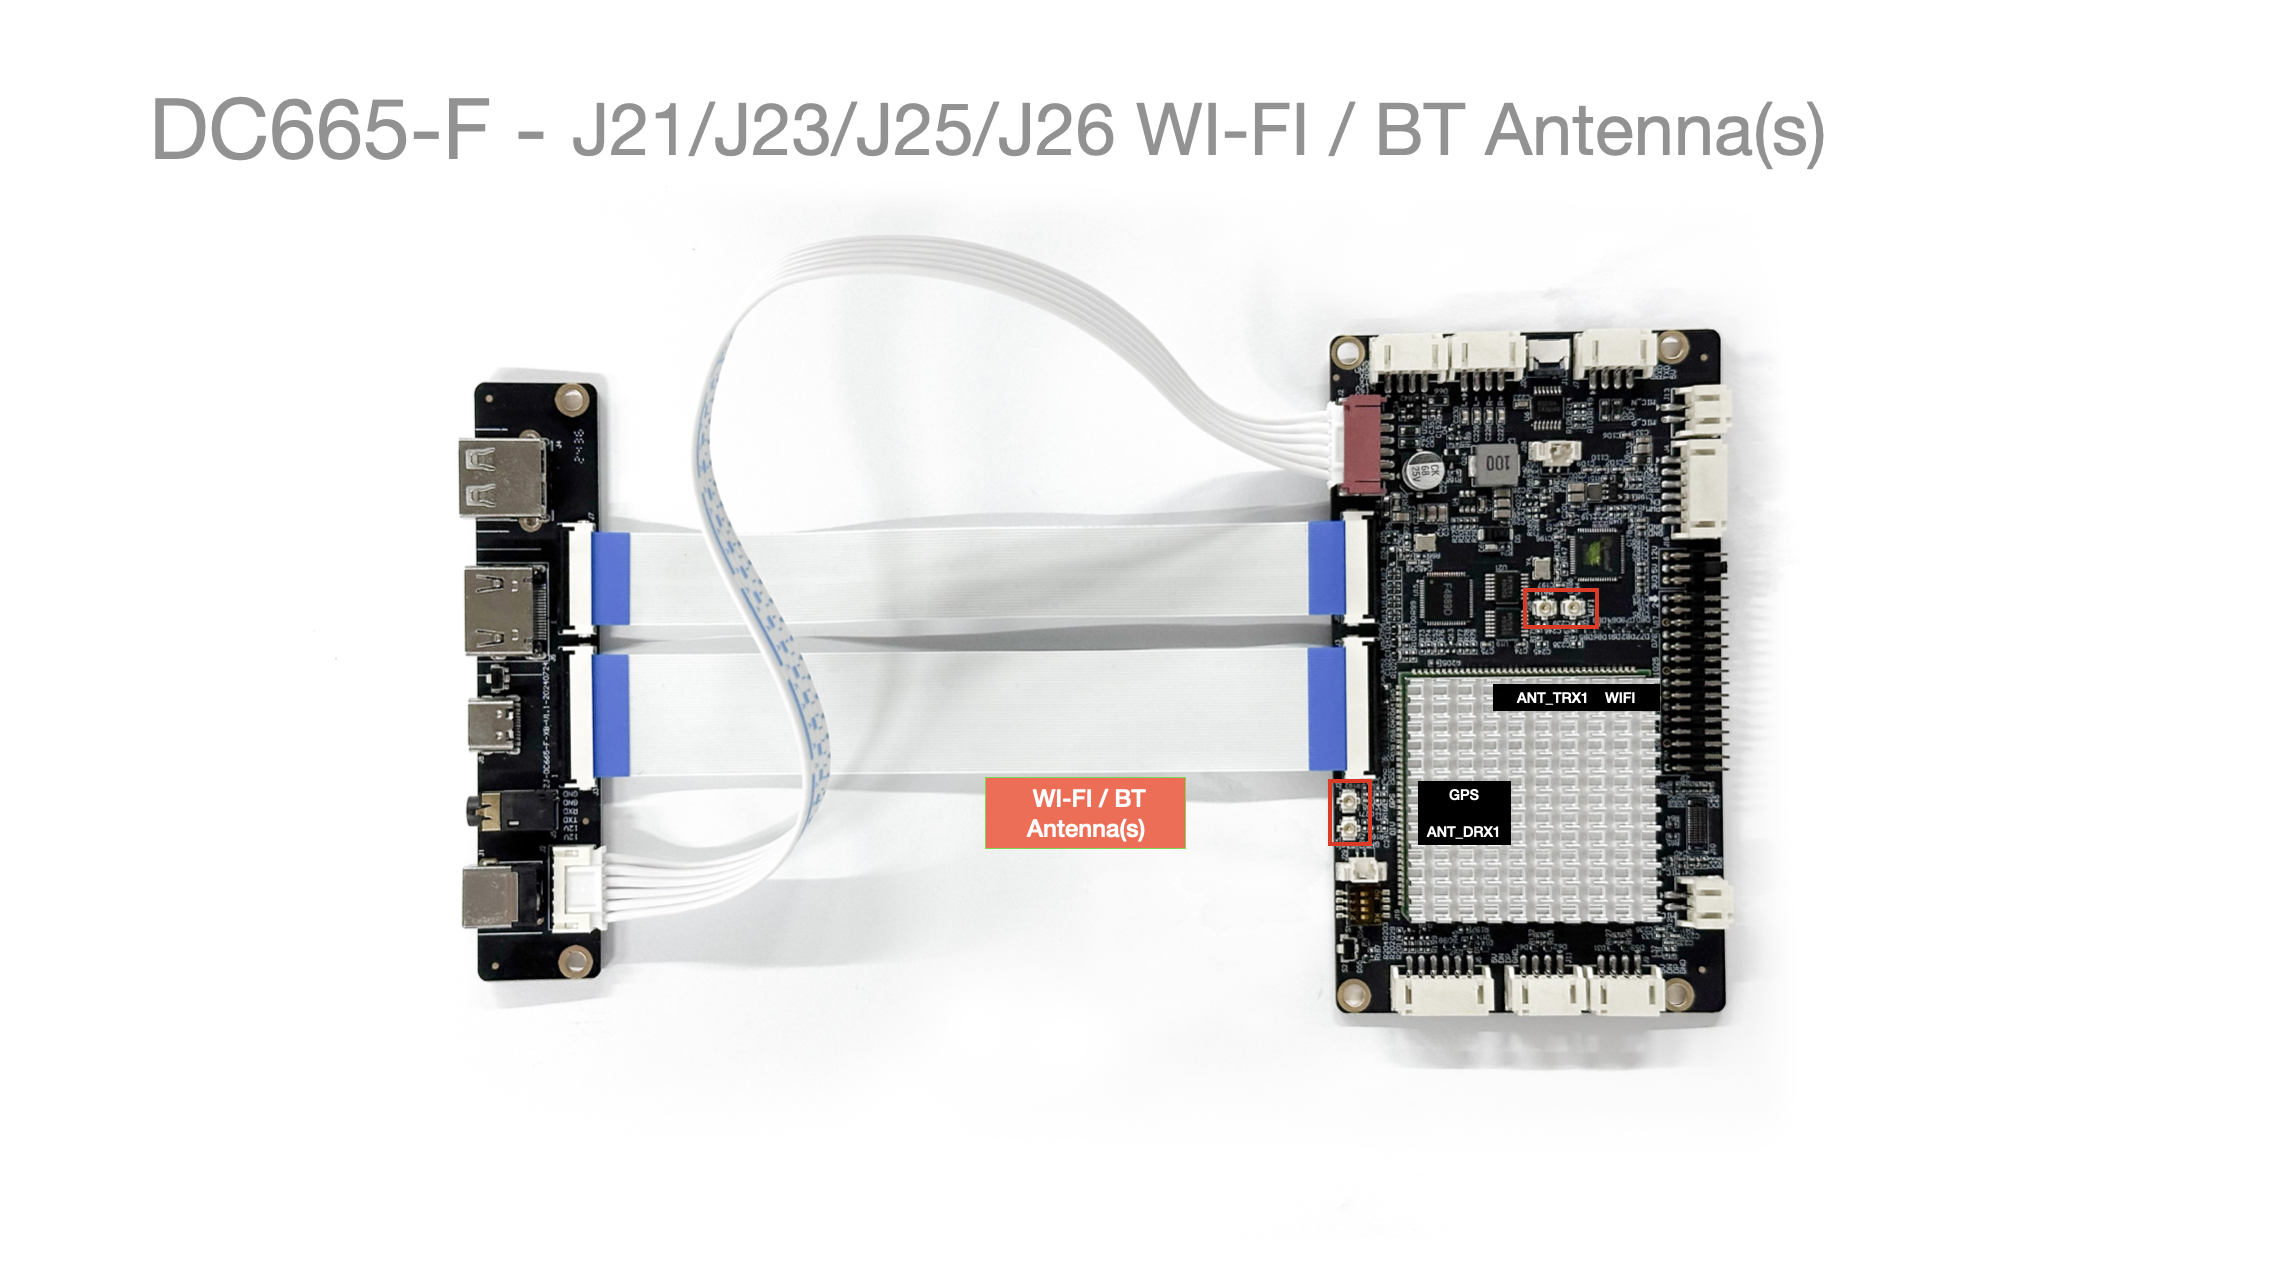
| Interface | Description | Wire Color (Reference) |
|---|---|---|
| J21 | GPS Antenna | Red |
| J23 | WIFI Antenna | Black |
| J25 | 4G ANT_DRX1 Antenna | Black |
| J26 | 4G ANT_TRX1 Antenna | Red |
- 4G antenna and GPS antenna are only required for the 4G version.
J28 SYS FAN (Cooling Fan)
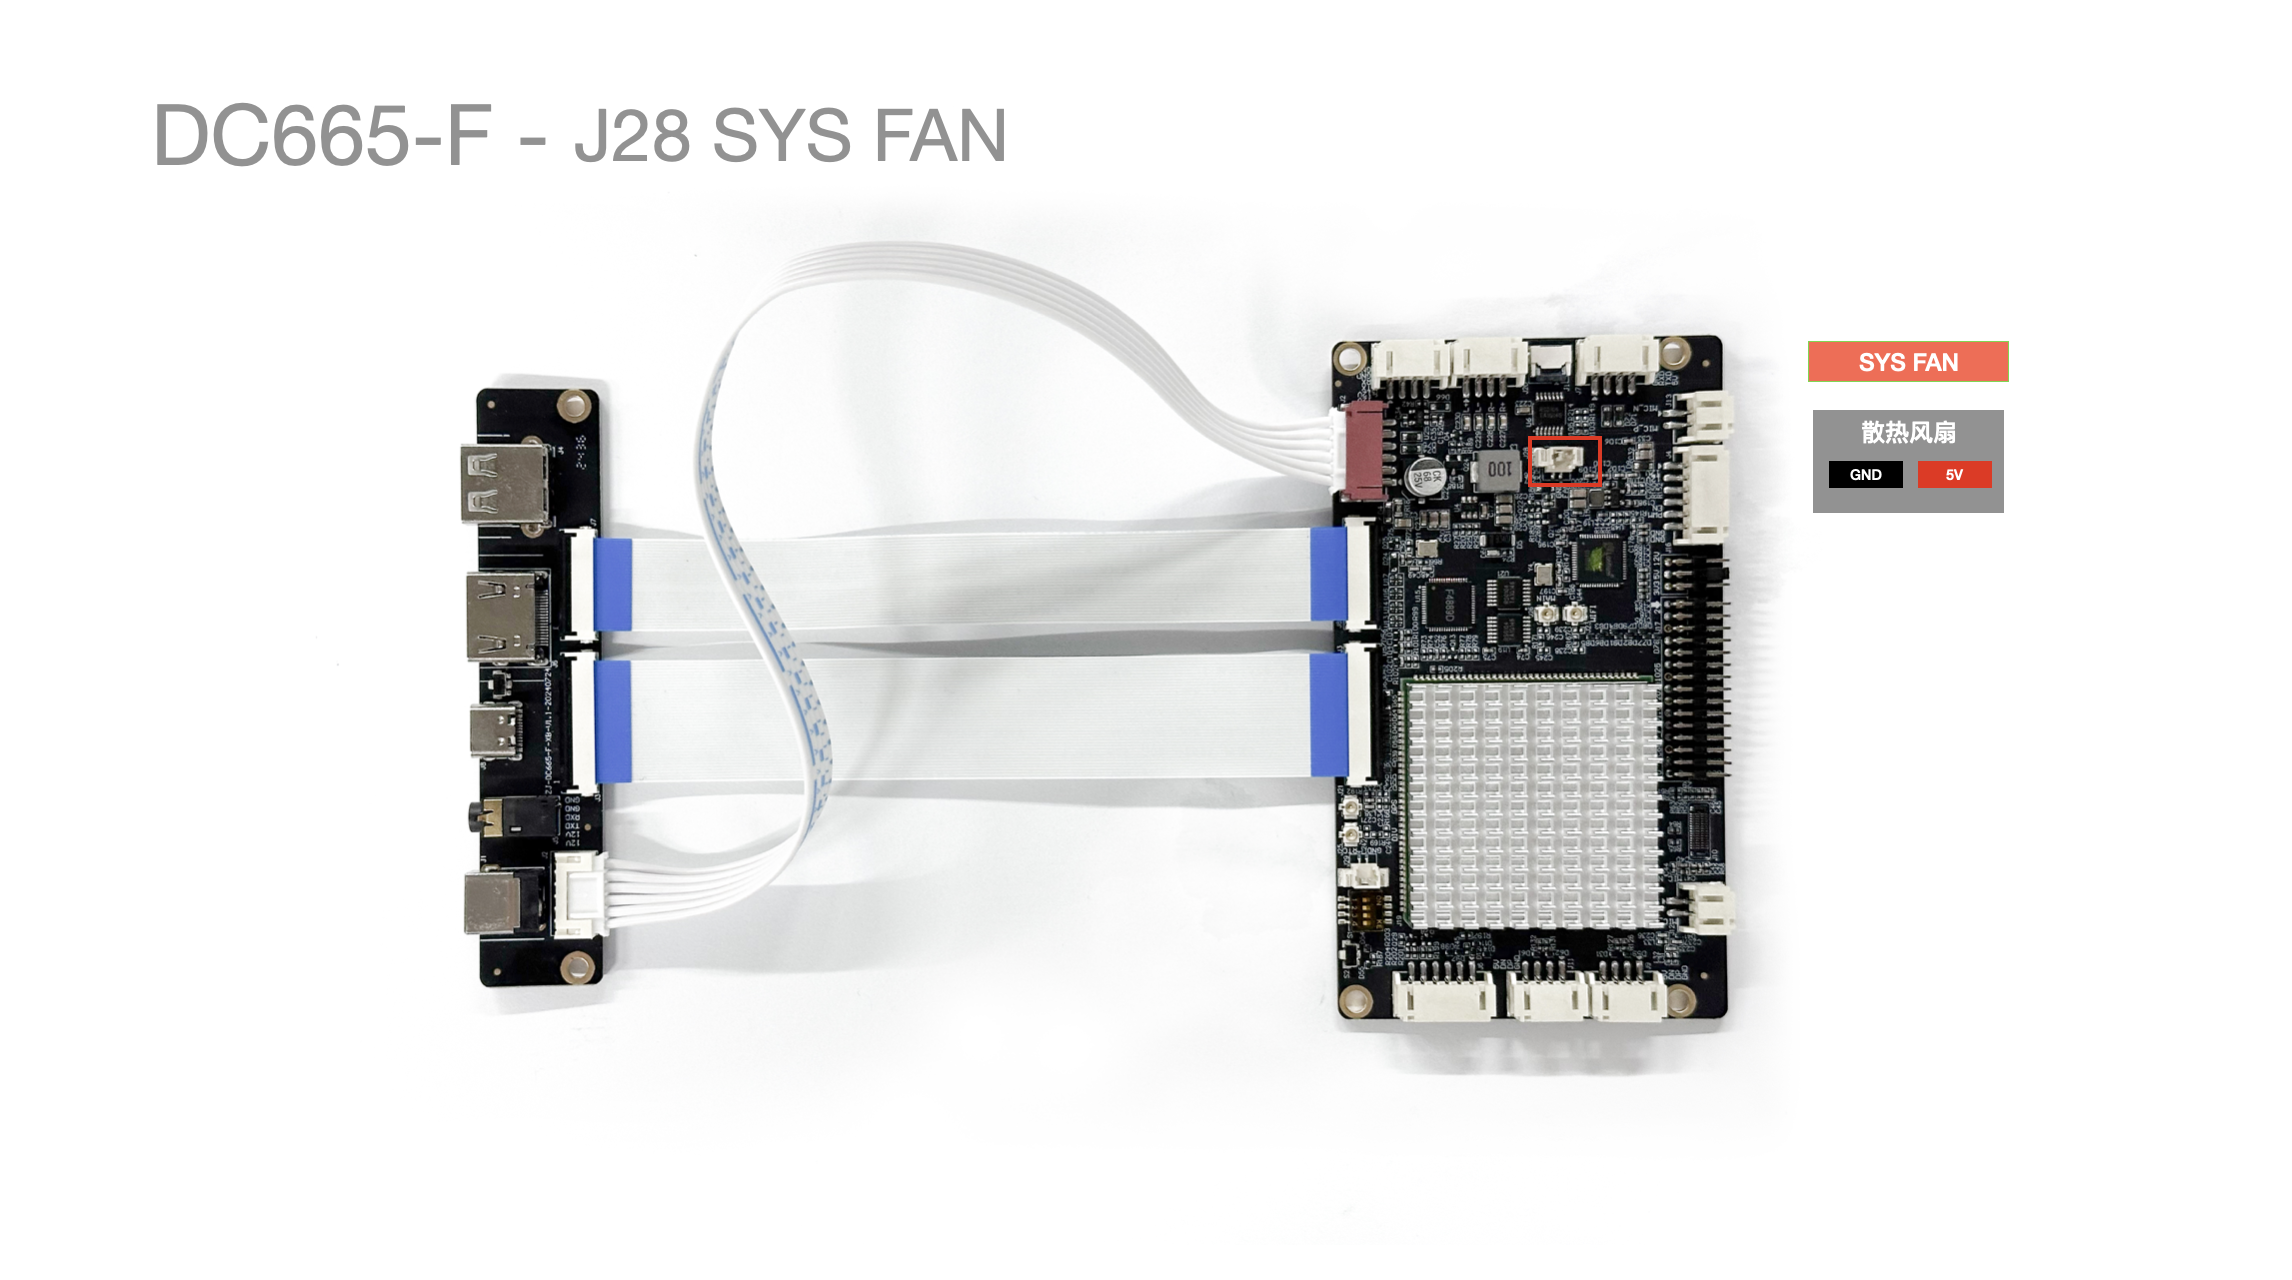
| Pin No. | Pin Description | Wire Color (Reference) |
|---|---|---|
| 1 | 5V | Red |
| 2 | GND | Black |
J29 RTC Battery
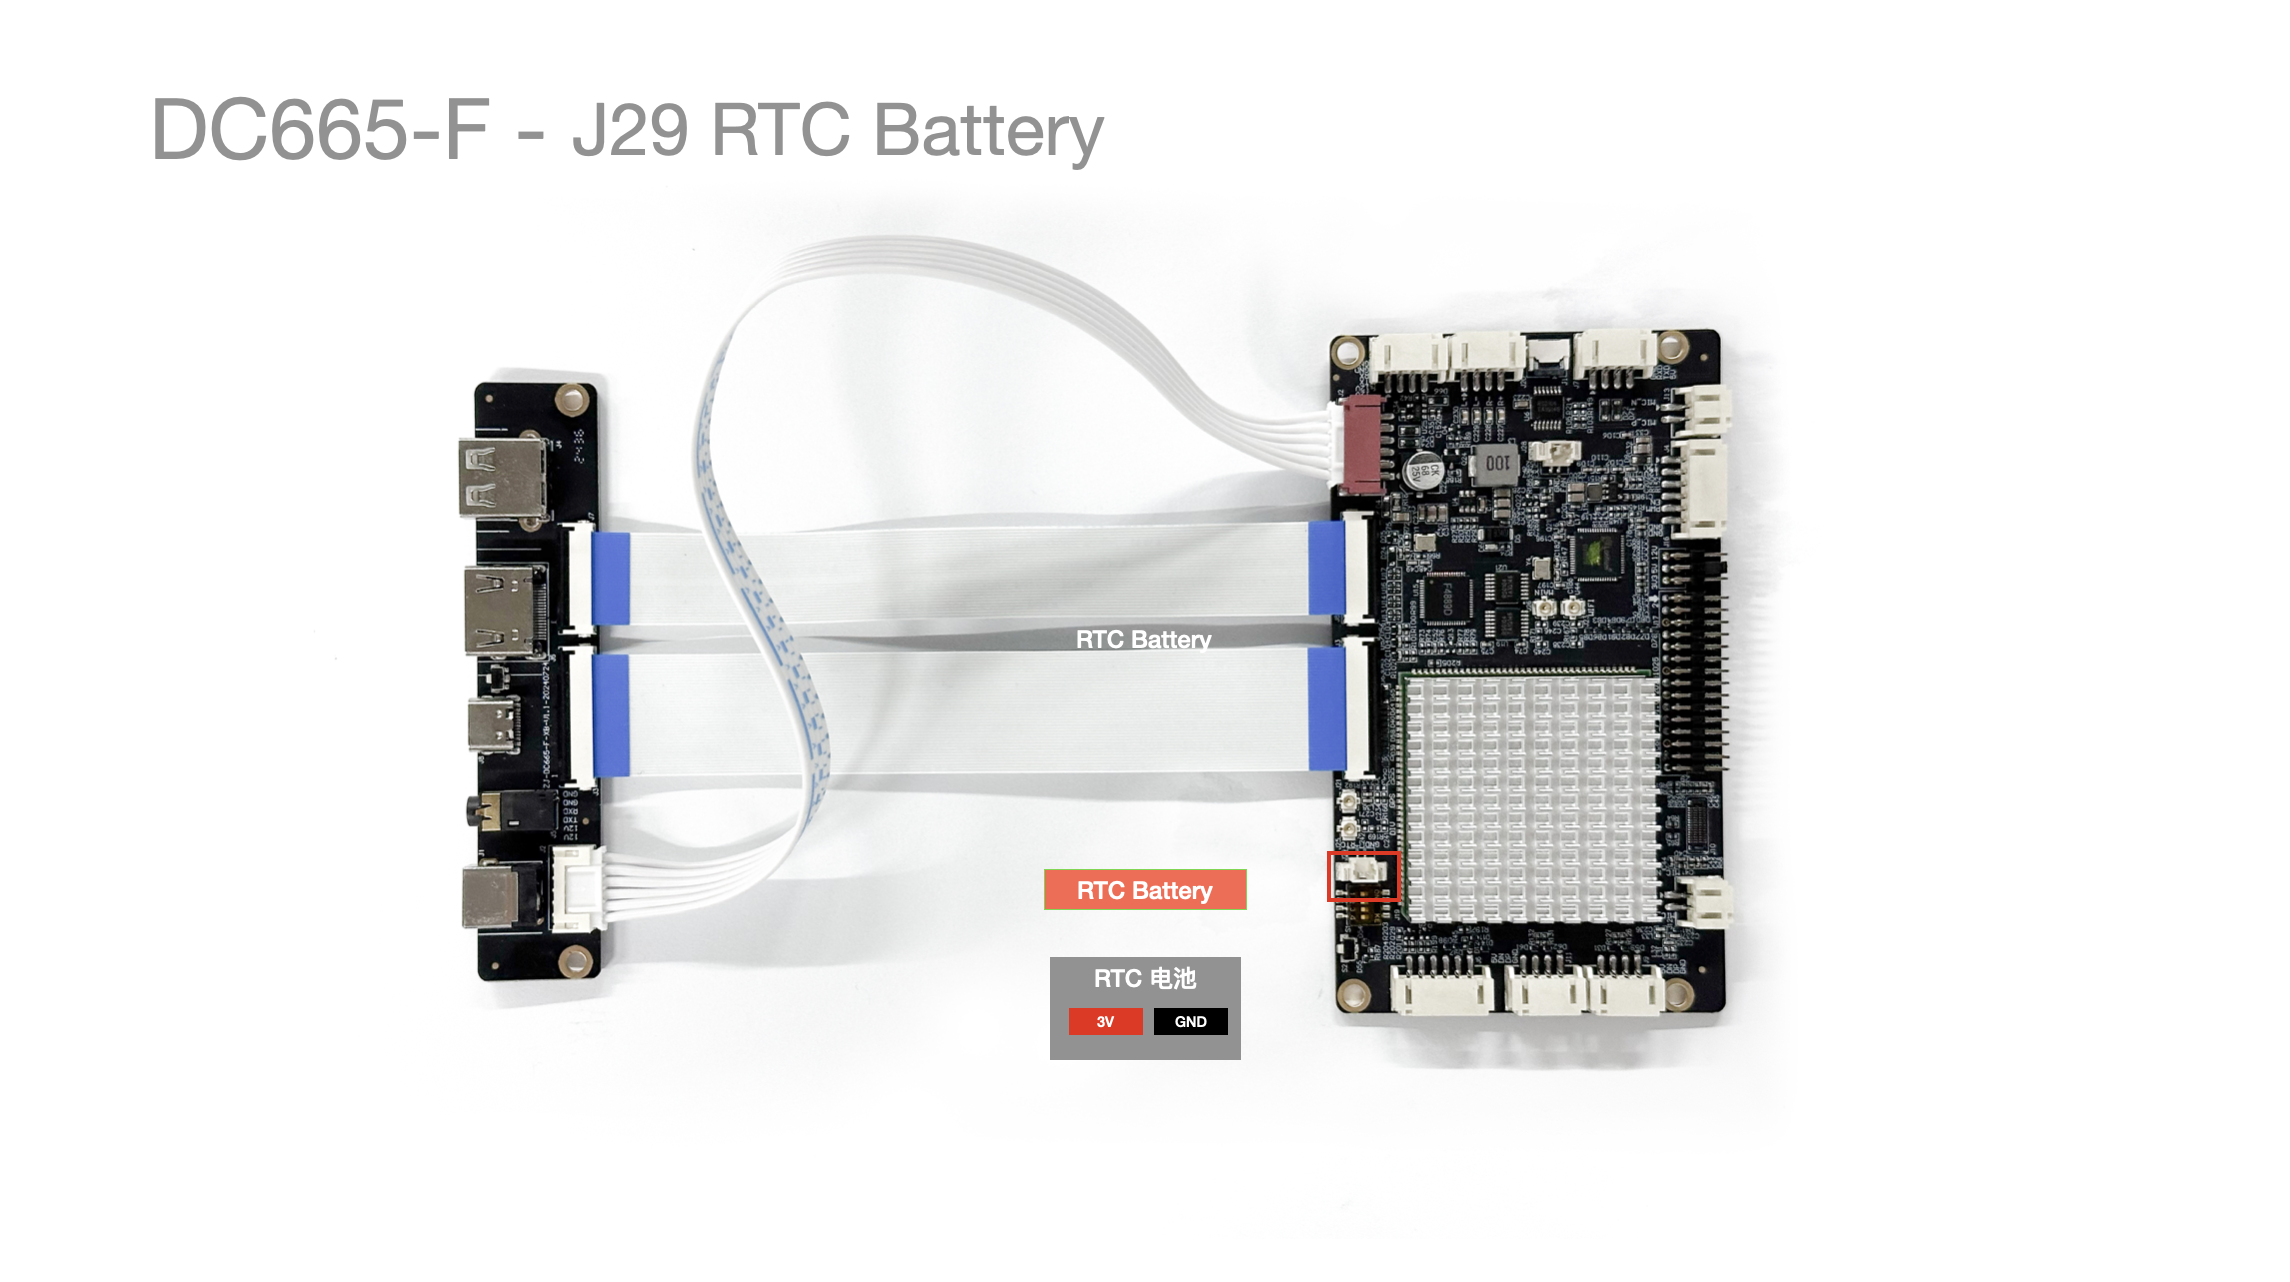
| Pin No. | Pin Description | Wire Color (Reference) |
|---|---|---|
| 1 | 3V3 | Red |
| 2 | GND | Black |
S1 DIP Switch
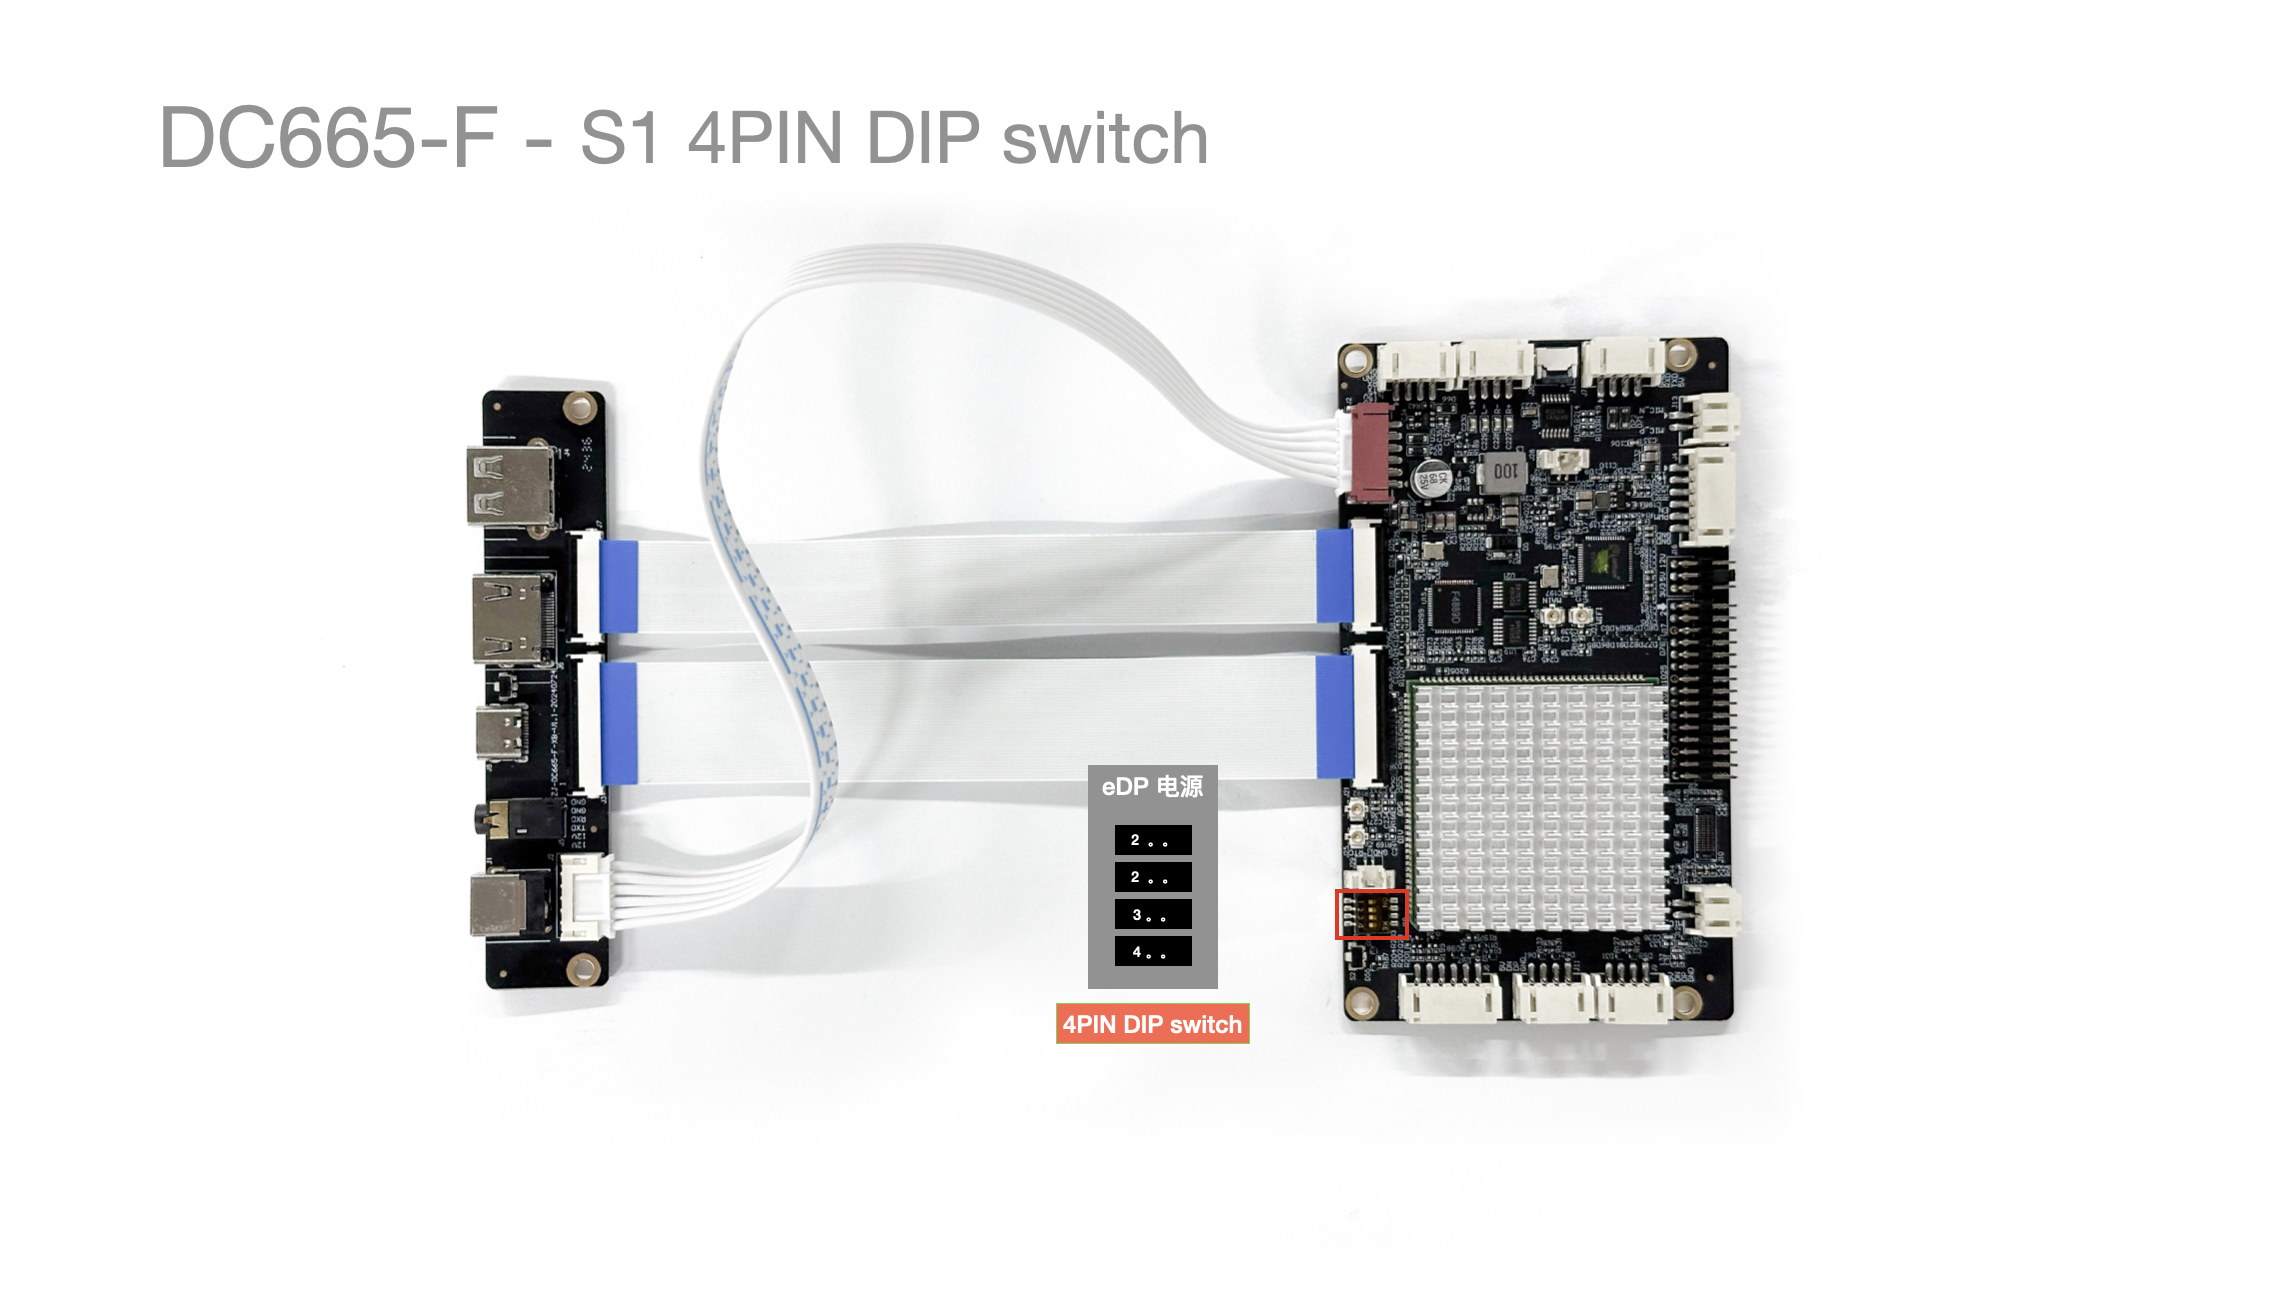
- Component Model:
DSPV04LSGET, DIP Switch - Side-actuated Piano Key - SMT - 2.54mm pitch - 4 positions - DSPV04LSGET
Switch No. Name State (ON) Corresponding Function Notes 1 TAG_DATA_FORMAT 0/ON JEIDA Abnormal screen colors 2 TAG_PORT_WASP 0/ON 1 Stripes appear on screen 3 TAG_COLOR_DEPTH 0/ON DEPTH_6BIT Color difference on screen 4 Backlight Polarity Adj. 0/ON Polarity Inversion Brightness decreases when trying to increase
Pressing the switch towards the PCB
S2 Boot/Upgrade Button
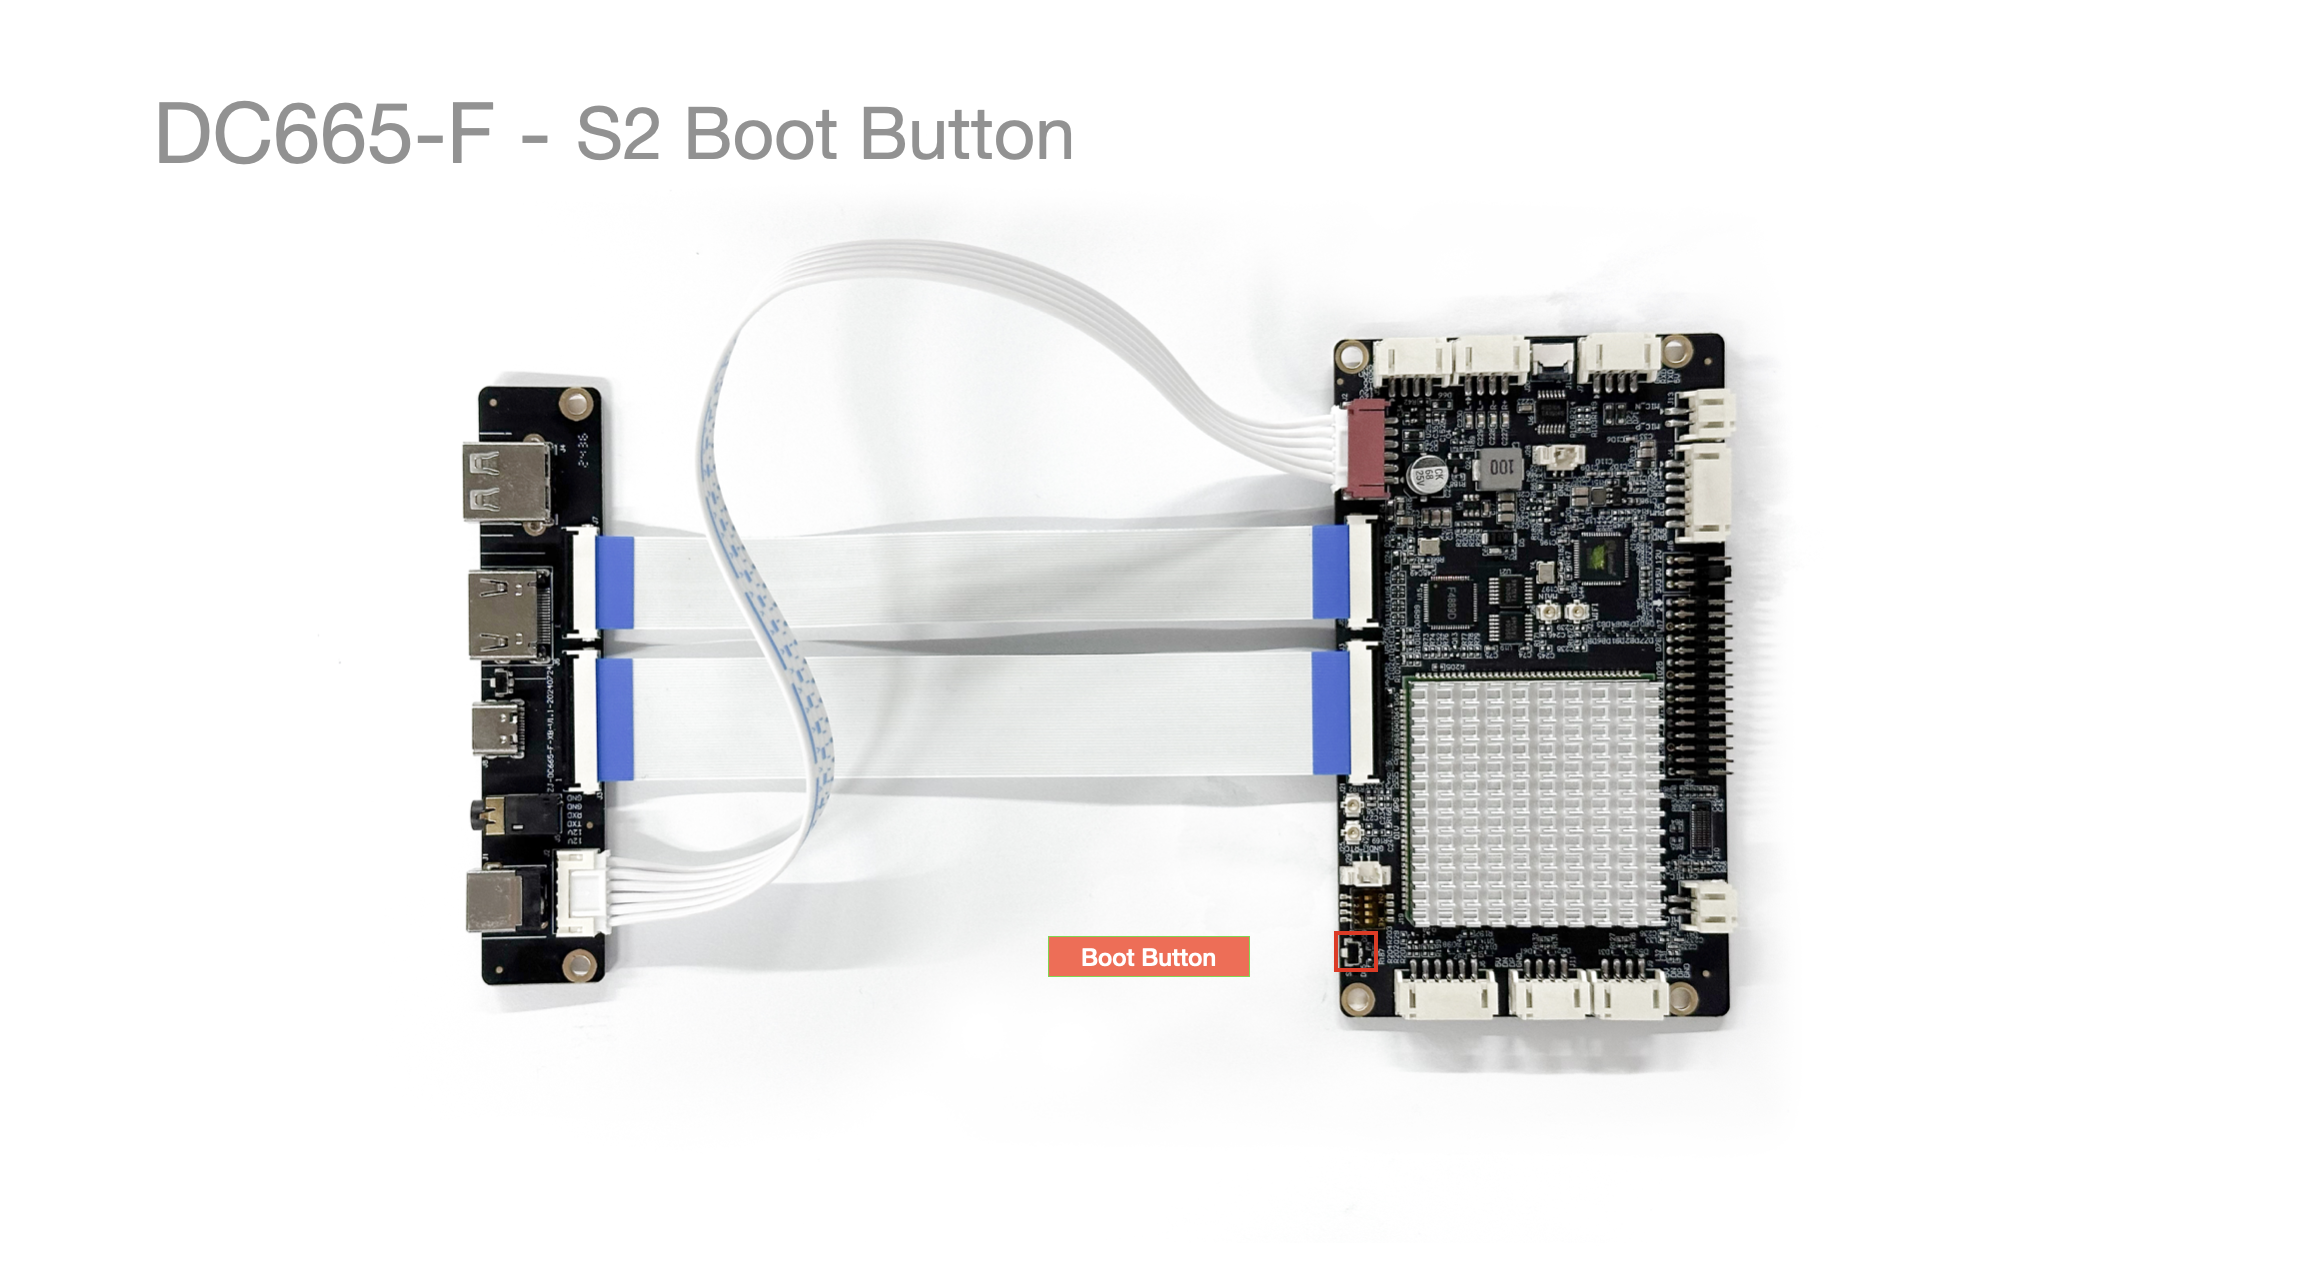
Press and hold during power-on/startup to enter
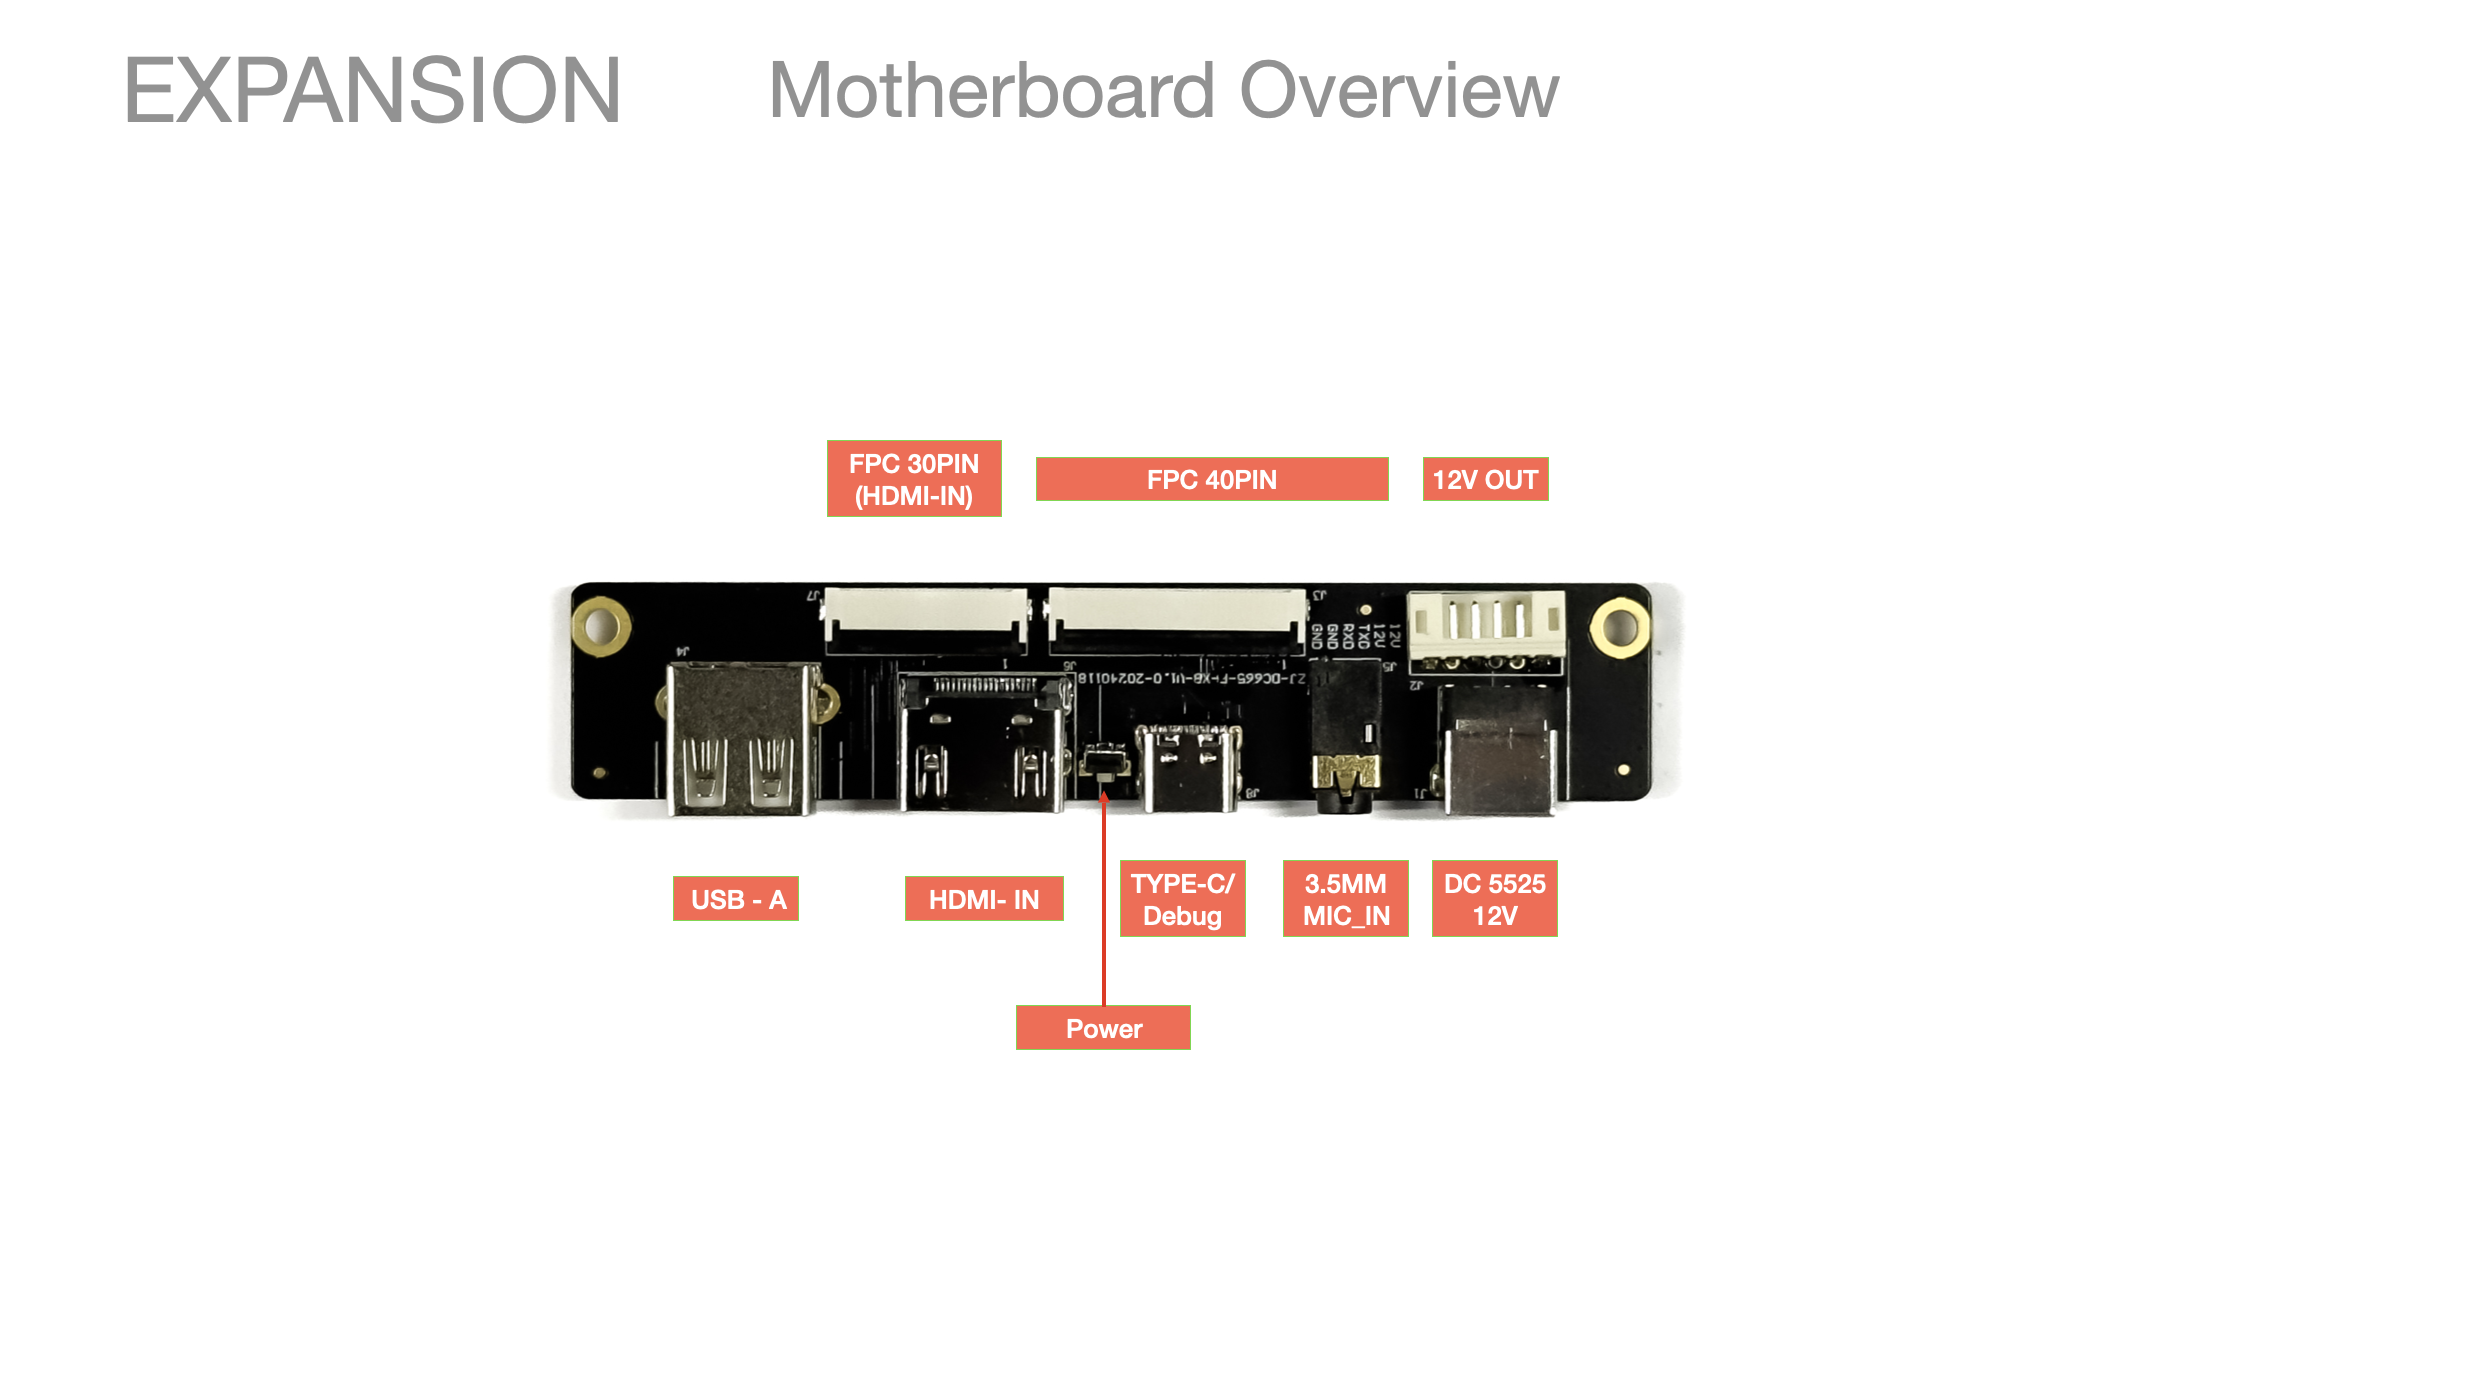
Expansion Interface
Expansion Interface Preview
The expansion boards all use standard interfaces and will not be described in detail unless specified otherwise.